
Integrate Partnero with WordPress
This guide will walk you through the steps to integrate Partnero with WordPress to track website visitors, capture sign-ups, and monitor sales. Following these instructions will enable accurate tracking of user interactions on your website and ensure that all relevant data is sent to Partnero.

Prerequisites: Installing a plugin to add custom code
Step 1: Start tracking website visitors
- Go to Integration > Guides tab > WordPress. Click Instructions.
- Copy the PartneroJS snippet:
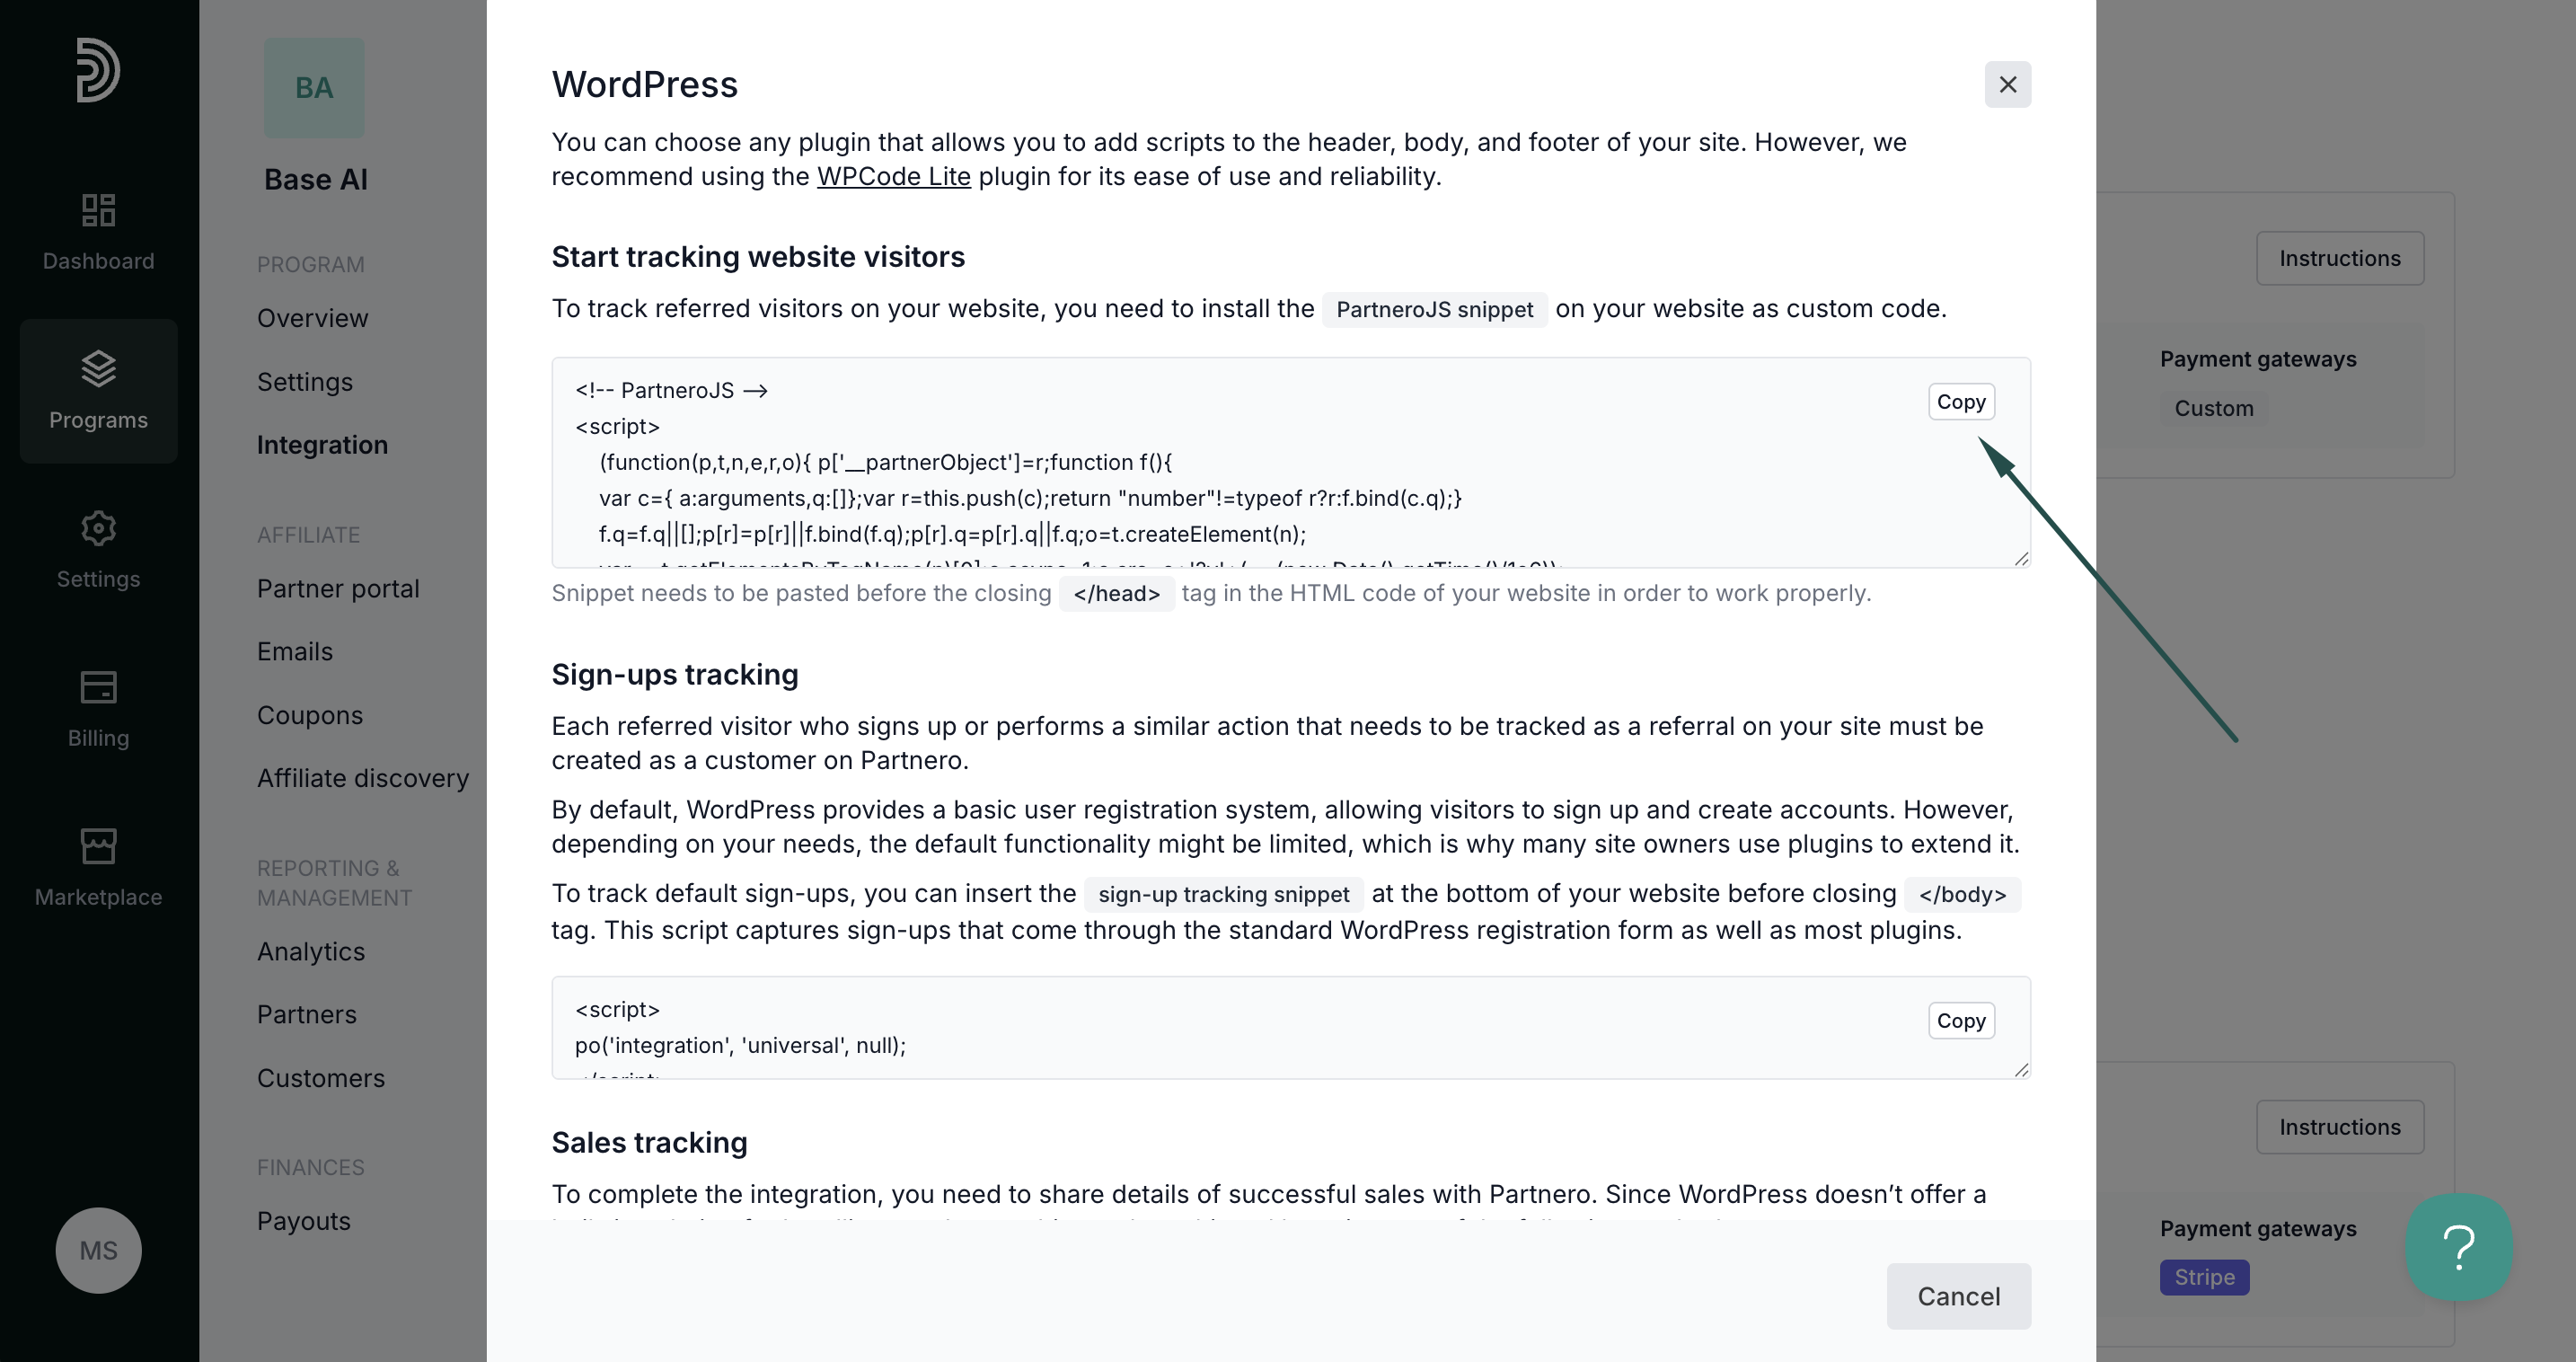
- Paste this snippet into the HTML code of your website, just before the closing
</head>tag.
This step is crucial for ensuring that Partnero can start tracking visitors on your website as soon as they land on any page.

Step 2: Sign up tracking
To track default sign-ups:
- Copy the sign-up tracking snippet from the Partnero integration guide:
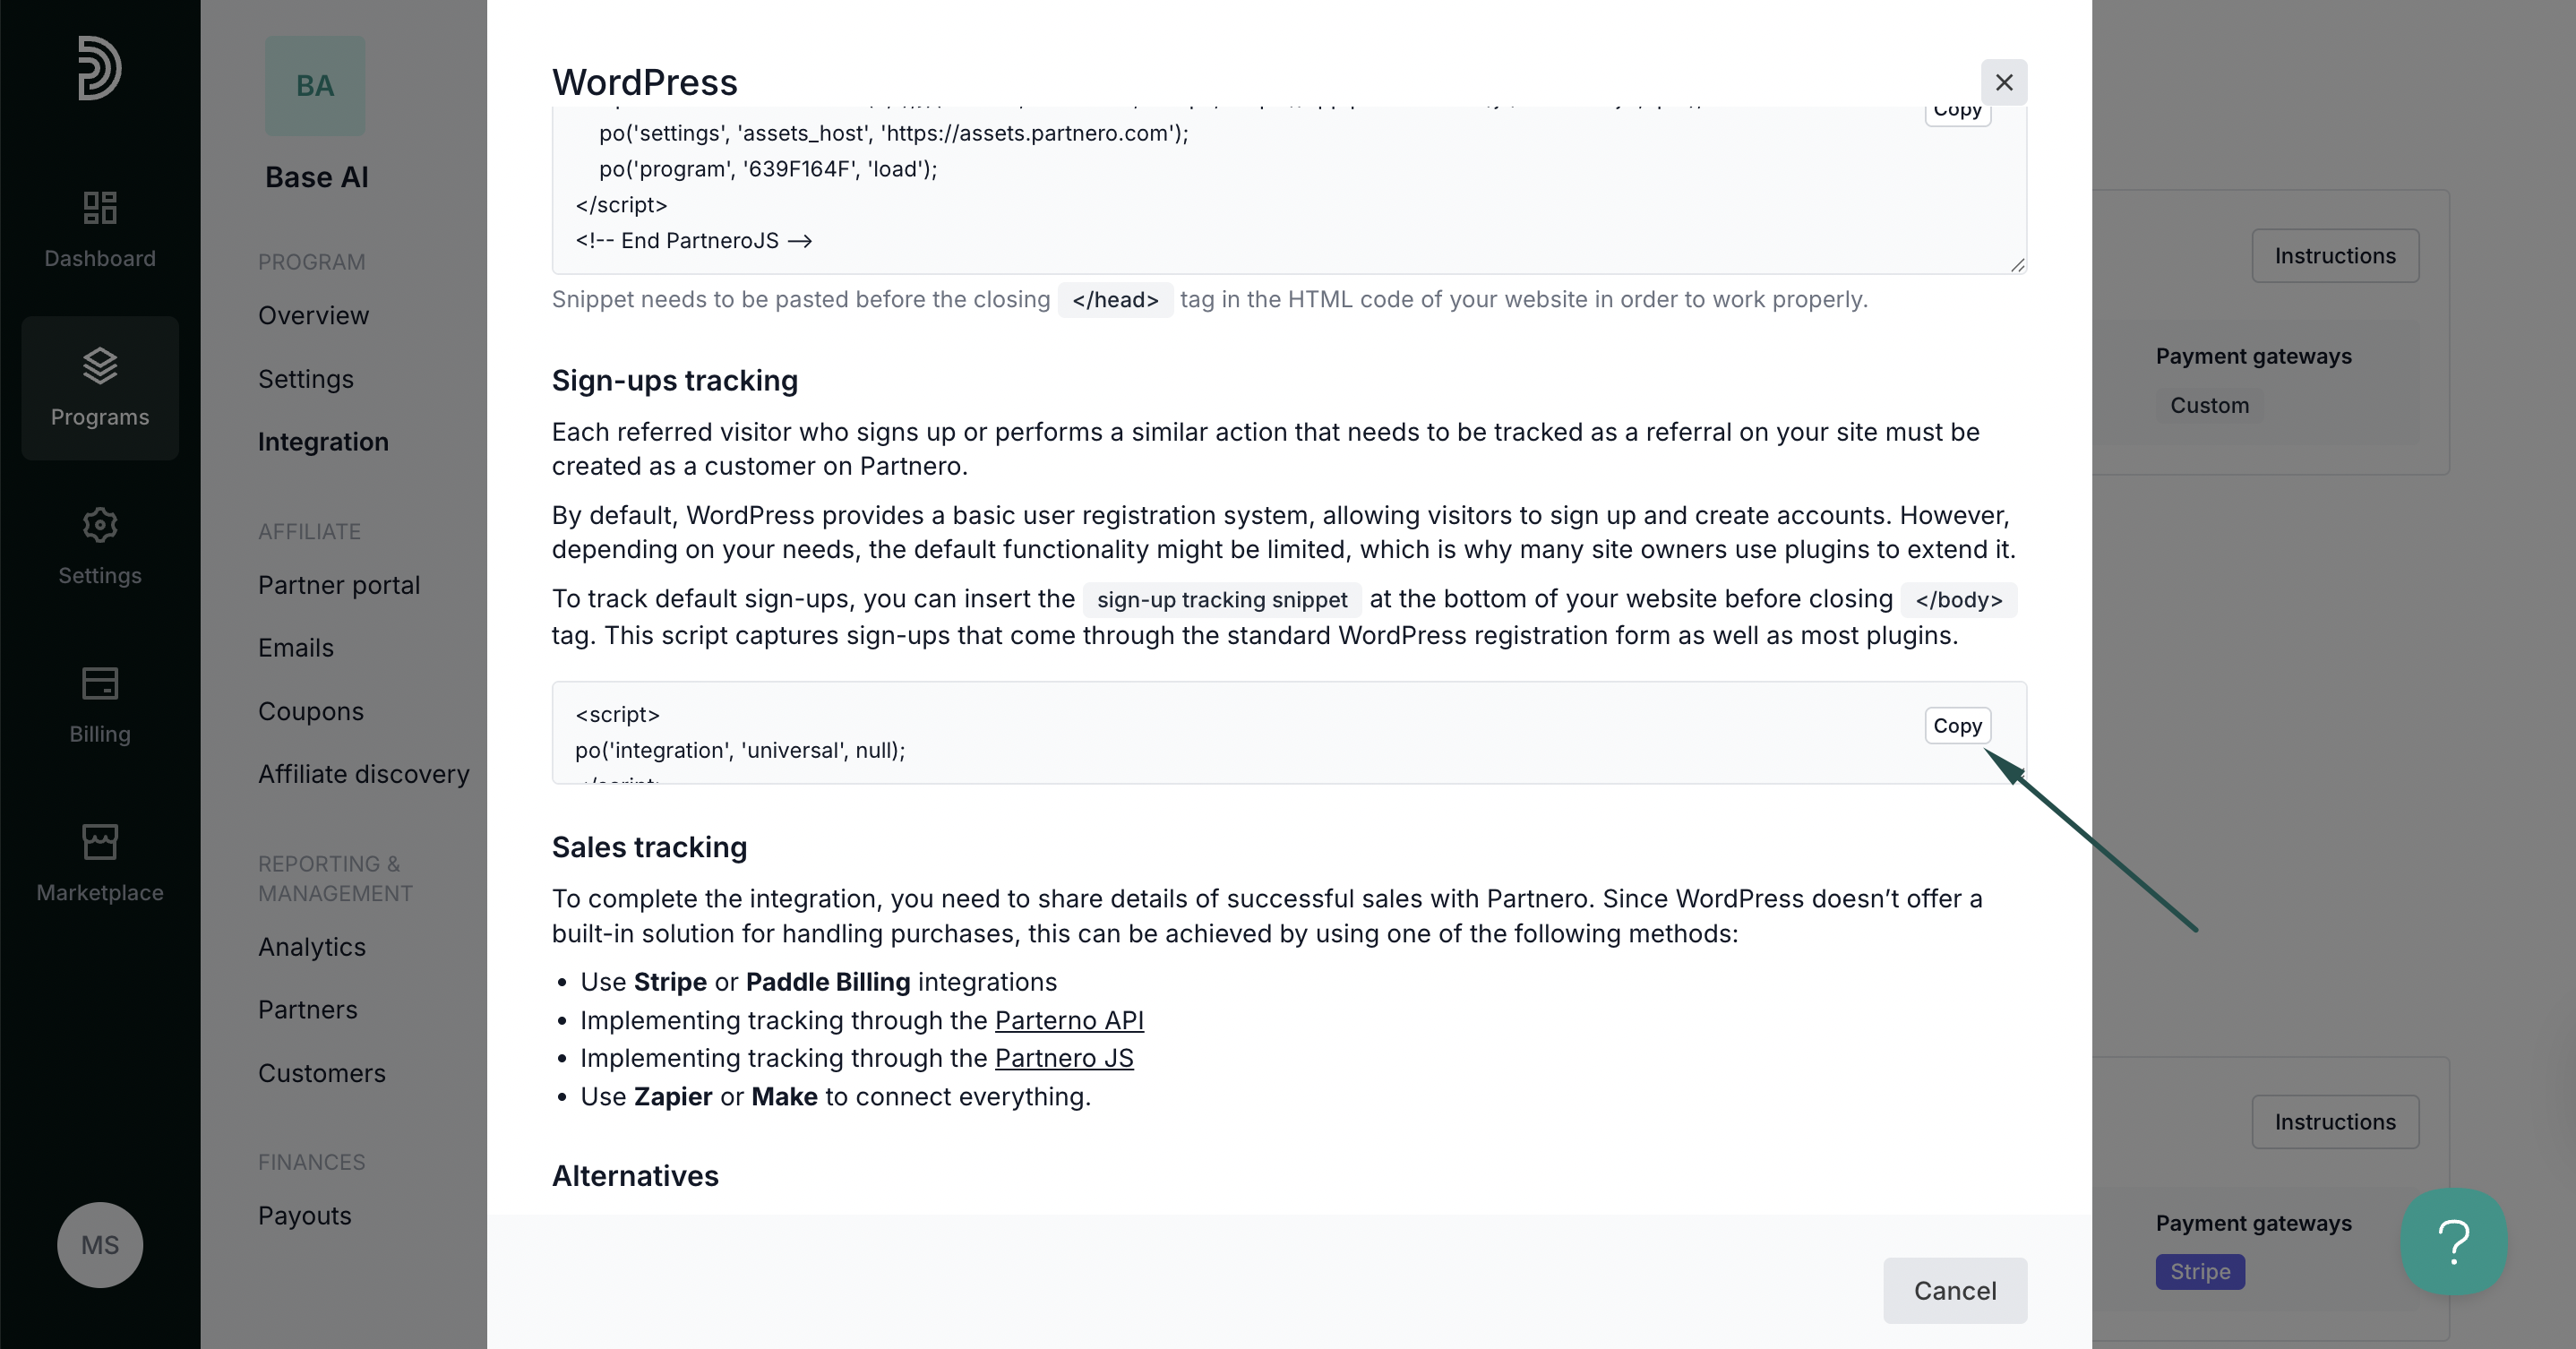
- Insert the sign-up tracking snippet at the bottom of your website before closing the
</body>tag. This script captures sign-ups that come through the standard WordPress registration form as well as most plugins.

Step 3: Sales tracking
To complete the integration, you need to share details of successful sales with Partnero. Since WordPress doesn’t offer a built-in solution for handling purchases, this can be achieved by using one of the following methods:
- Use Stripe or Paddle Billing integrations
- Implementing tracking through the Parterno API
- Implementing tracking through the Partnero JS
- Use Zapier or Make to connect everything.
Alternative integration options may be available. If you’re using third-party plugins on your WordPress site, please refer to other guides, such as the one for integrating with Stripe via Payment Links, or explore other relevant options.