
Itegrate Partnero with Calendly
This guide will walk you through the steps to integrate Partnero with Simvoly to track website visitors, capture sign-ups, and monitor sales. Following these instructions will enable accurate tracking of user interactions on your website and ensure that all relevant data is sent to Partnero.
These instructions can also be found on your Partnero account, under Integration > Guides tab > Calendly:
Step 1: Start tracking website visitors
To track visitors on your website, you need to install the PartneroJS snippet as custom code.
Install the PartneroJS Snippet
- On Partnero, go to Integration > Guides tab > Calendly. Click Instructions.
- Copy the PartneroJS snippet:
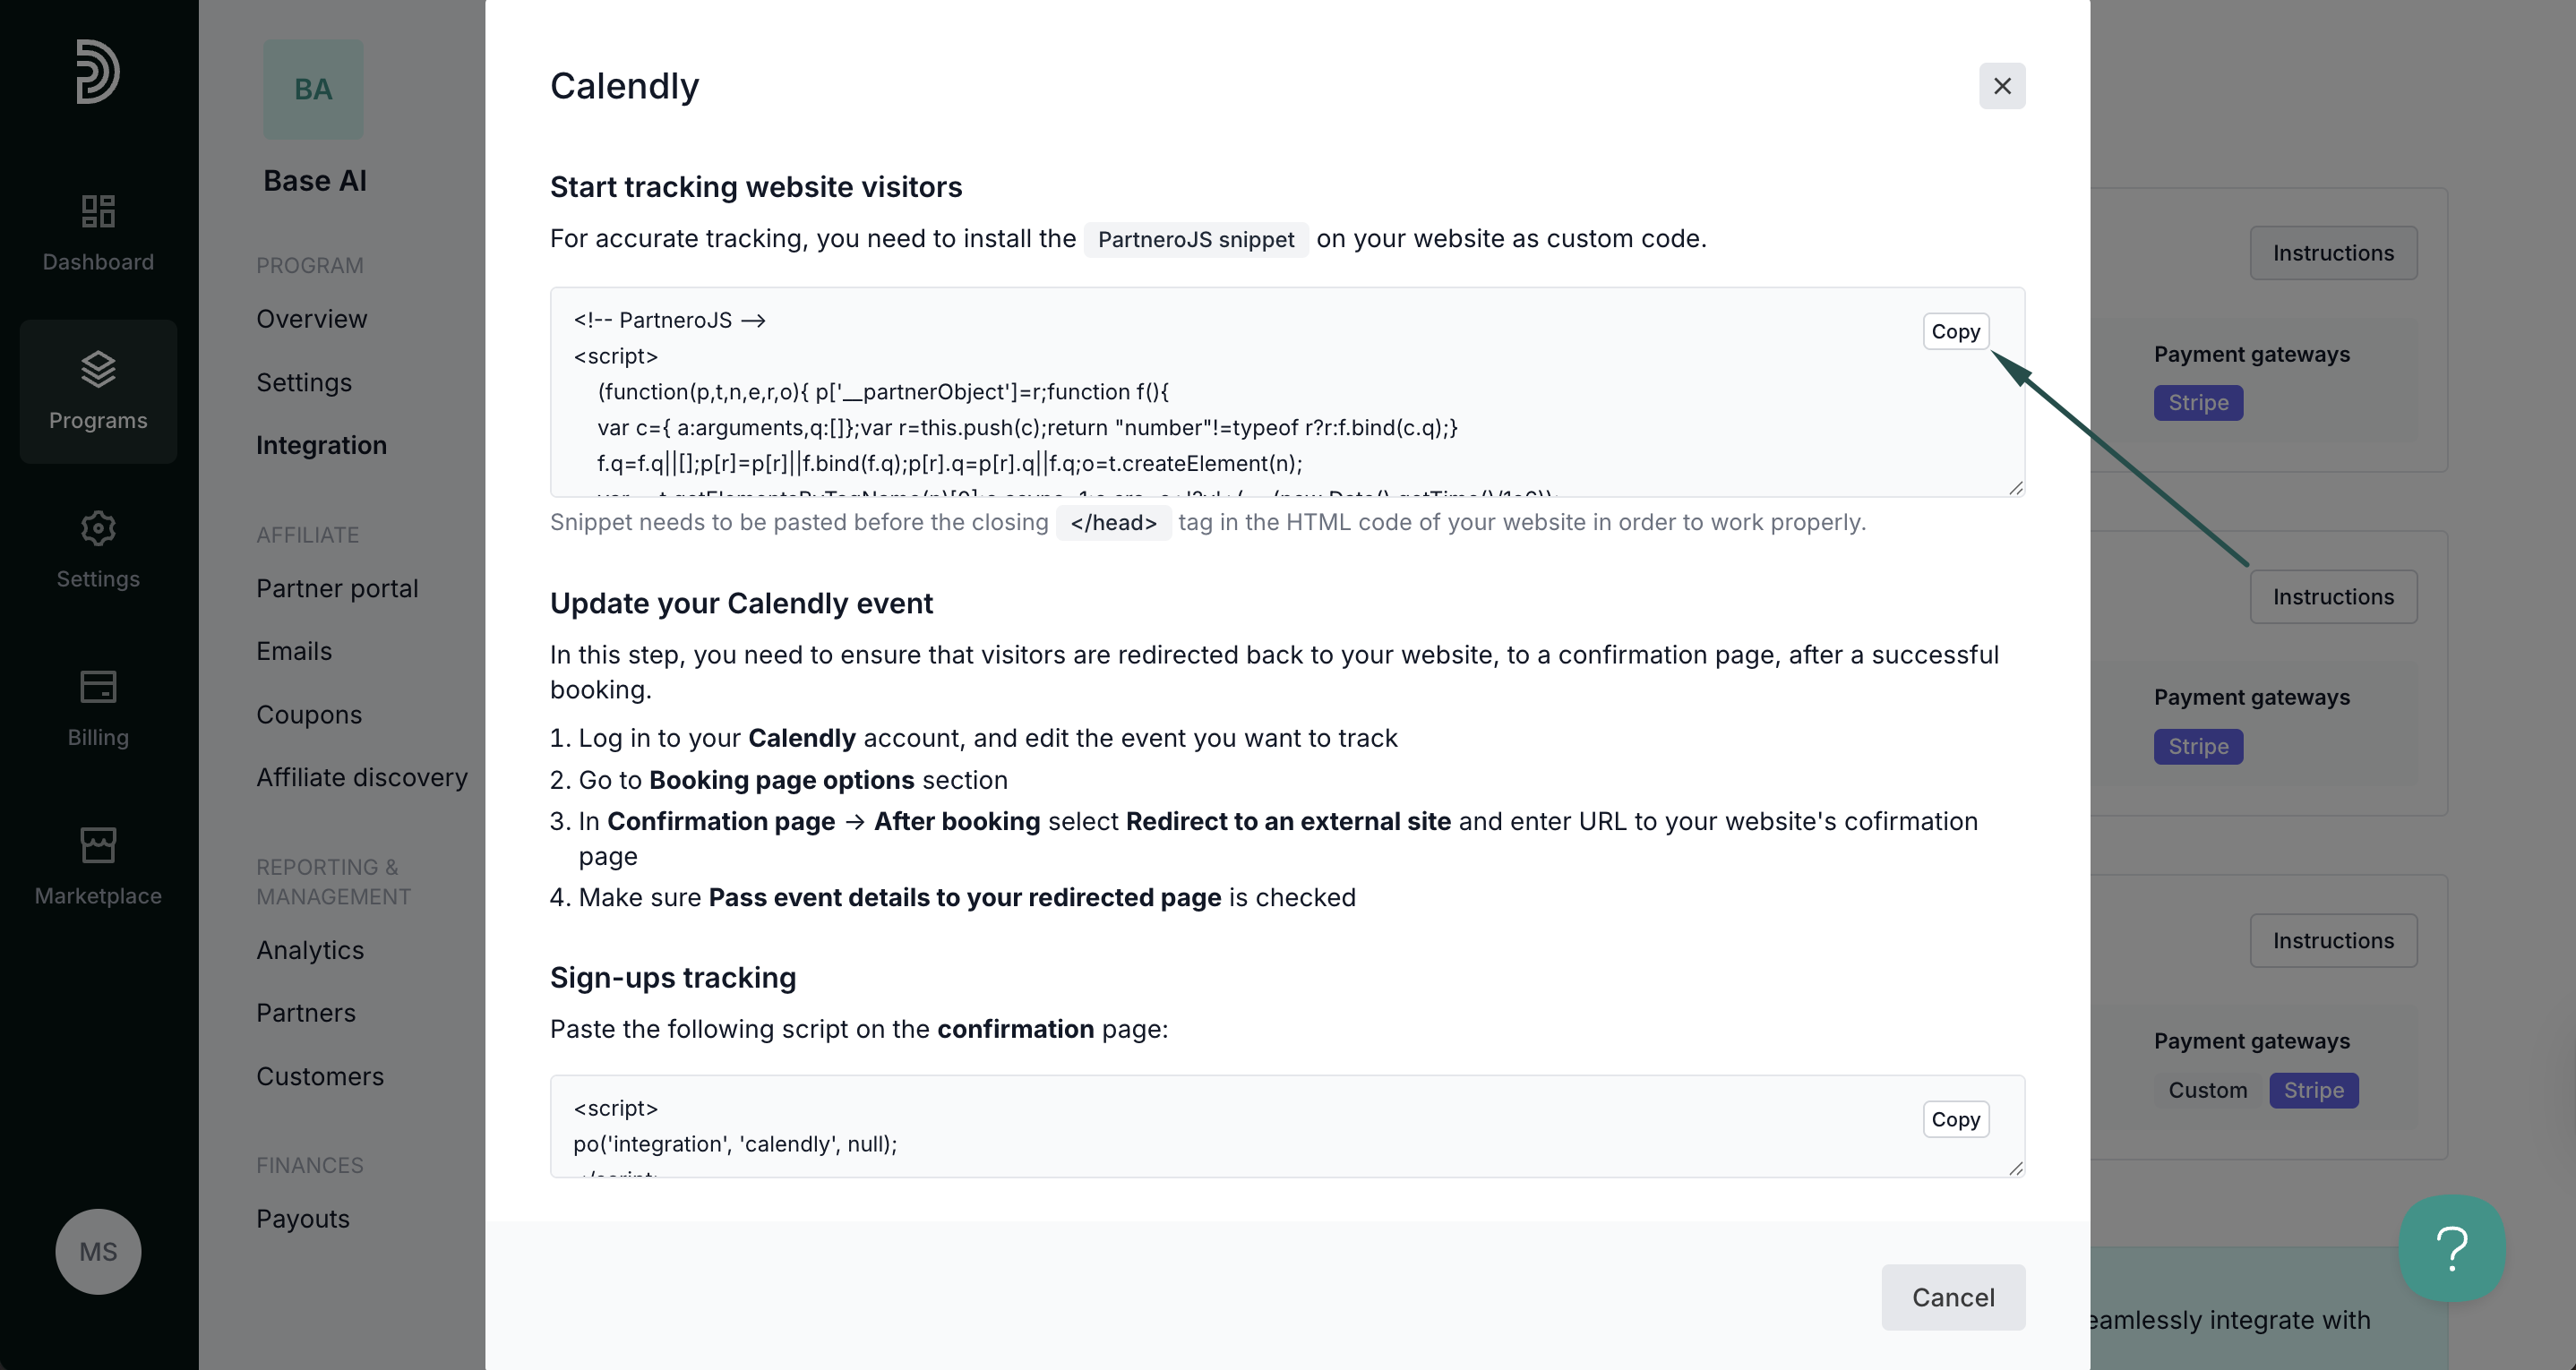
- Paste the snippet before the closing of the </head> tag in the HTML code of your website.

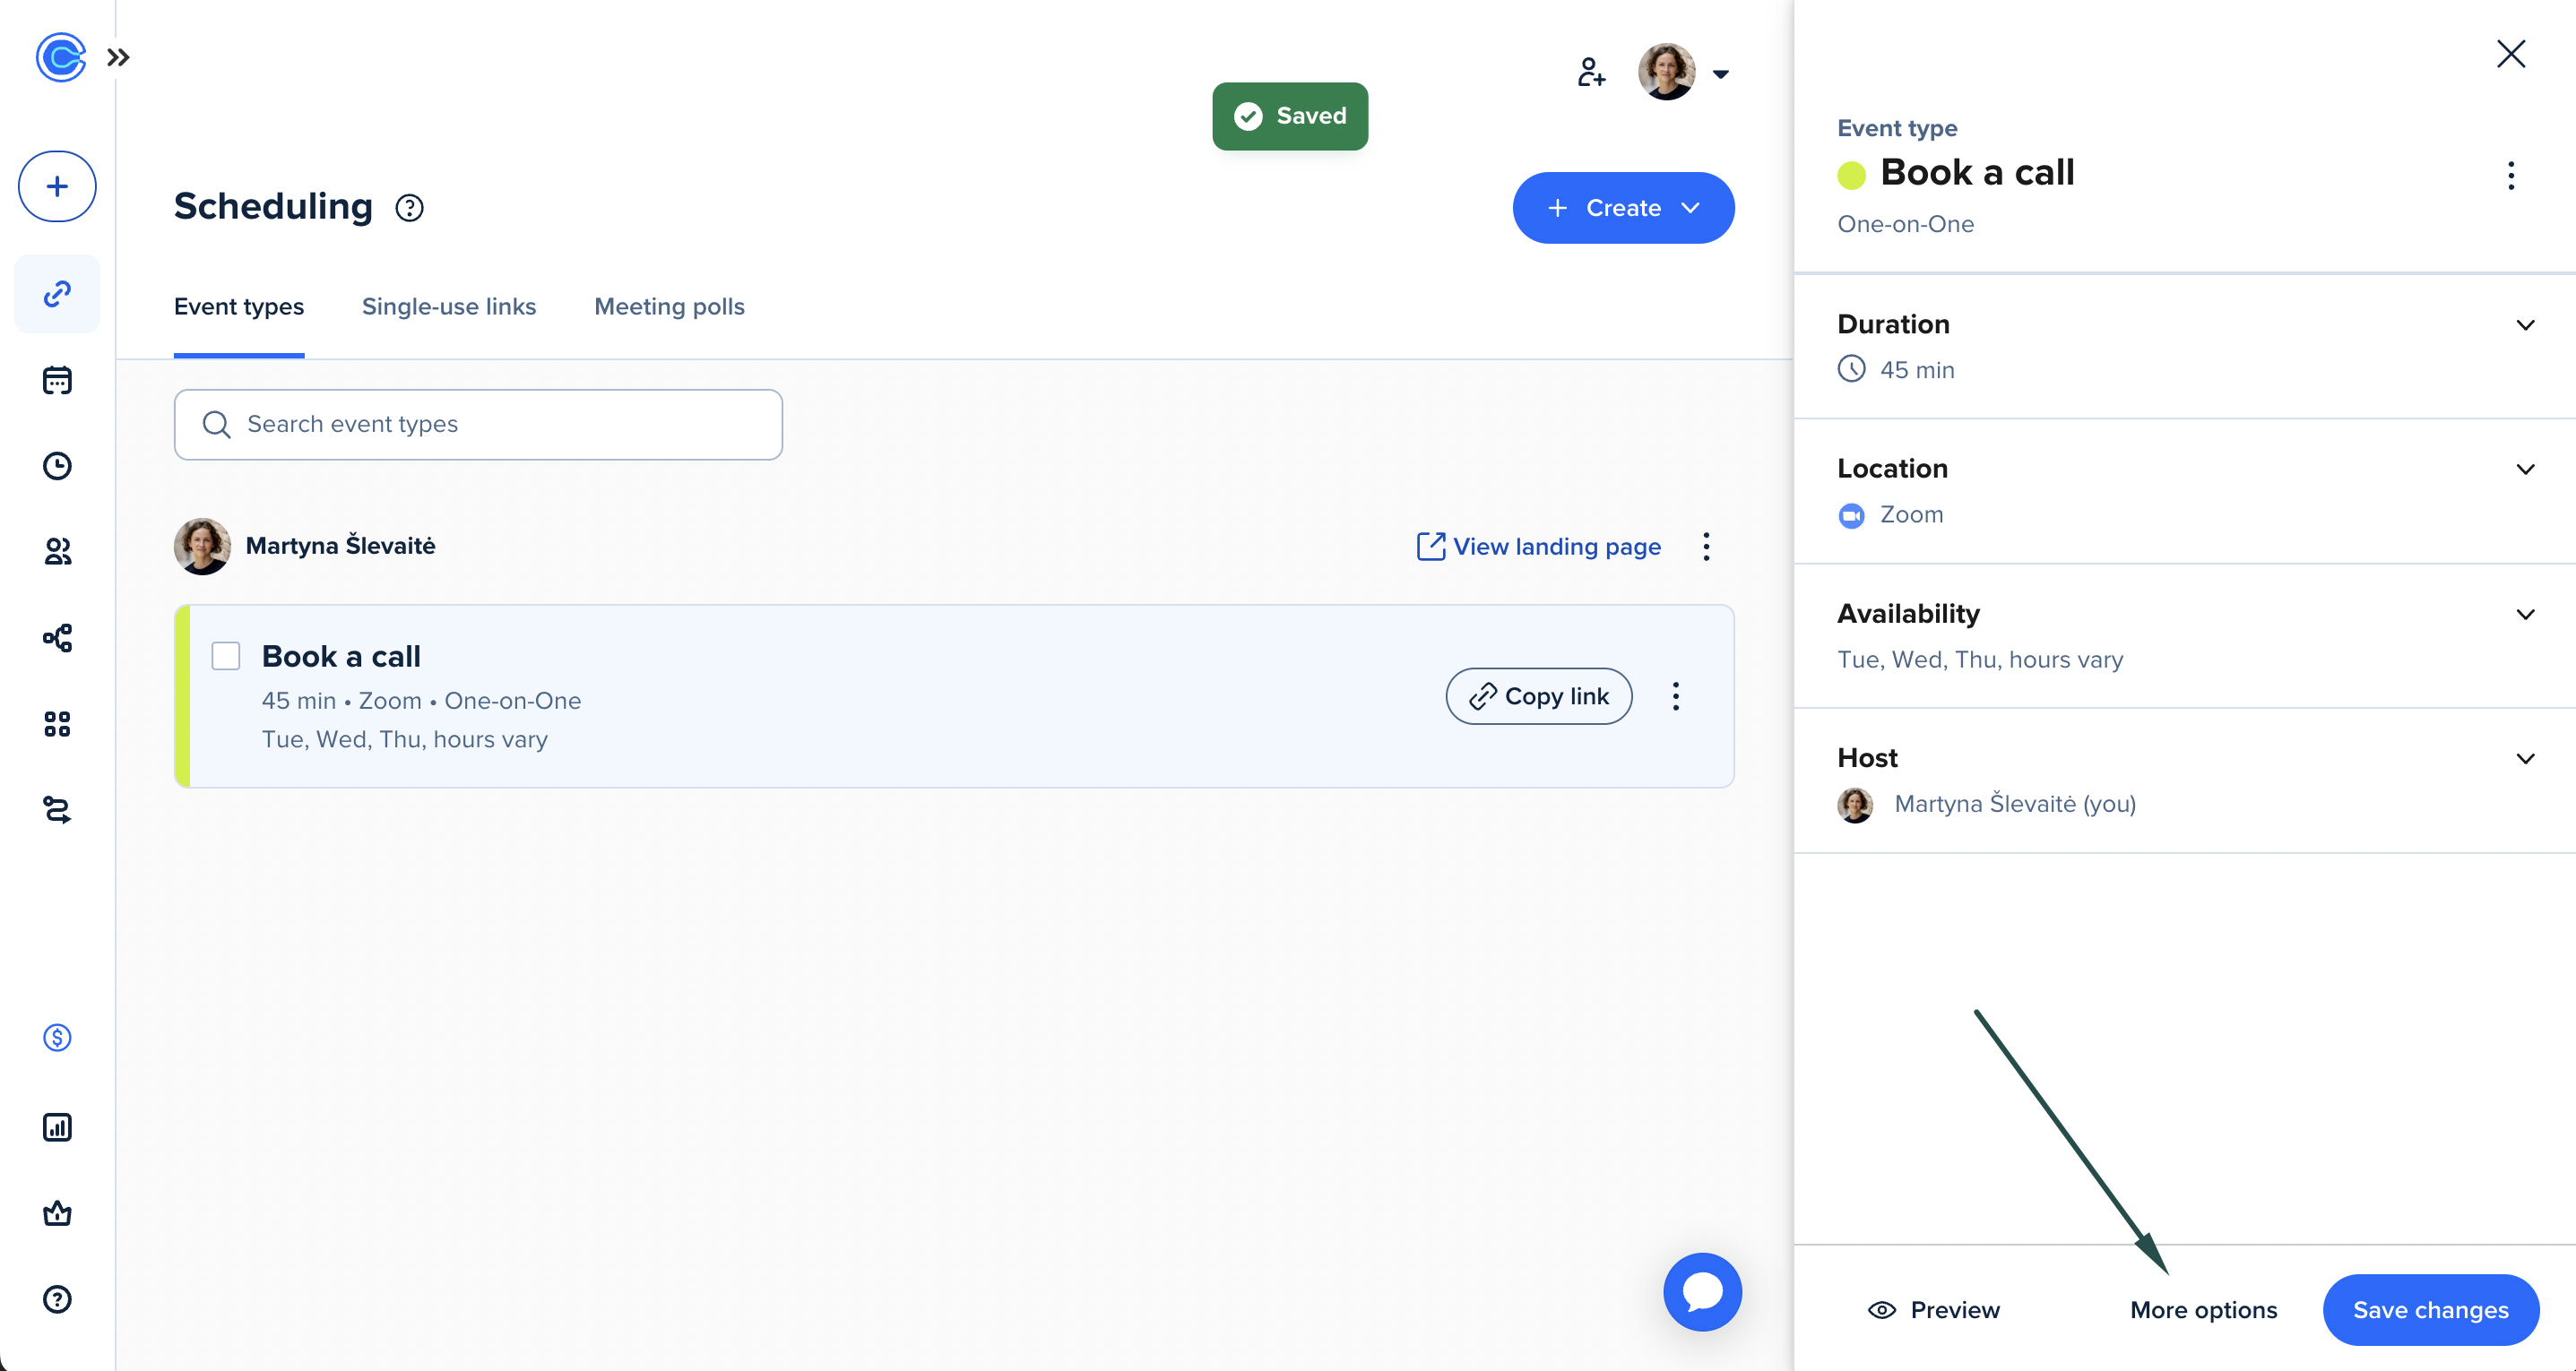
Step 2: Update your Calendly event
This step ensures that visitors are redirected back to your website, to a confirmation page, after a successful booking.
- Log in to your Calendly account, and edit the event you want to track. Click More options:
- Go to the Confirmation page and select "Redirect to an external site" under After booking.
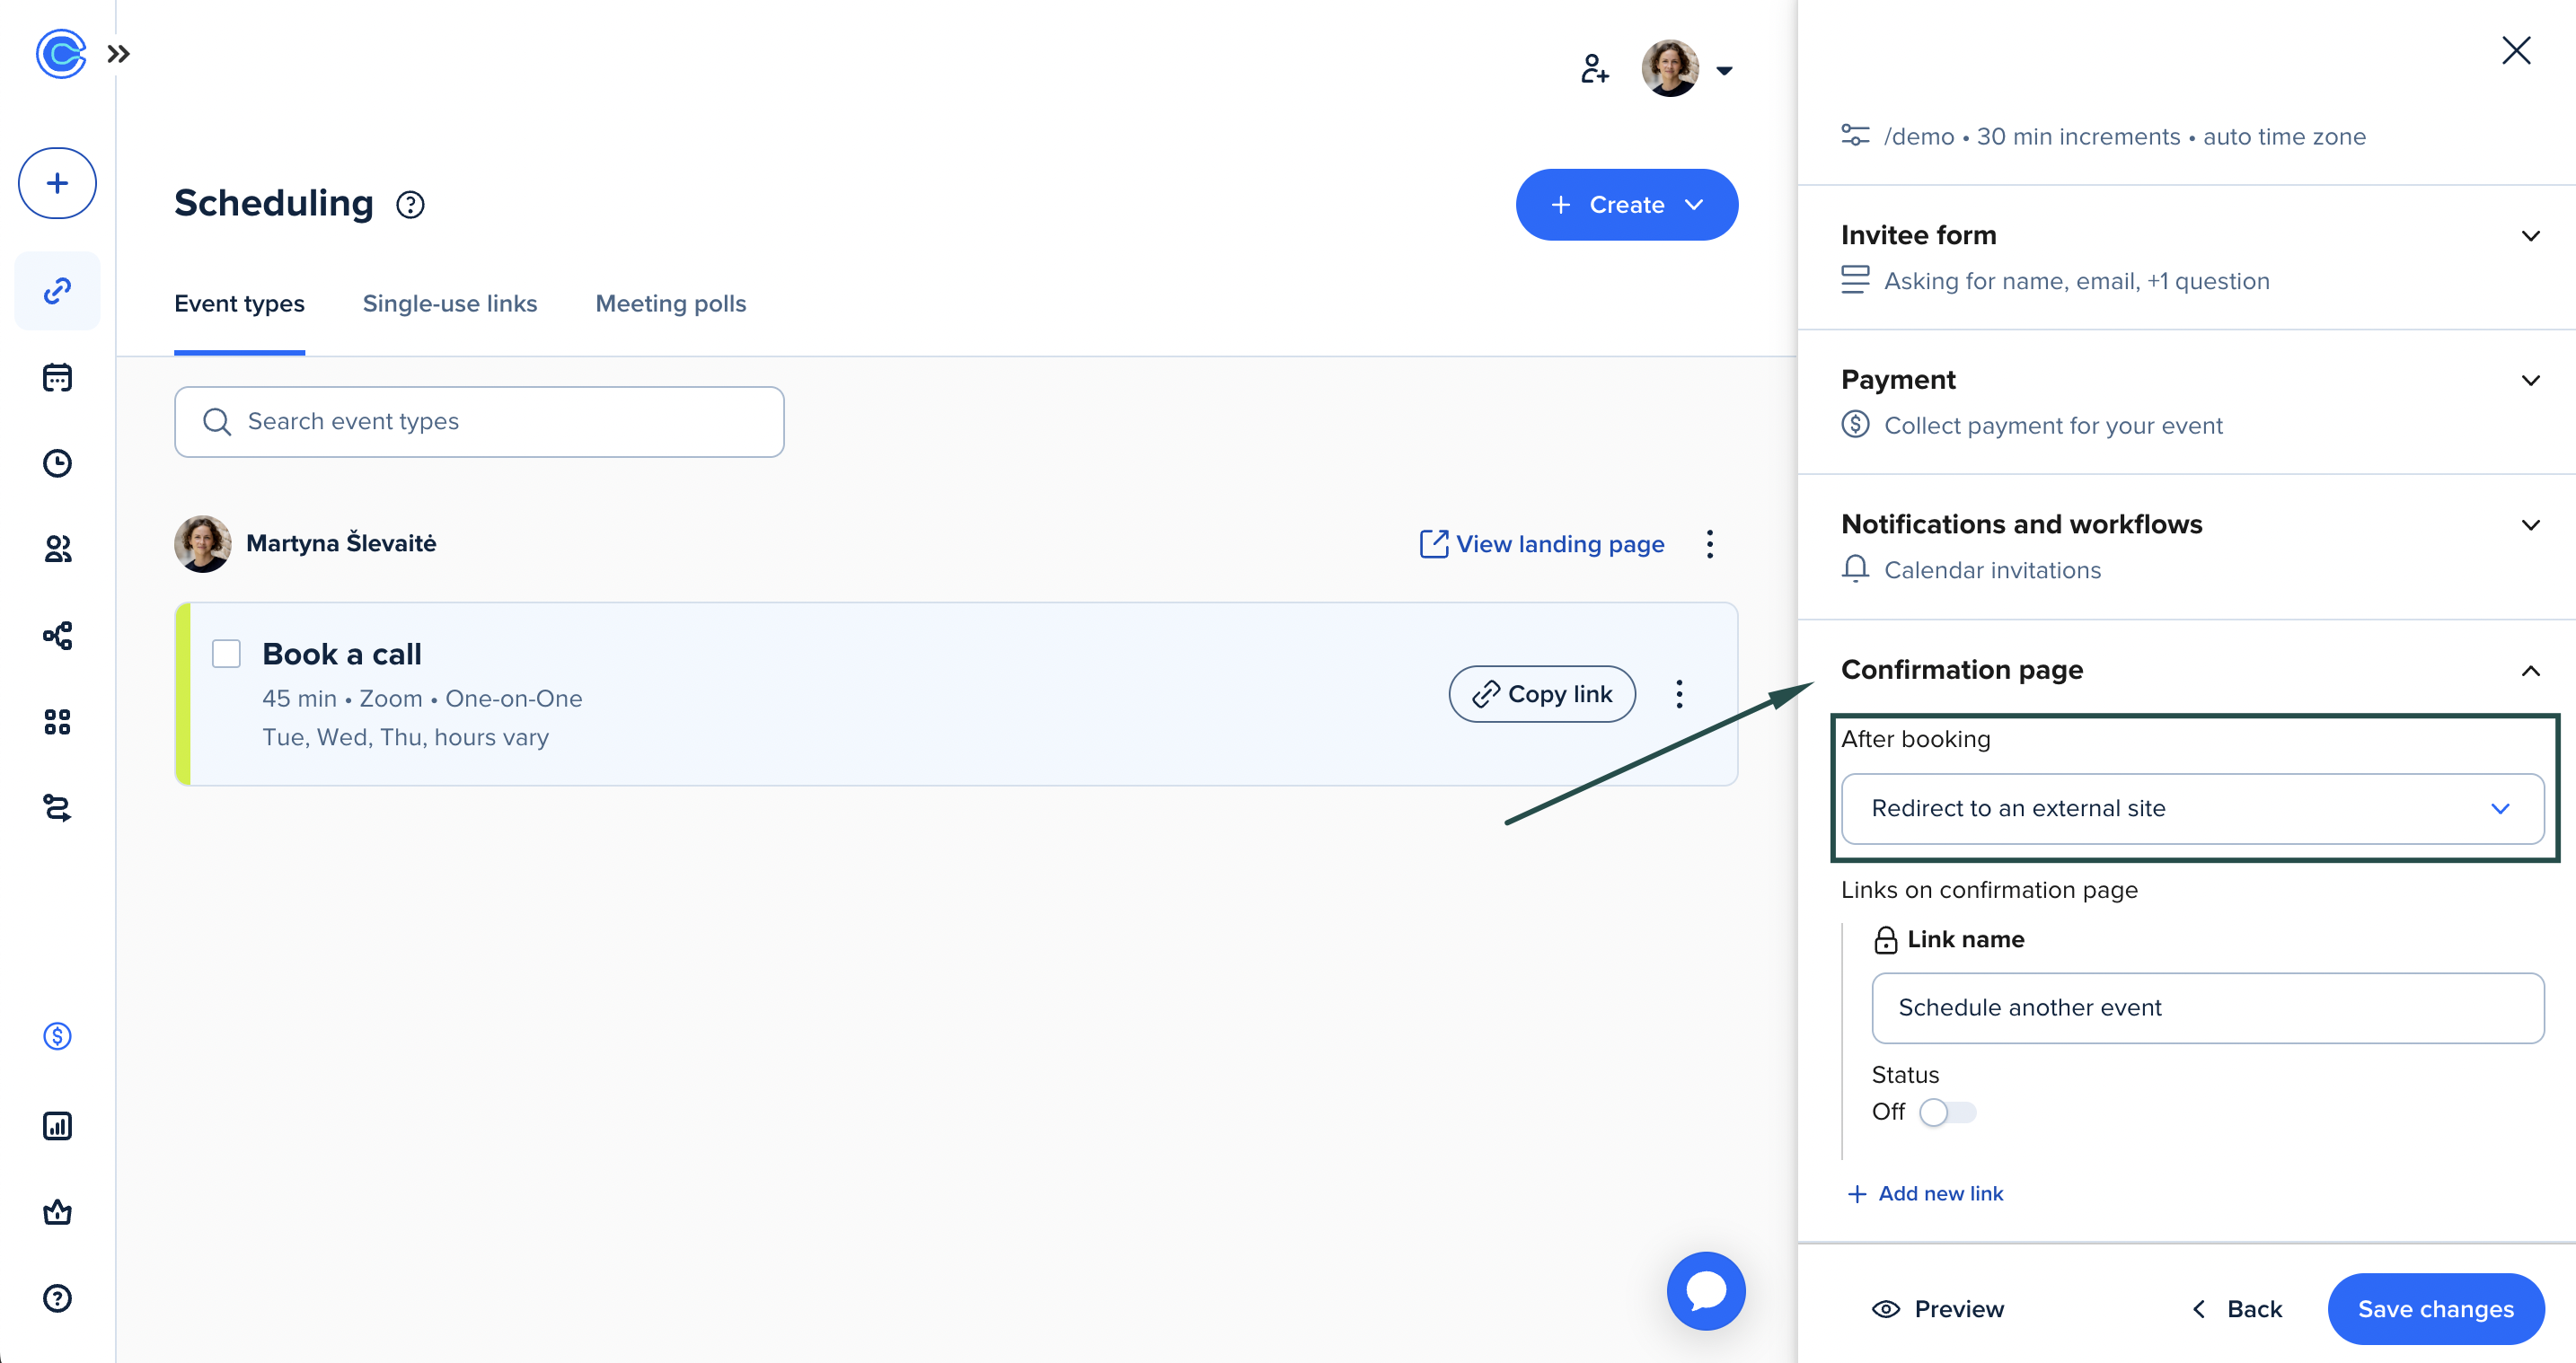
- Navigate to Confirmation page > After booking,
- Select Redirect to an external site. Enter a URL to your website's confirmation page.
- Make sure that Pass event details to your redirected page is checked.
- Slick Save changes.


Step 3: Sign up tracking
To track signups:
- On Partnero, copy the snippet provided under the Sign-up tracking section:
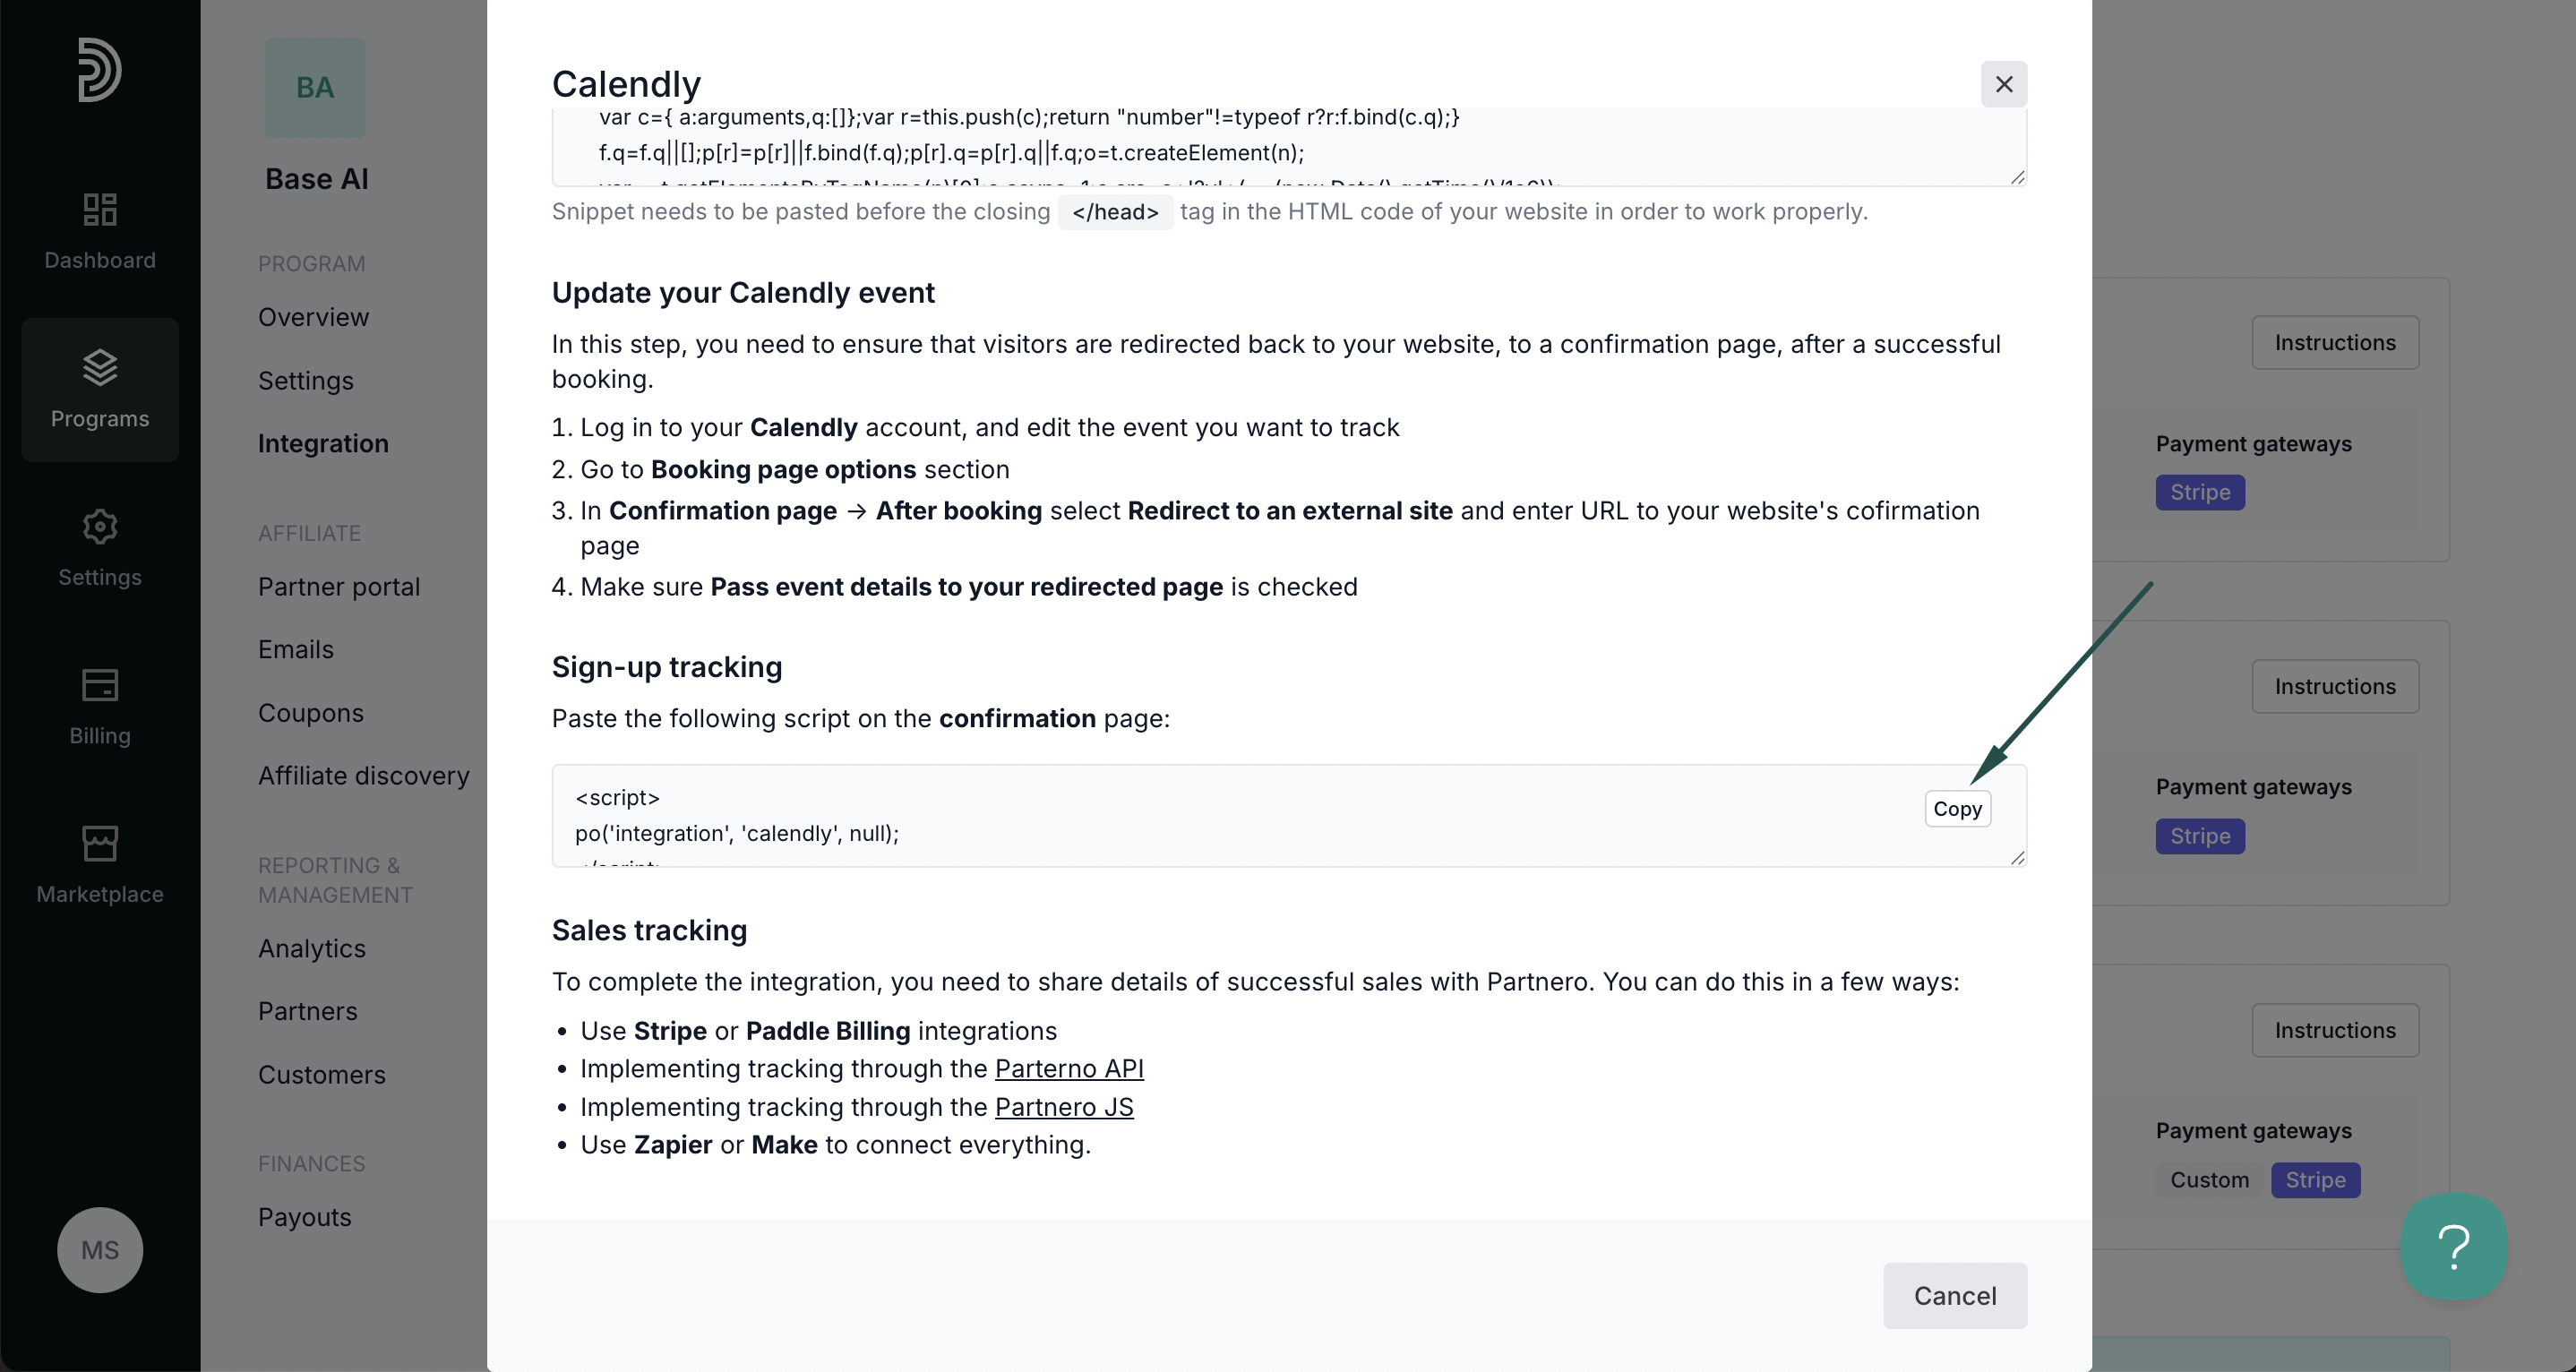
- Paste the script at the bottom of the confirmation page. If that is not possible, insert the script provided below directly after the PartneroJS code, before the closing </head> tag in the HTML code of your website.

Step 4: Sales tracking
To complete the integration, you need to share details of successful sales with Partnero. You can do this in a few ways:
- Use Stripe or Paddle Billing integrations
- Implementing tracking through the Partnero API
- Implementing tracking through the Partnero JS
- Use Zapier or Make to connect everything.