
Customer tags overview
Customer tags allow you to tag and categorize your customers, allowing for more efficient management. This enables you to:
- set custom partner rewards based on the customer tags;
- filter, segment, and manage your customers.
Let's review how to create and manage tags and how to set custom partner rewards.
How to create and manage customer tags
To create, view existing, edit or delete tags:
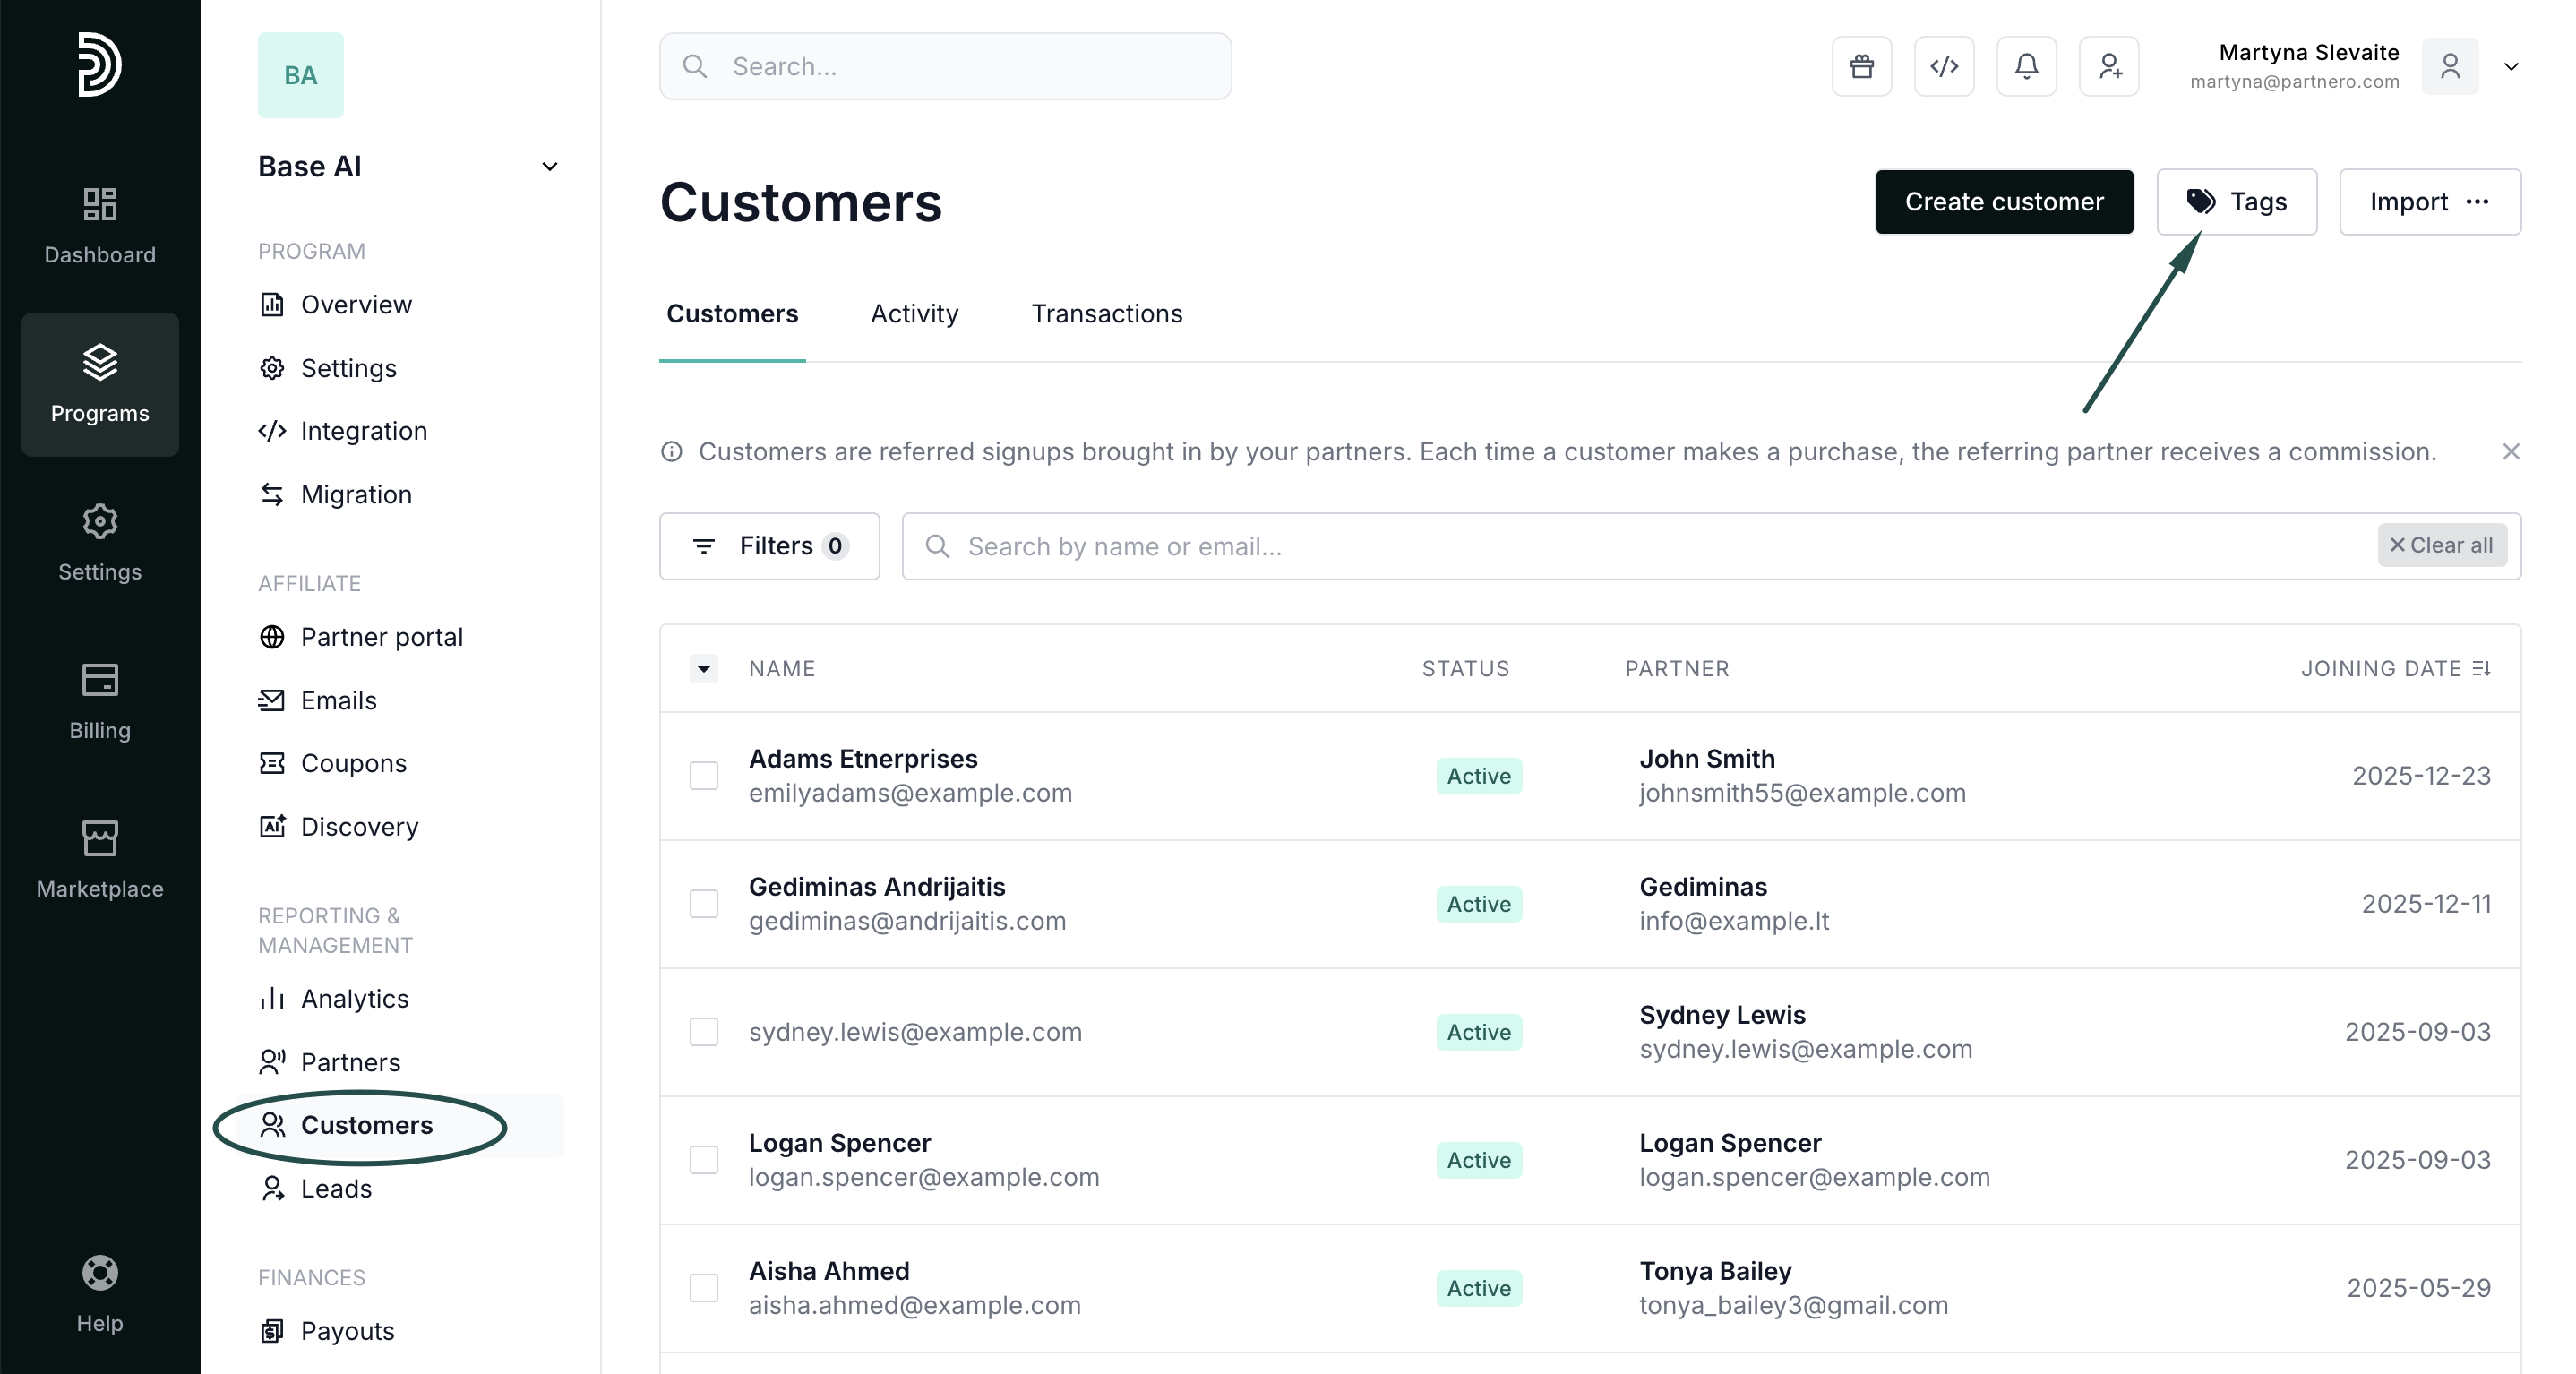
- In your program, click on Customers in the left-hand side menu.
- Click on Tags in the upper right-hand corner:
- Here you can view and delete existing tags or add new ones:


Click here to read more on how to create customer tags using Partnero API and JavaScript
→ Create customer tags using API or JavaScript
How to assign customer tags
Tags can be assigned to a customer from their profile or from the Customers table.
To assign tags from the Customers table:
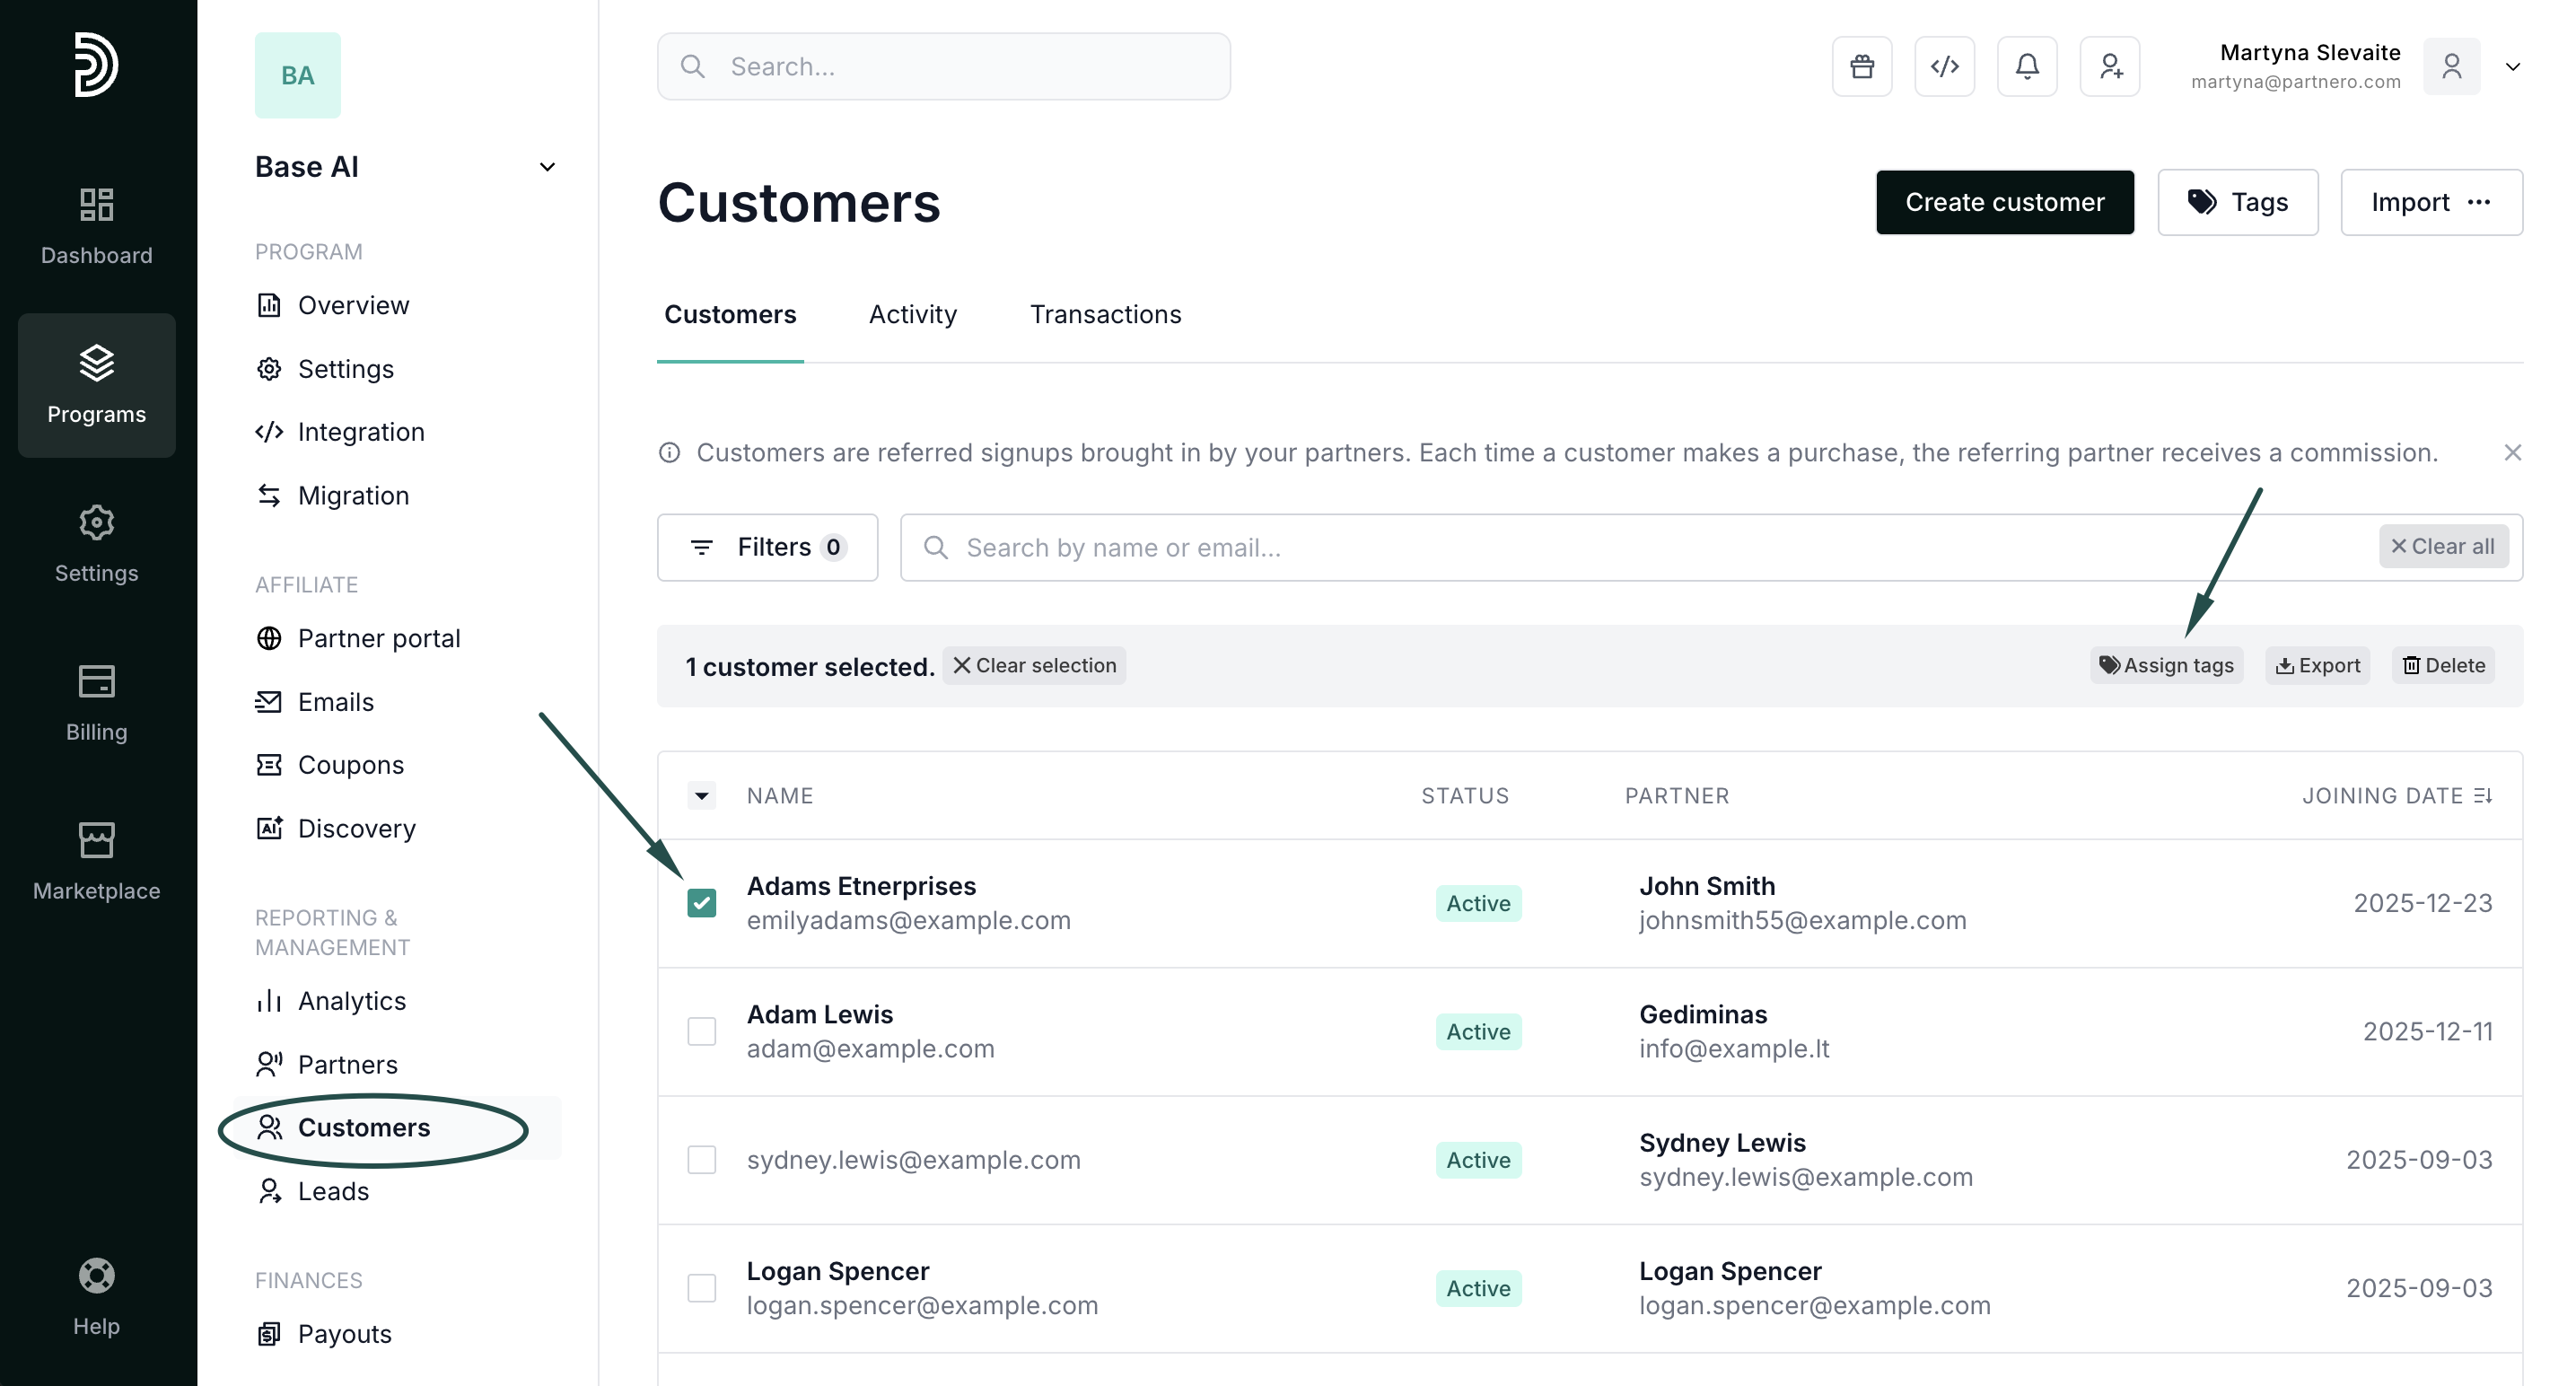
- In your program, click on Customers in the left-hand side menu.
- Select the customers you'd like to tag and click Assign tags:
- Click on the tags you wish to assign:
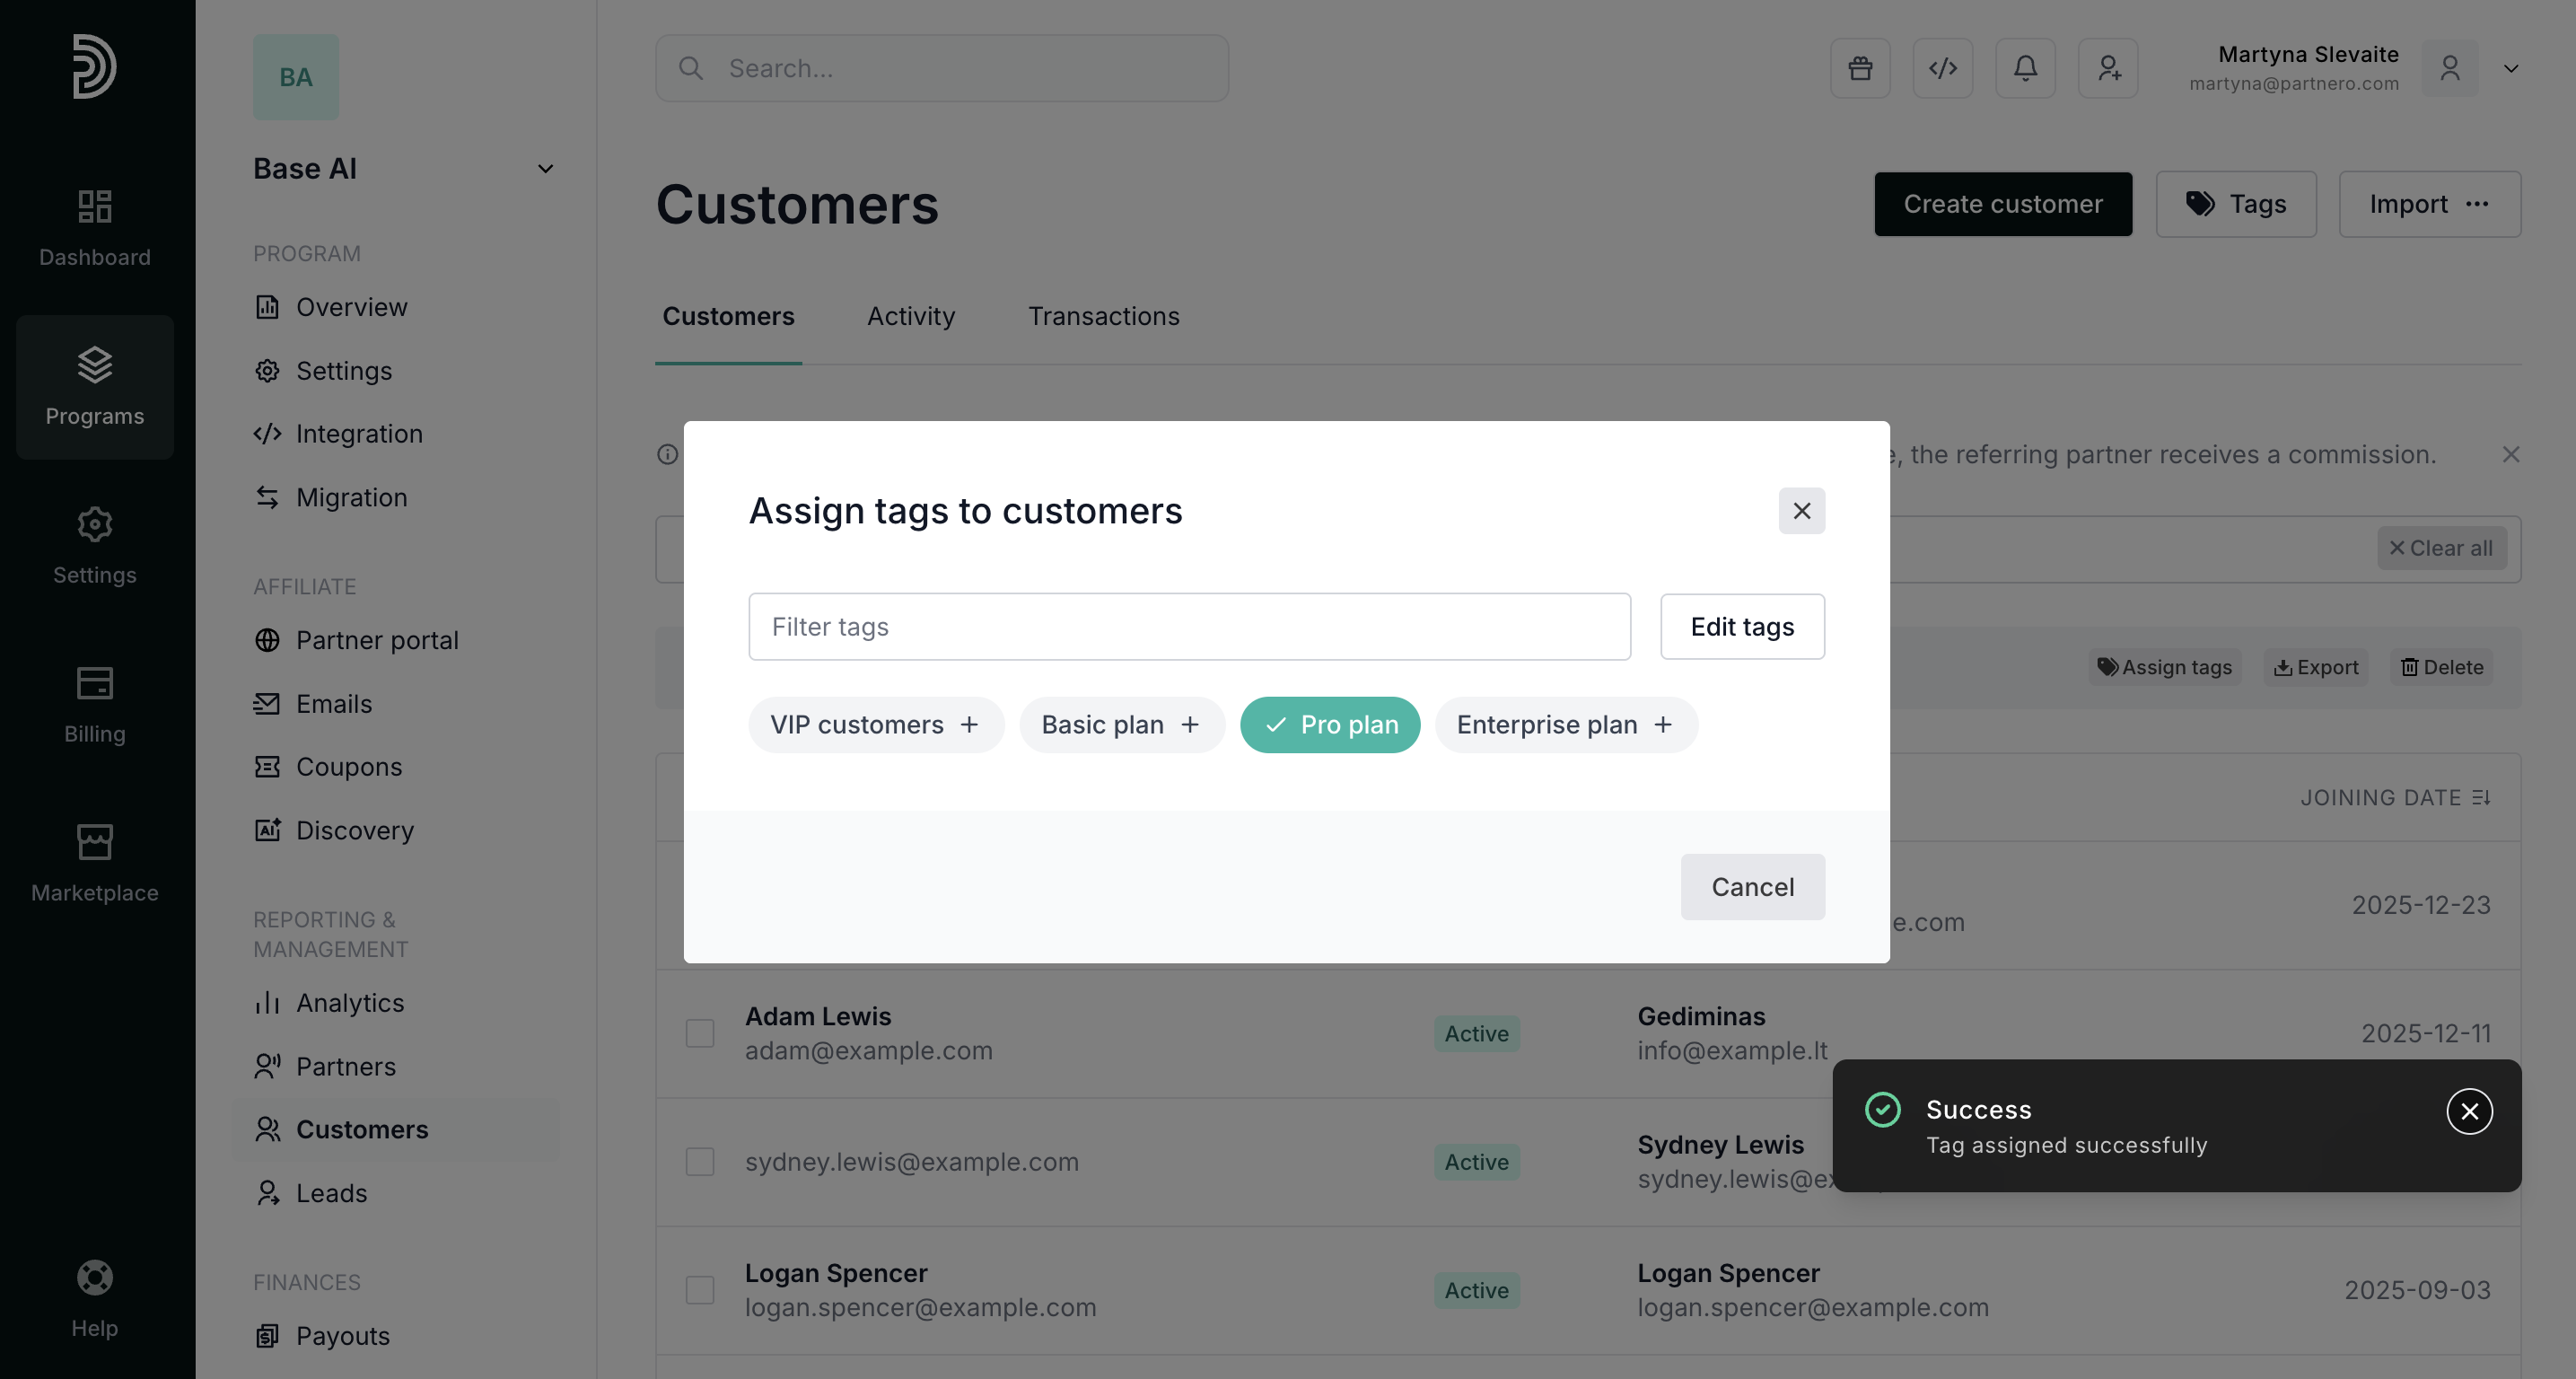 Additionally, you can click Edit tags to create new tags.

 Additionally, you can click Edit tags to create new tags.
To assign tags to an individual customer:
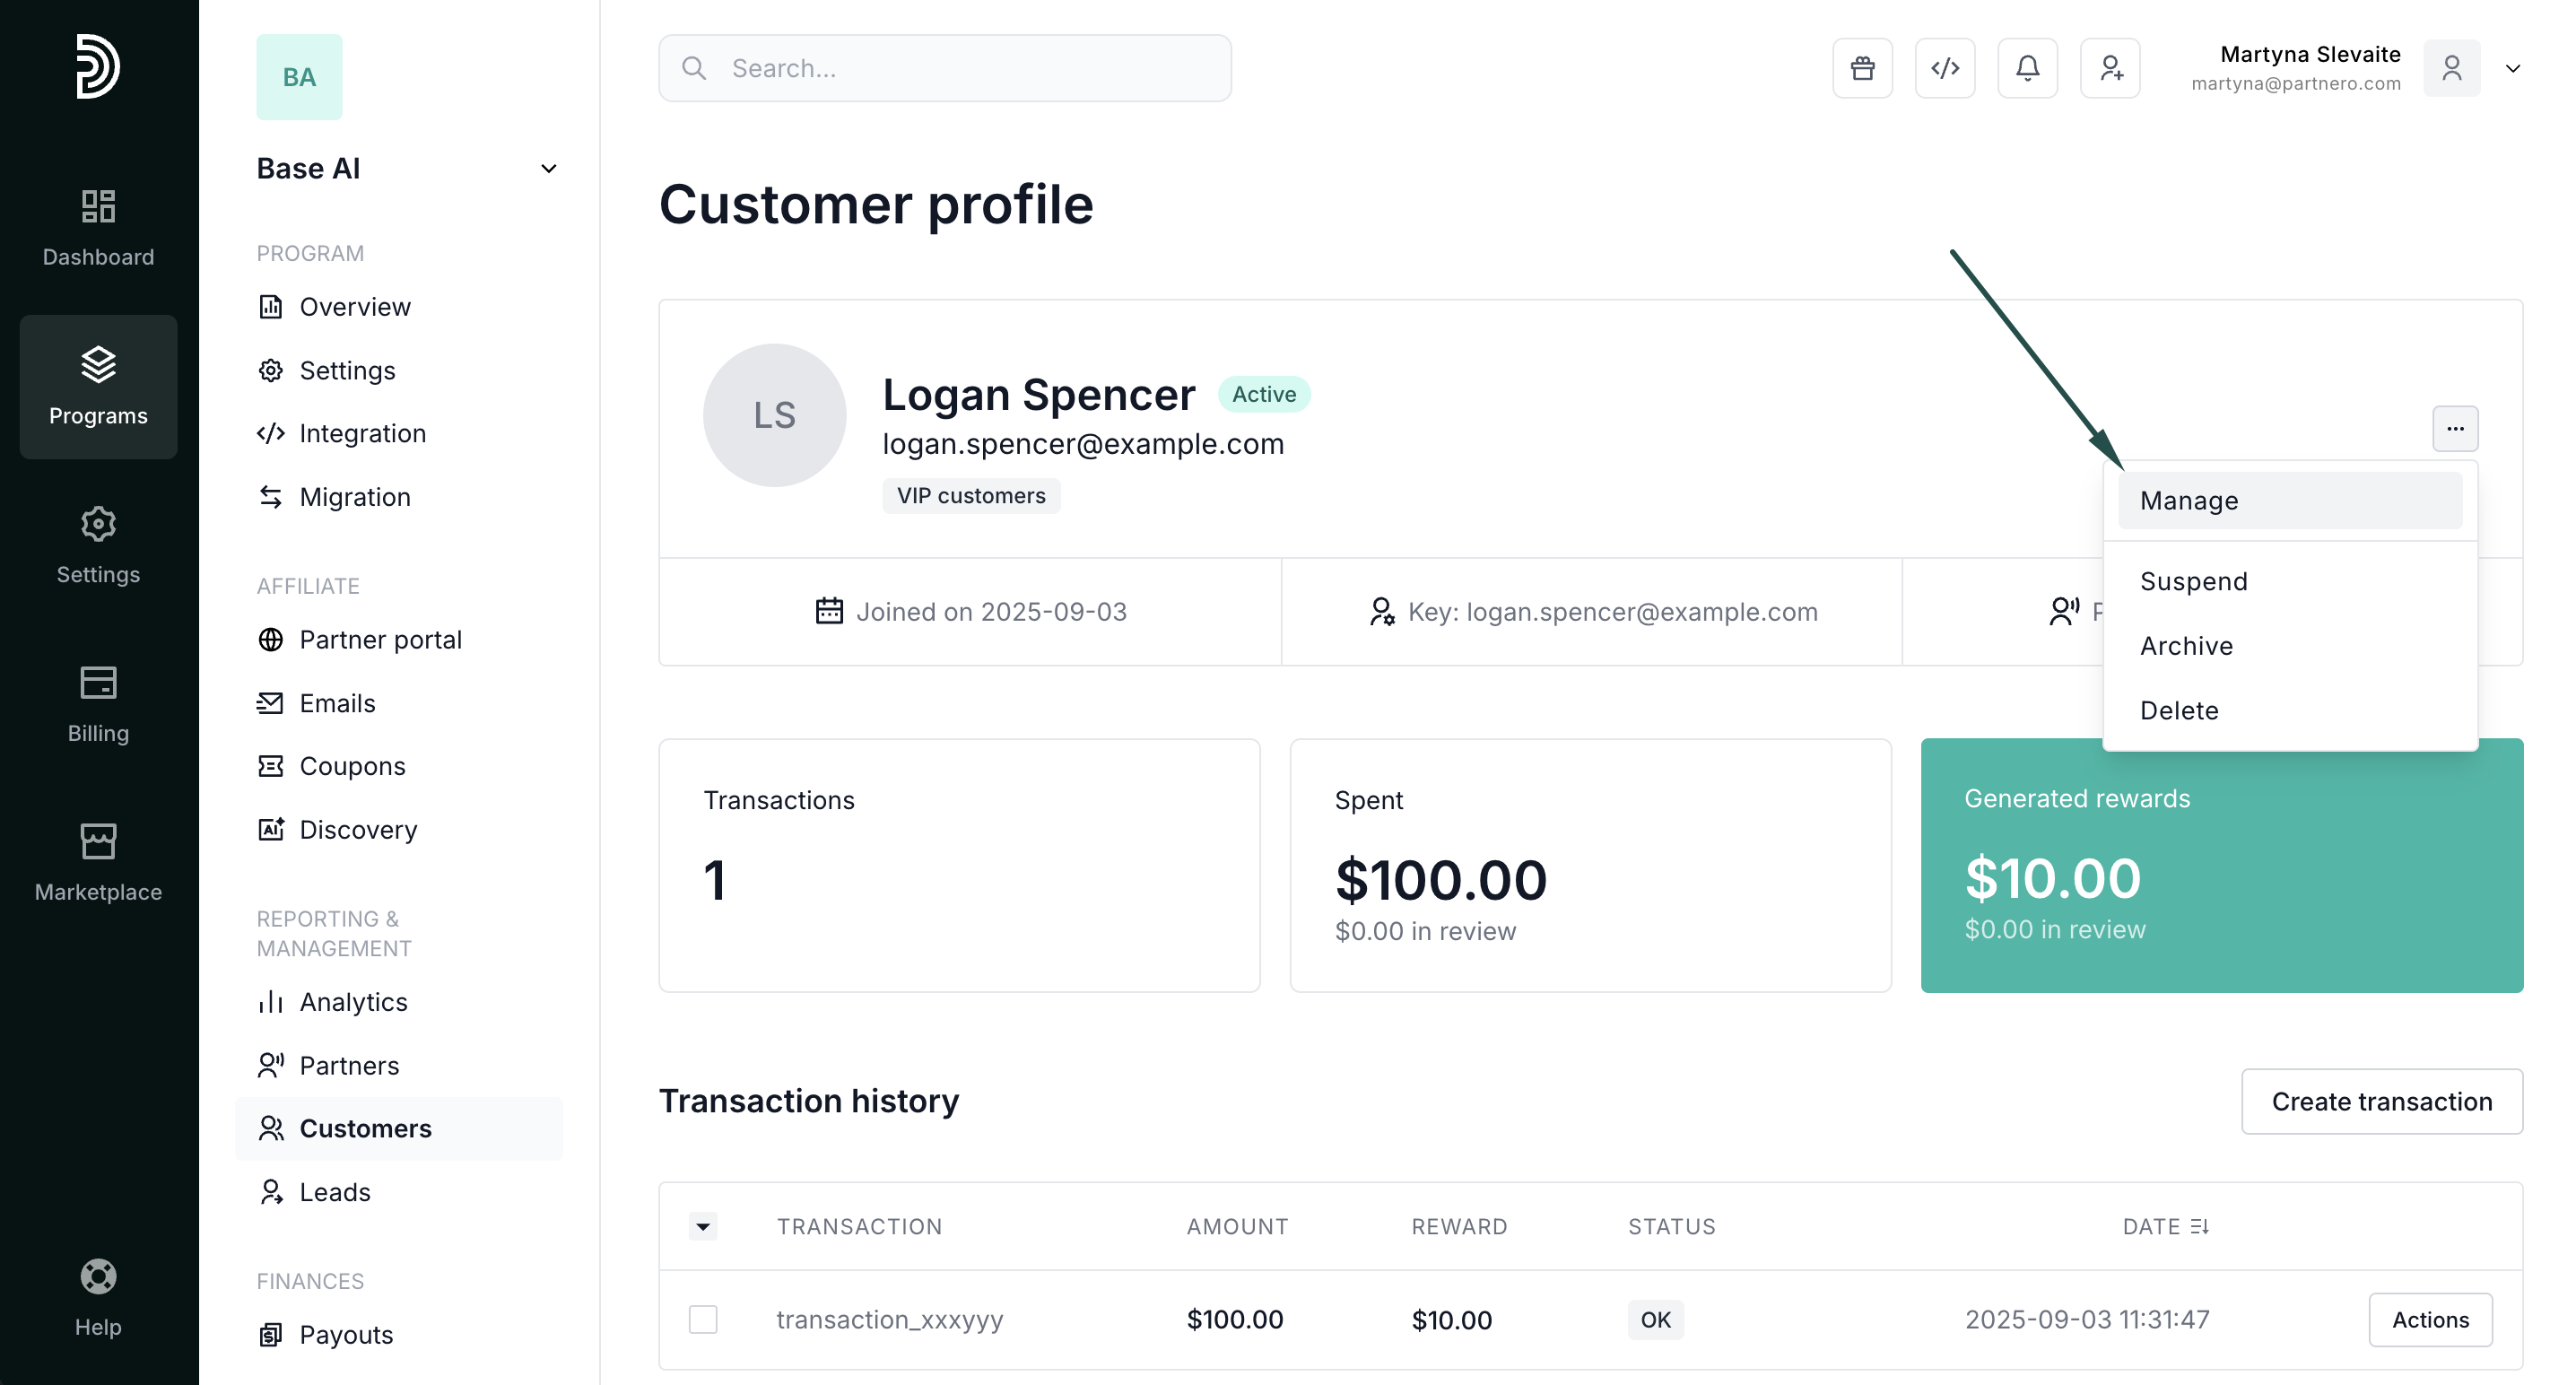
- In your program, click on Customers in the left-hand side menu.
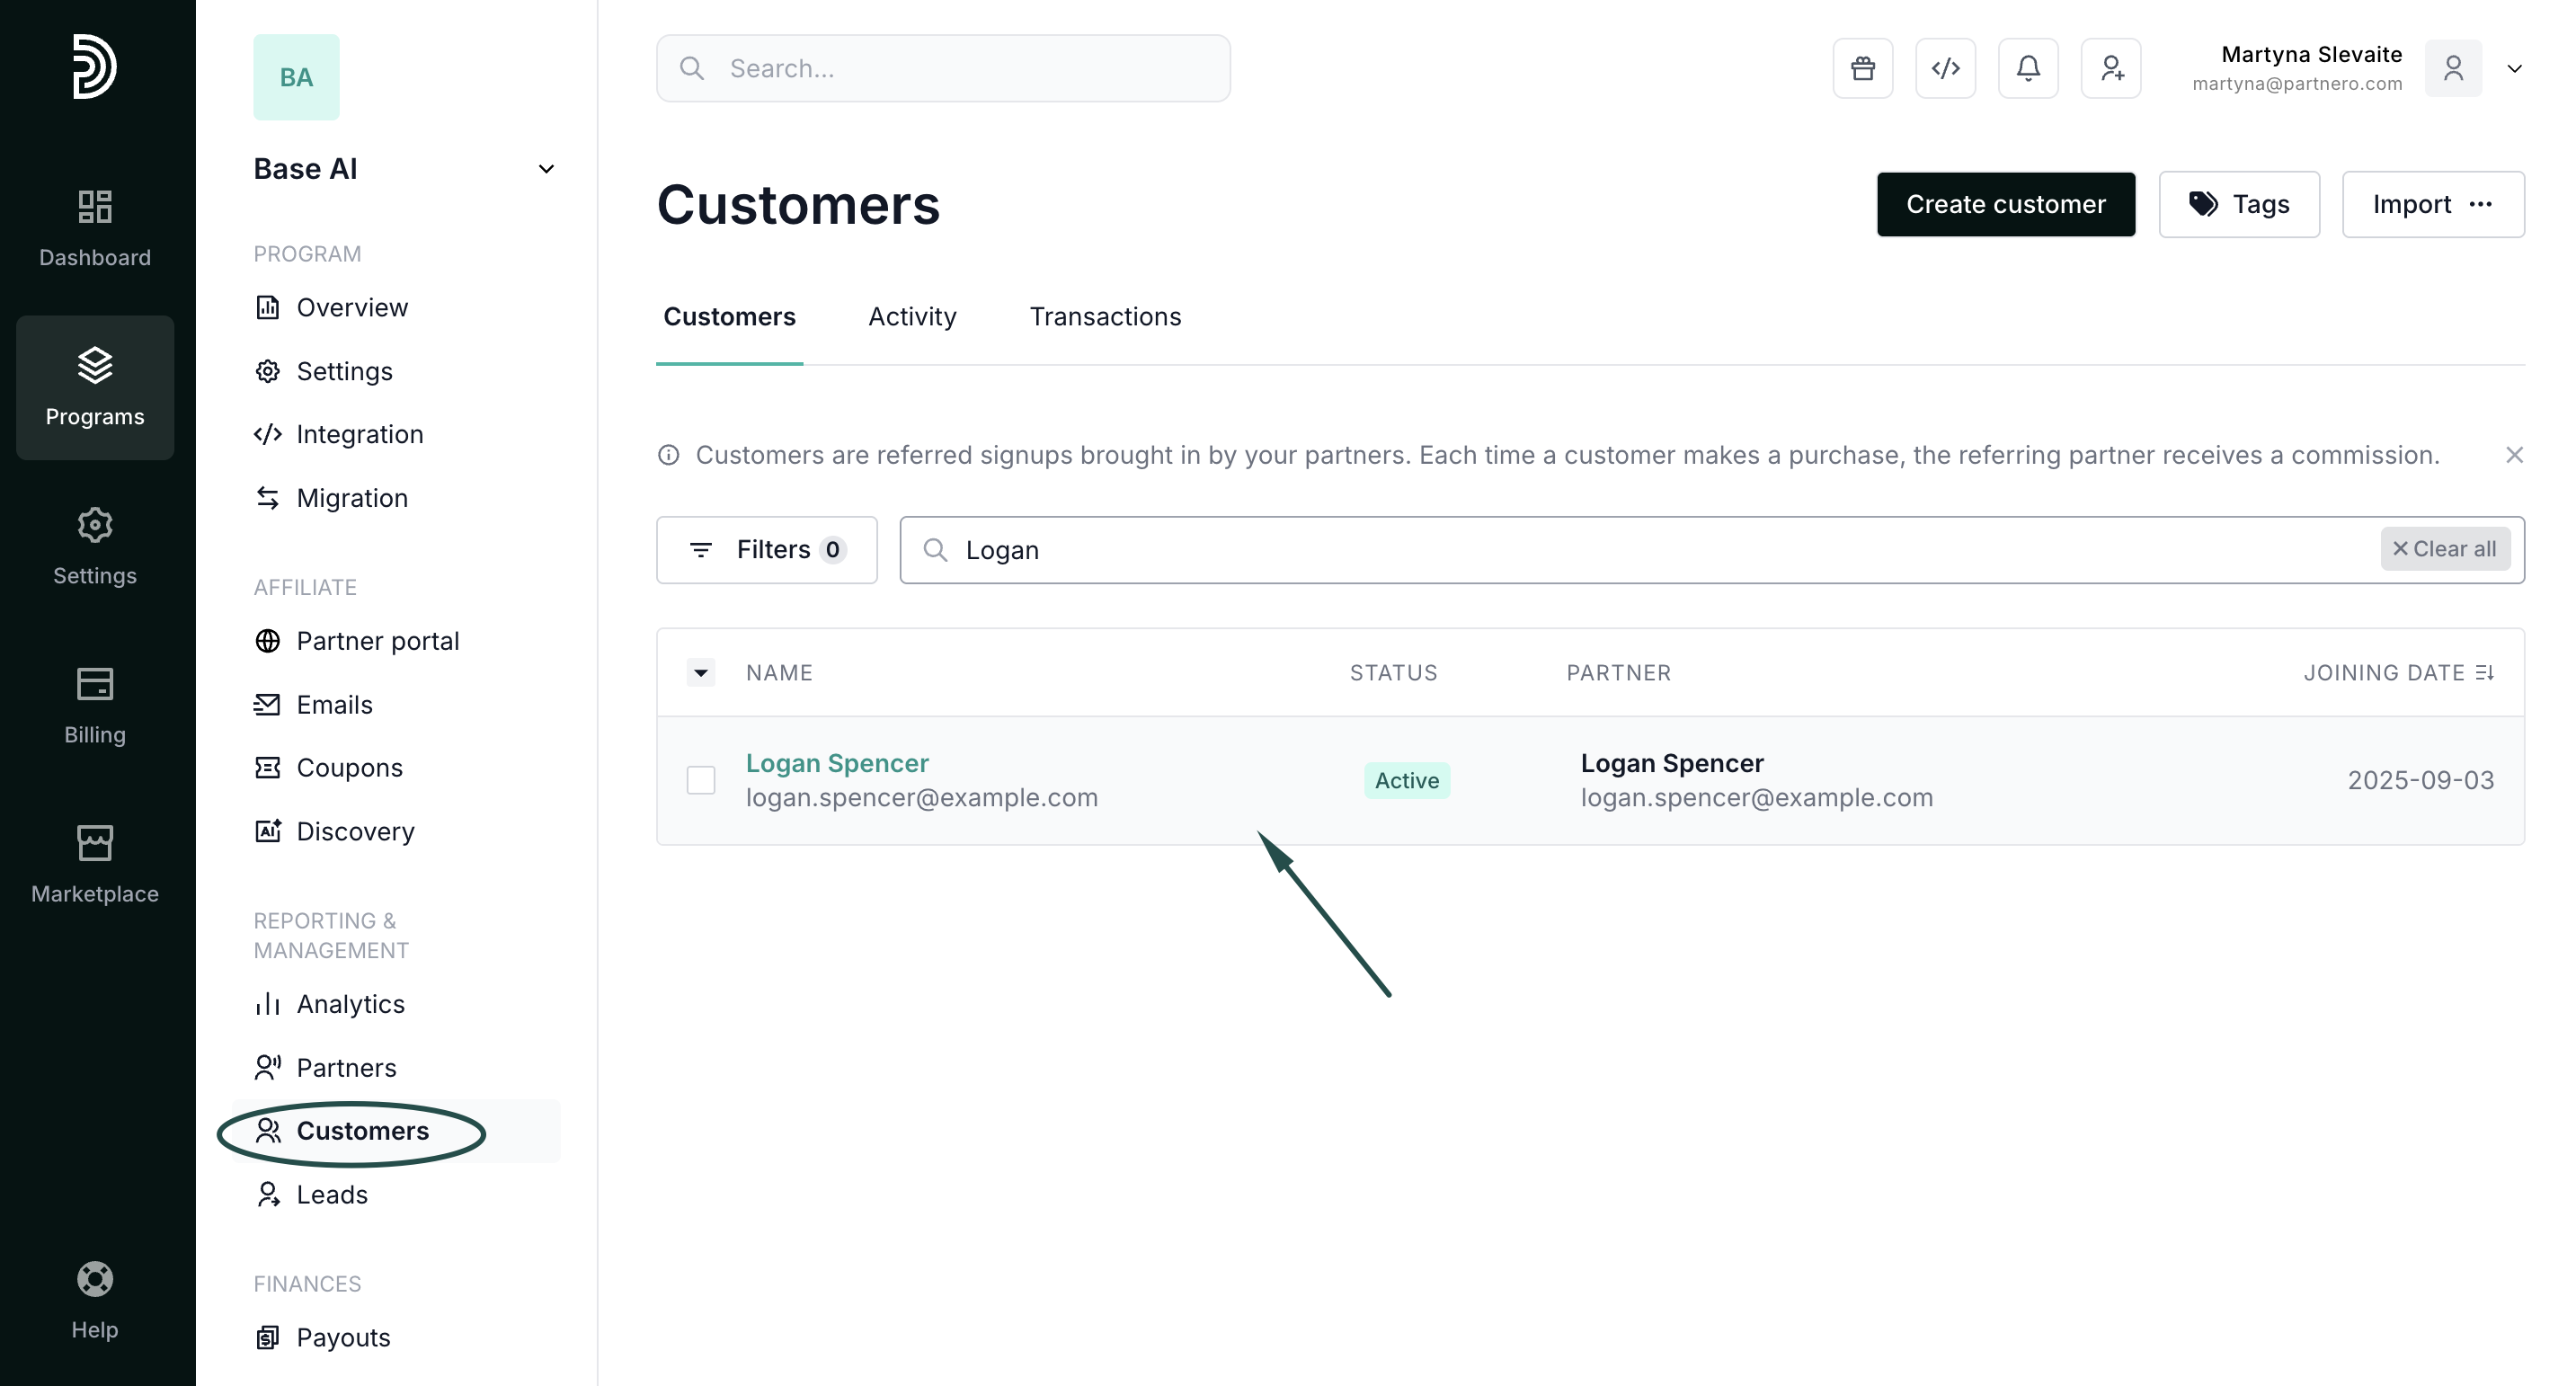
- Find a partner using their name or email and click on them to open the profile:
- Click on the three dots in the upper right corner and click Manage:
- Switch to the Tags tab and click on the tags you wish to assign:
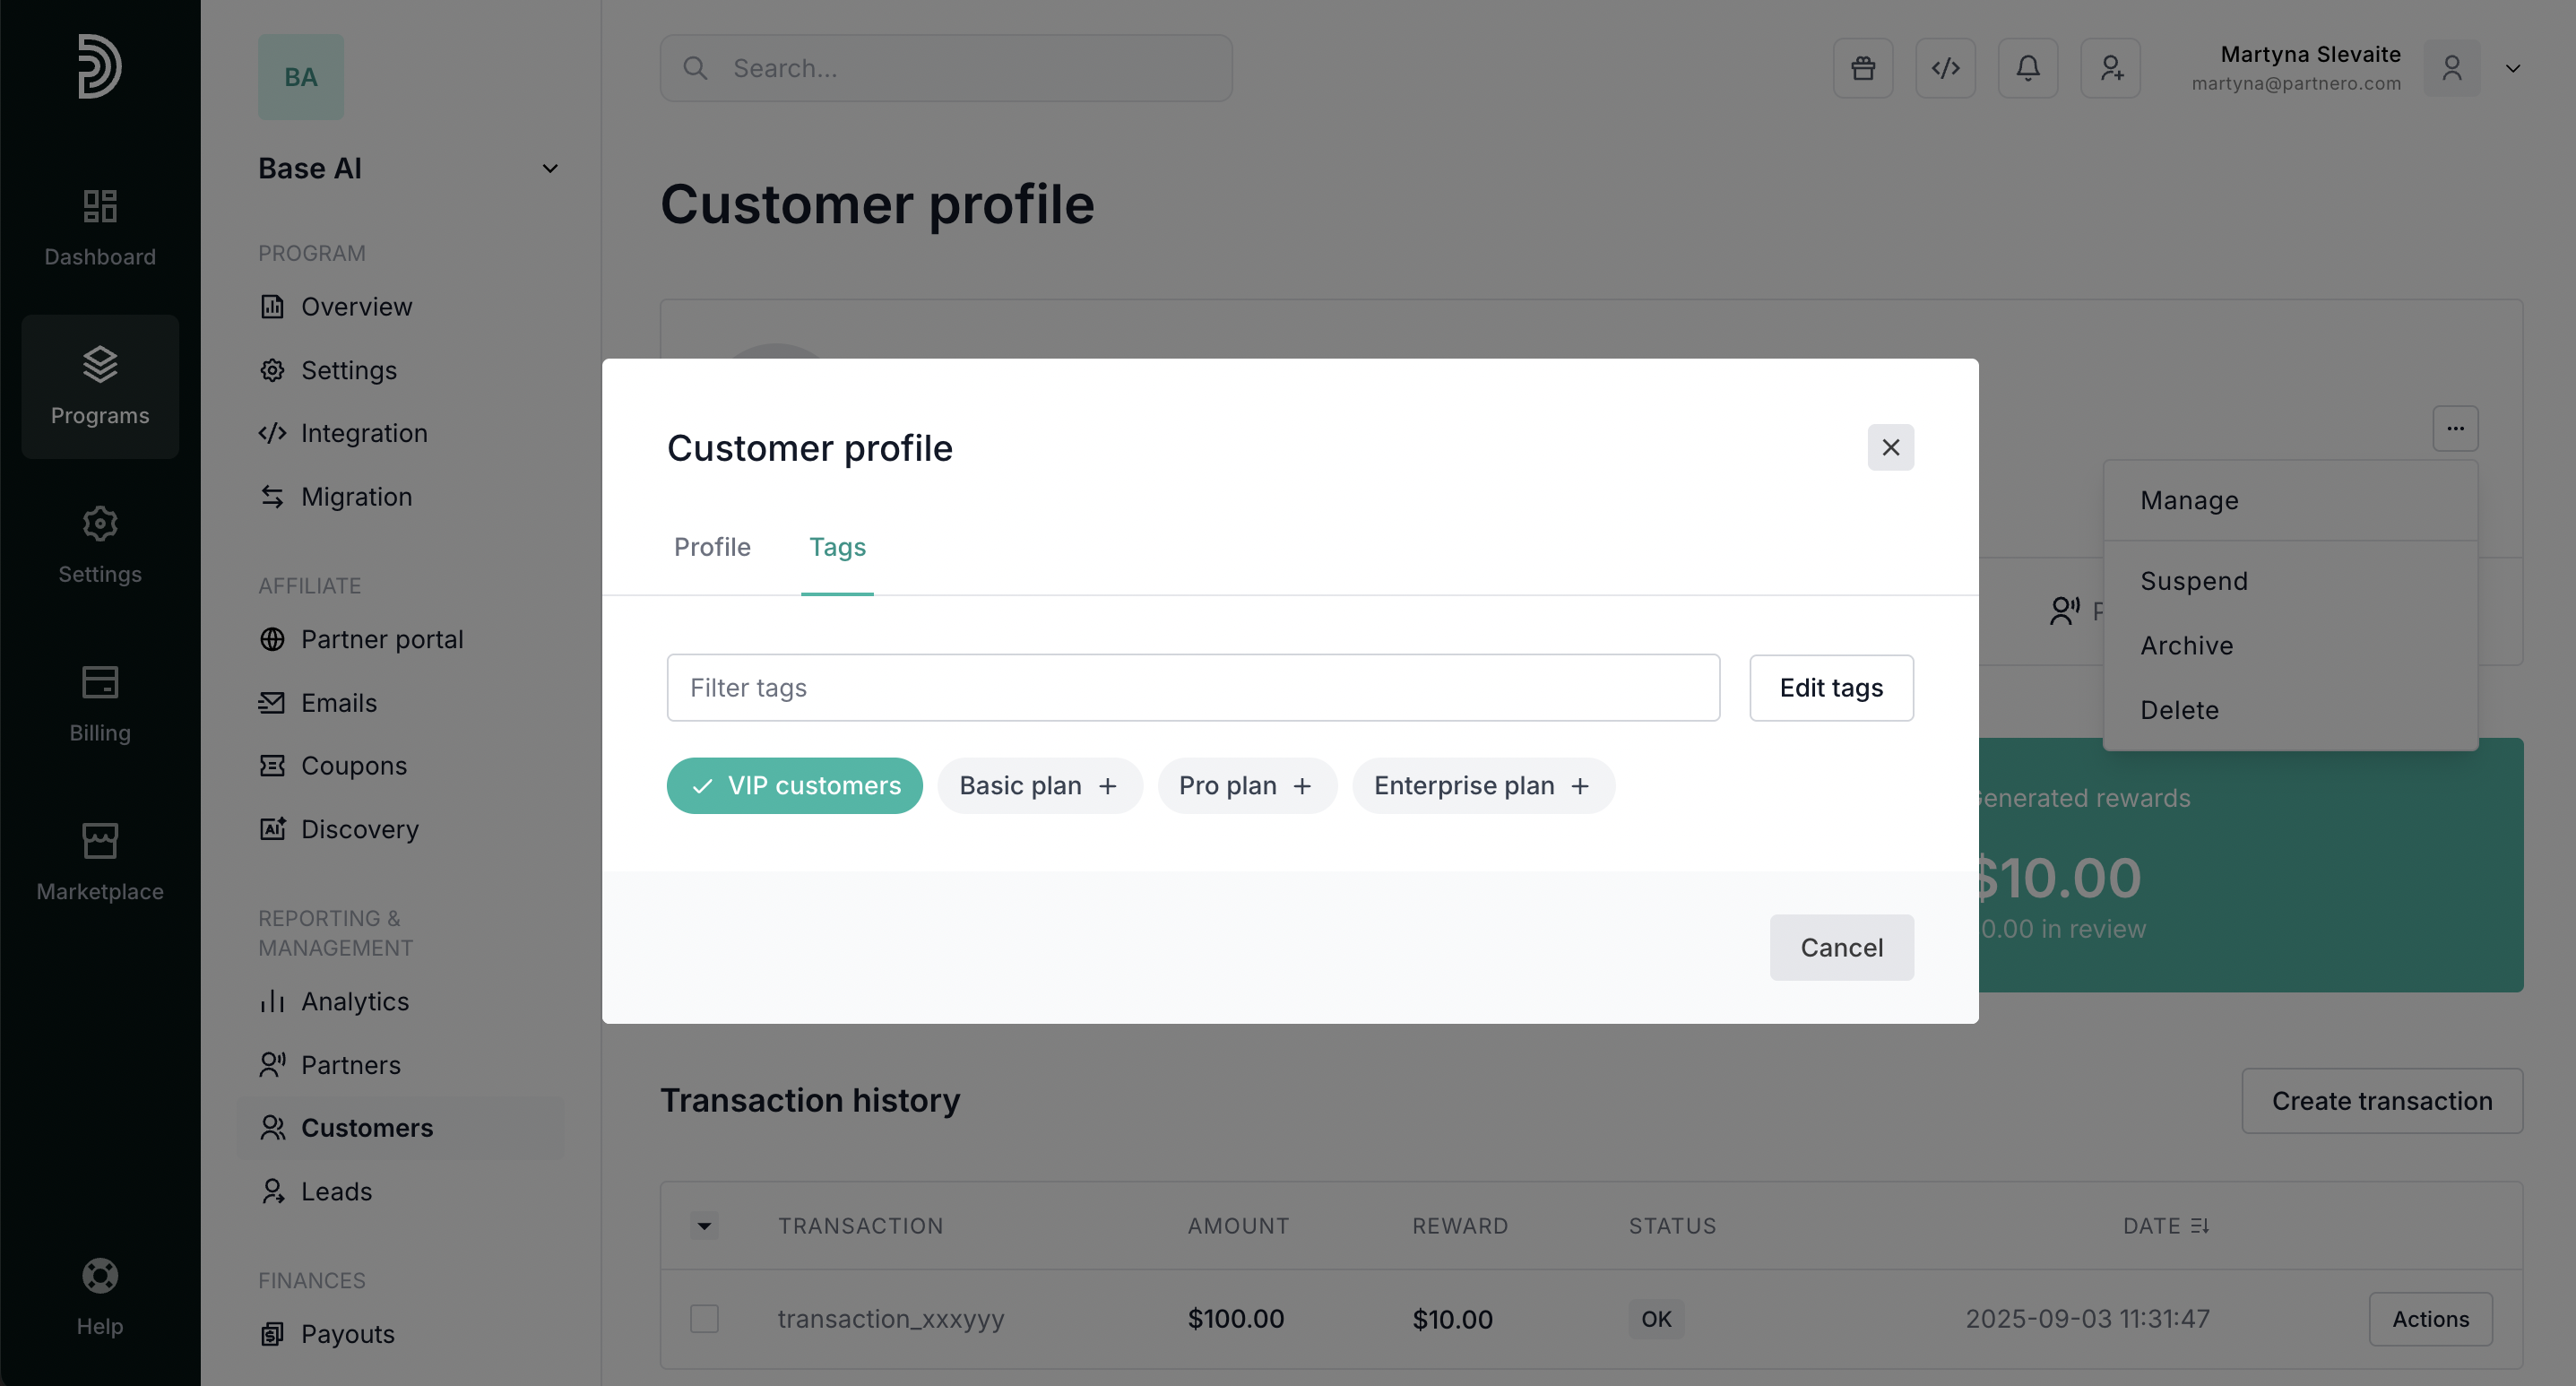 Additionally, you can click Edit tags to create new tags, if needed.


 Additionally, you can click Edit tags to create new tags, if needed.
How to set up commissions for specific tags
Your partners can receive different rewards based on the customer tags. To set up rewards:
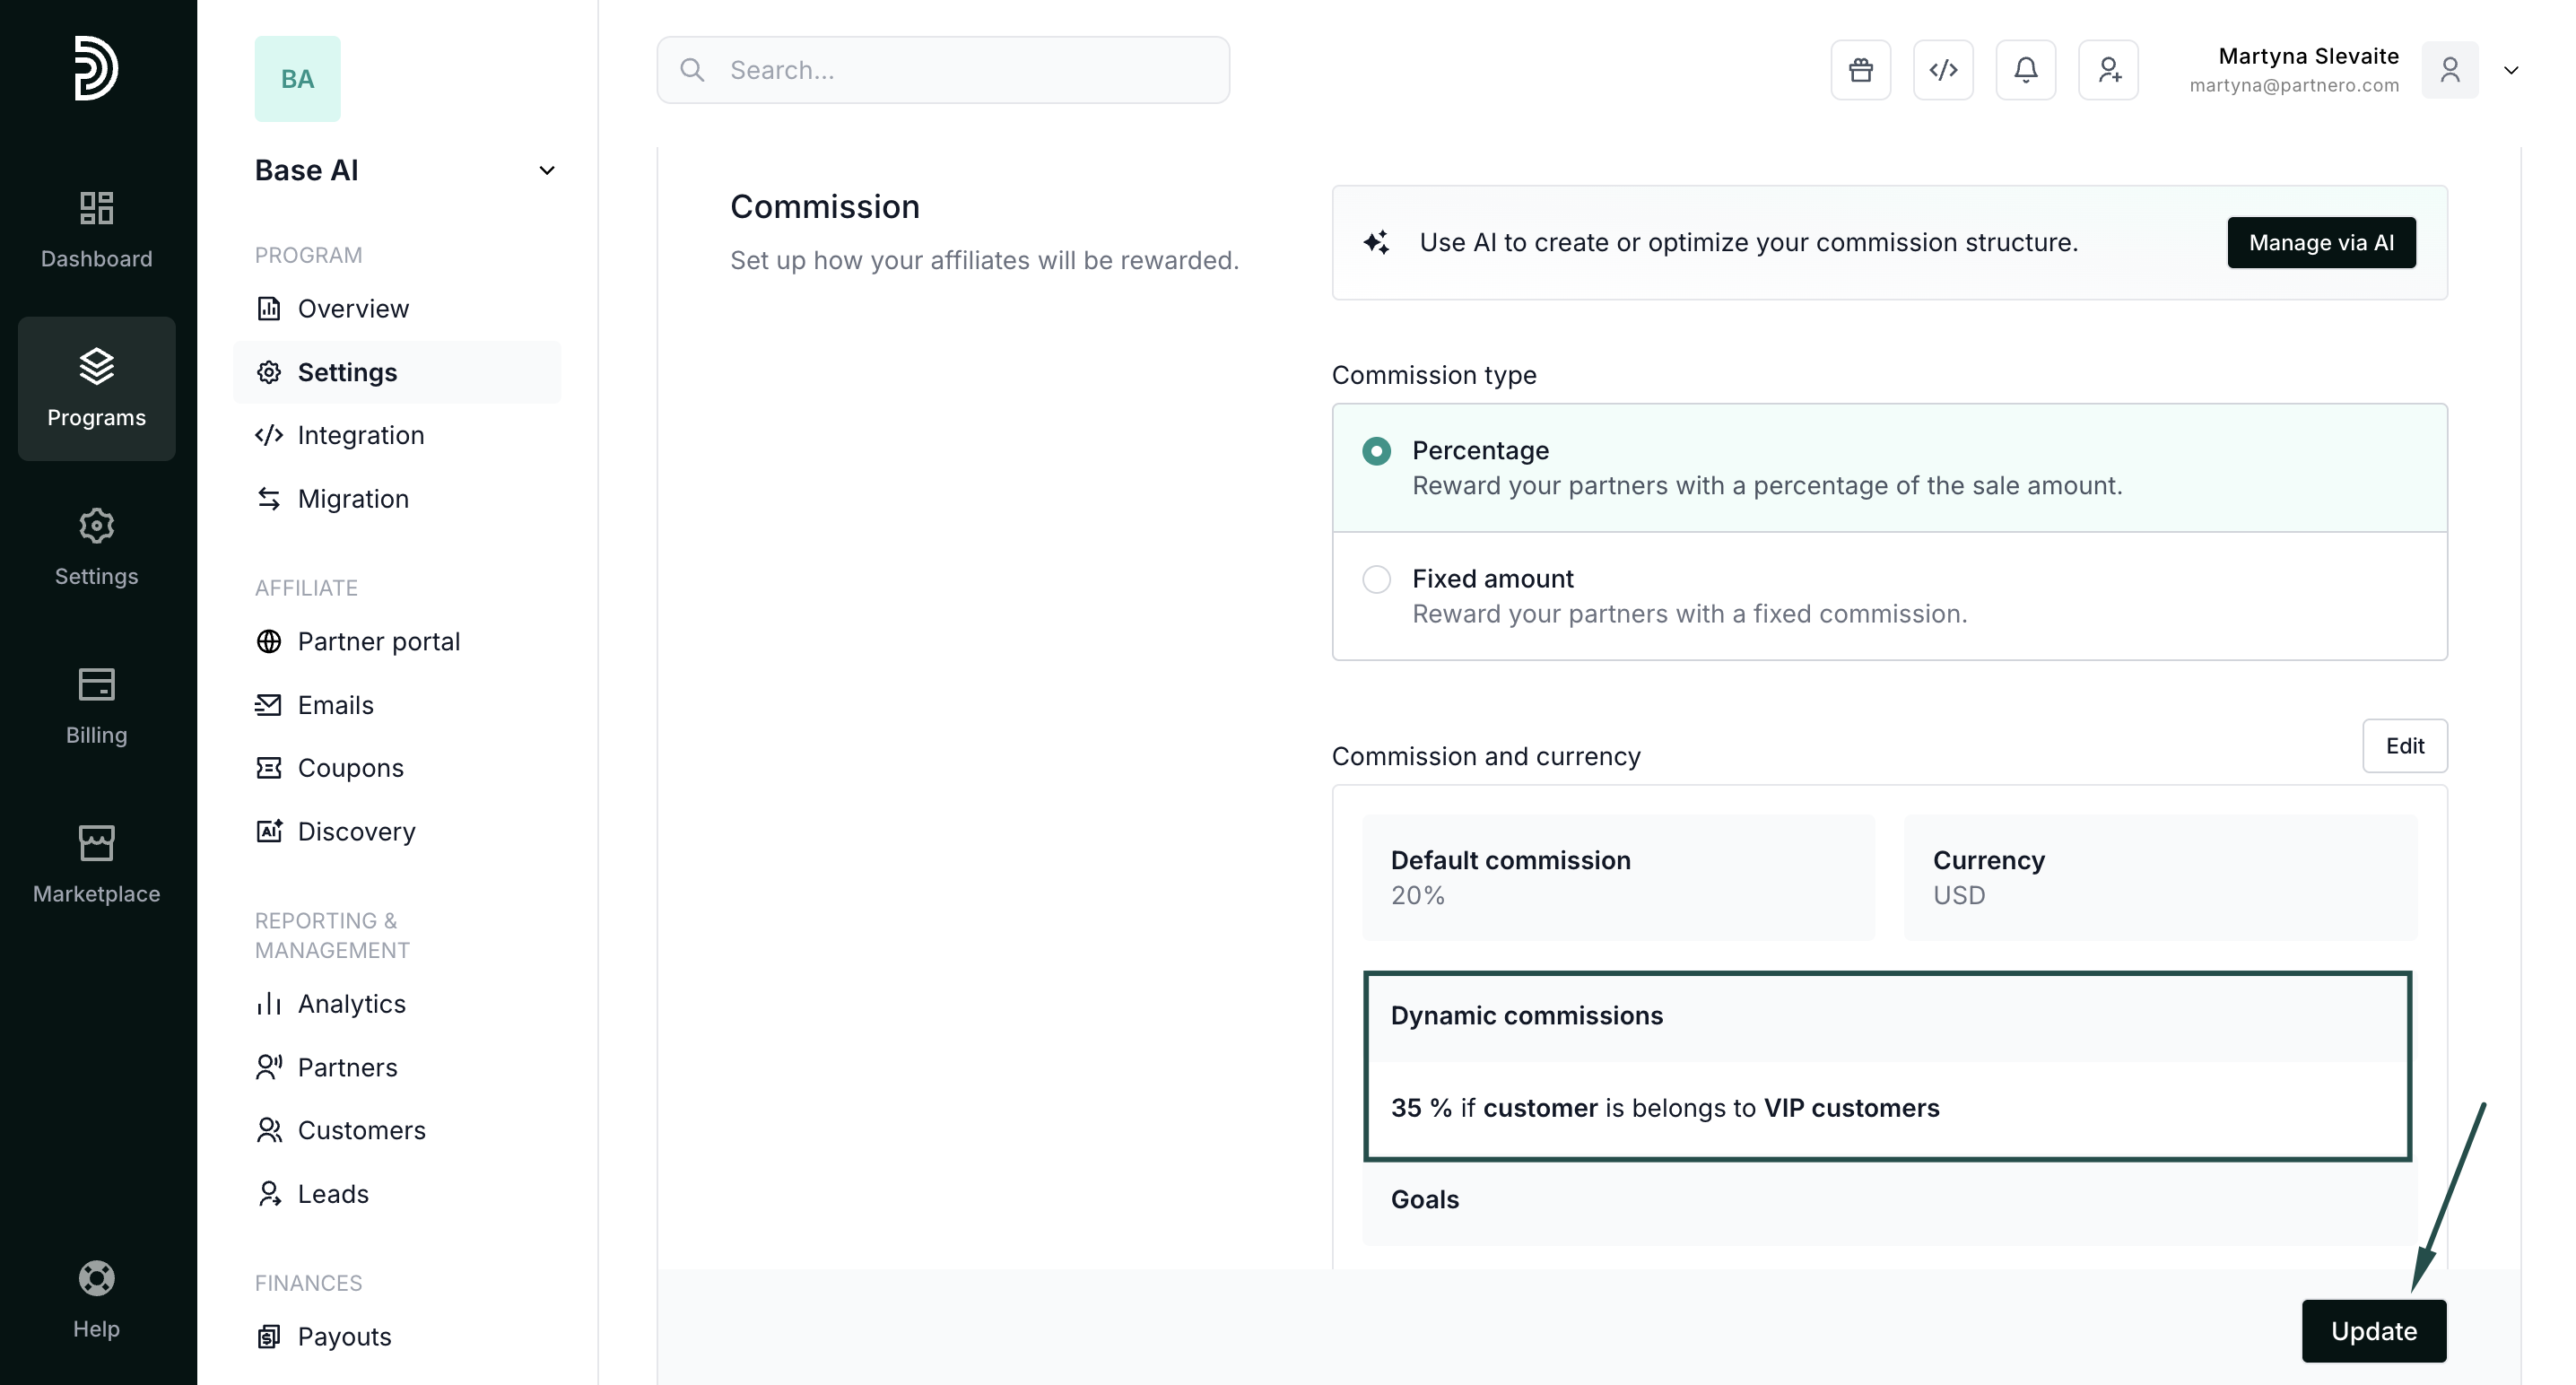
- Go to Settings under Program and click to set up Commission rules:
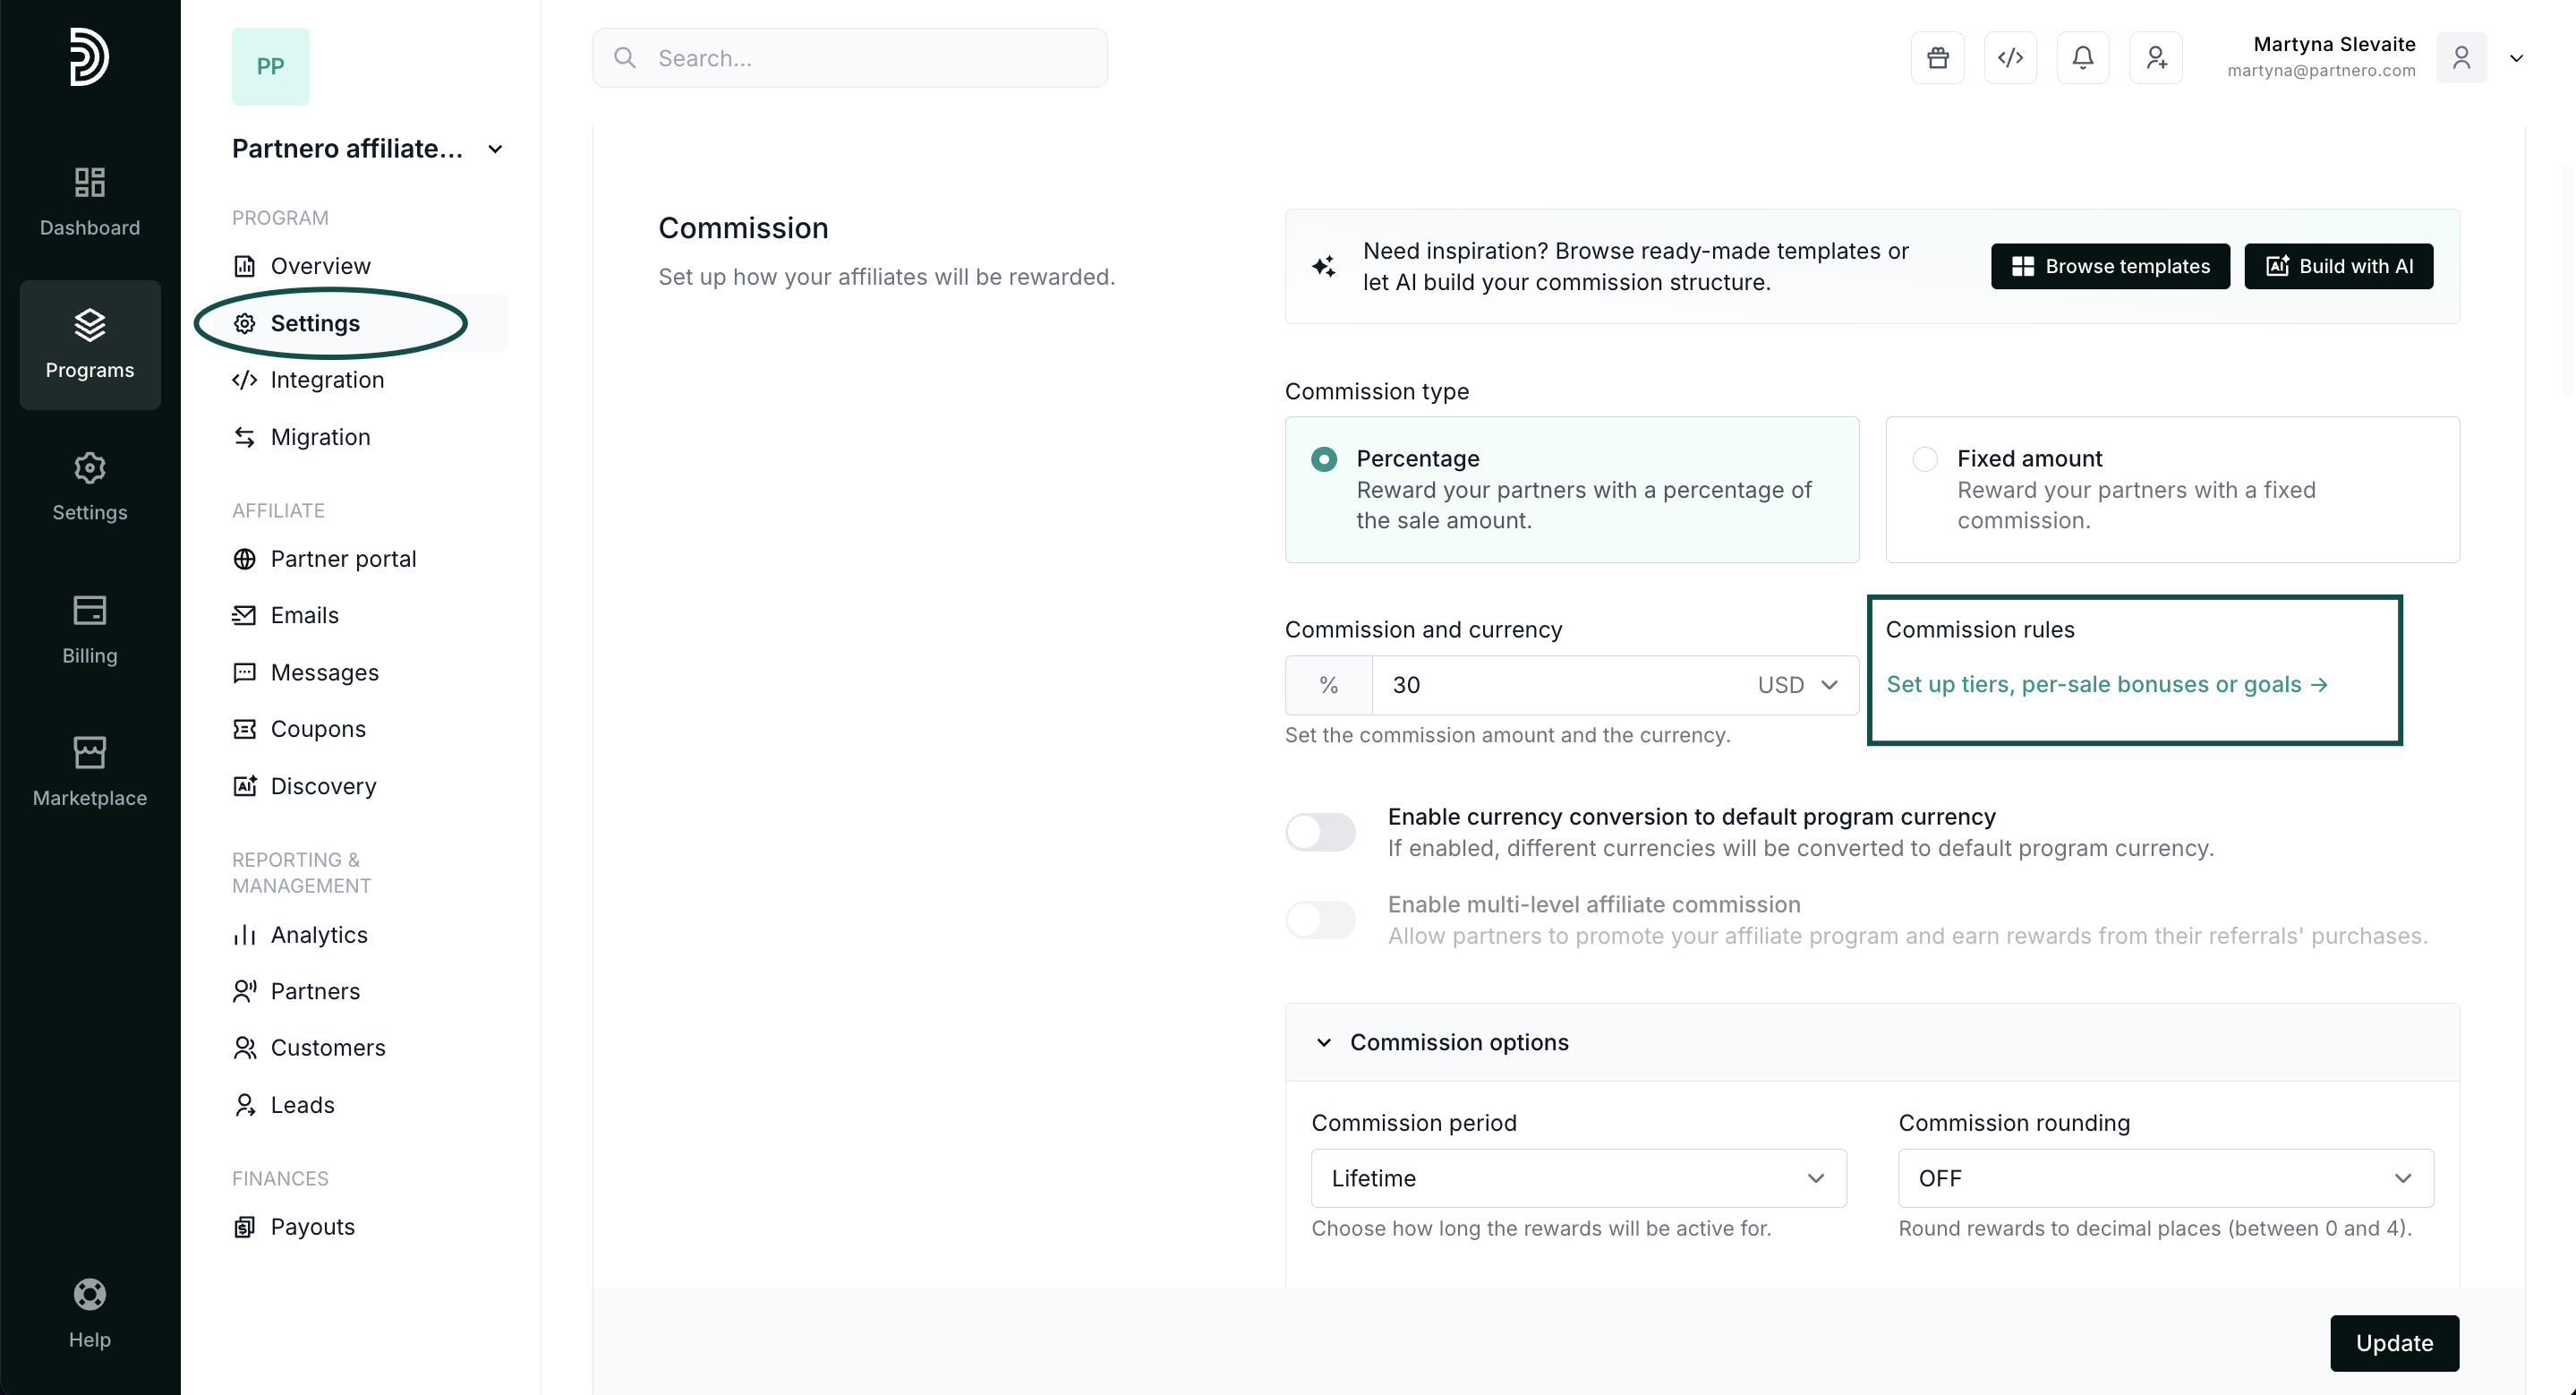 If you already have other advanced commissions set up, click Edit:
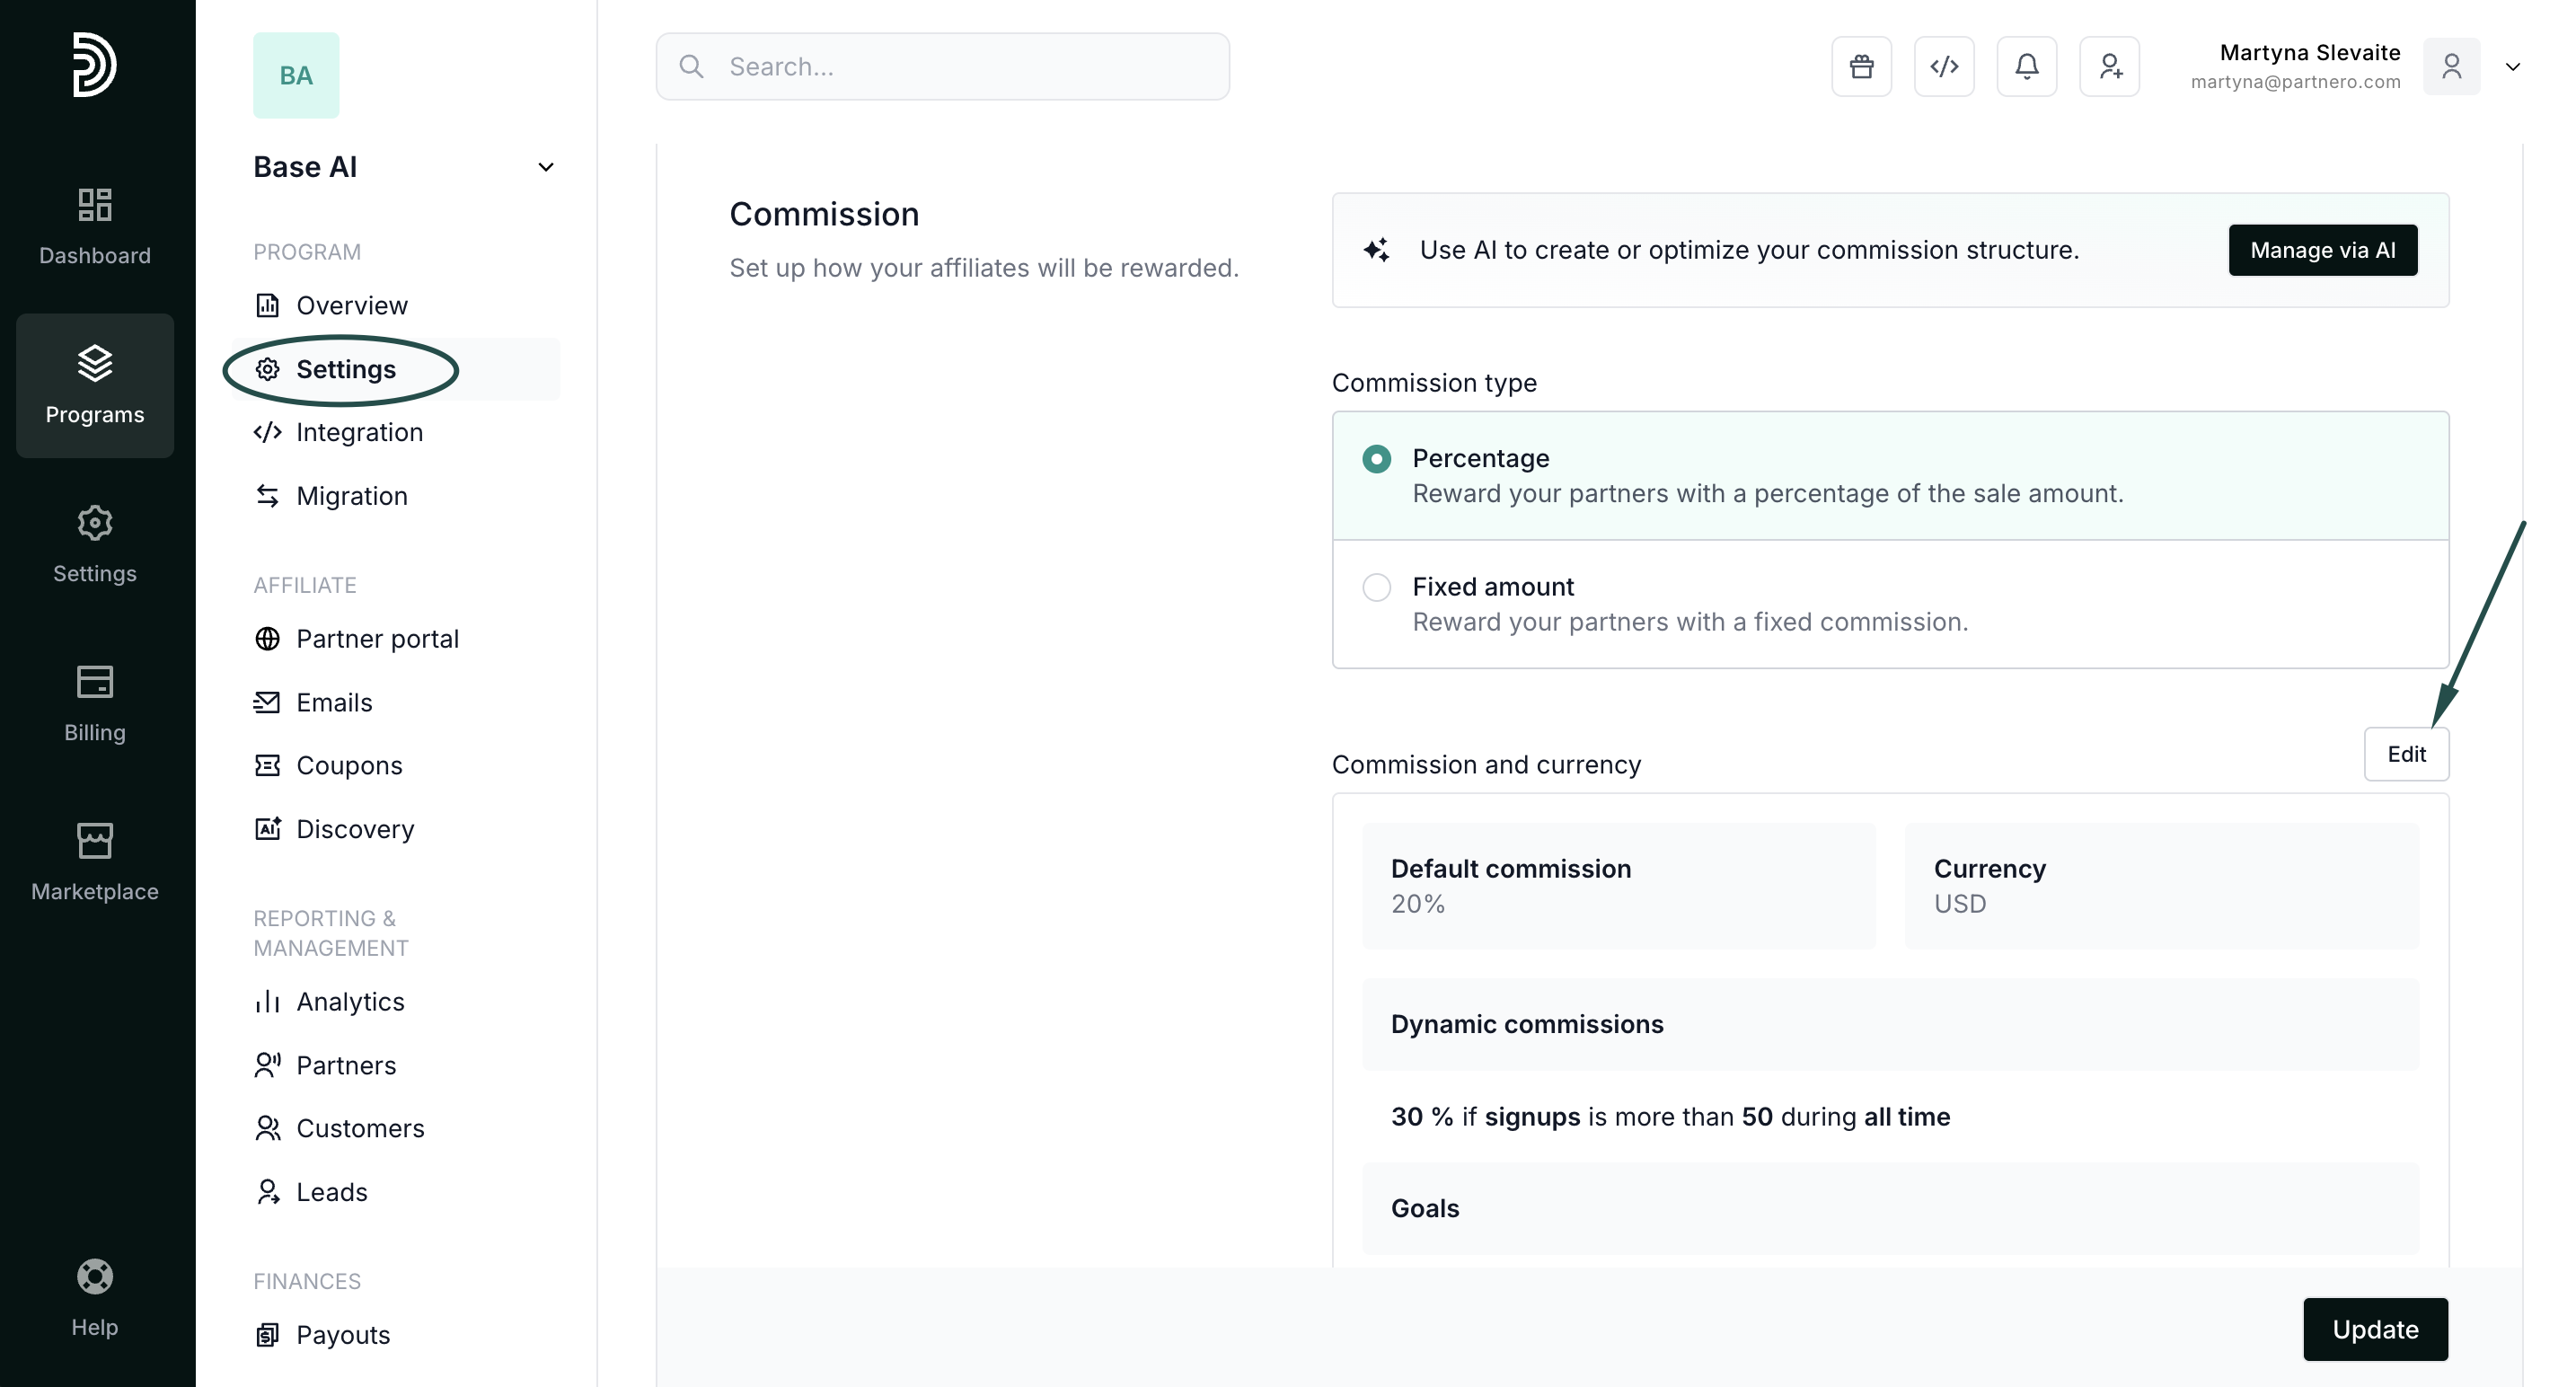
- In the Dynamic commissions tab, click +Add tier and set up the reward condition.
In the example below, we're offering 35% commission if a customer > belongs to >" VIP customers":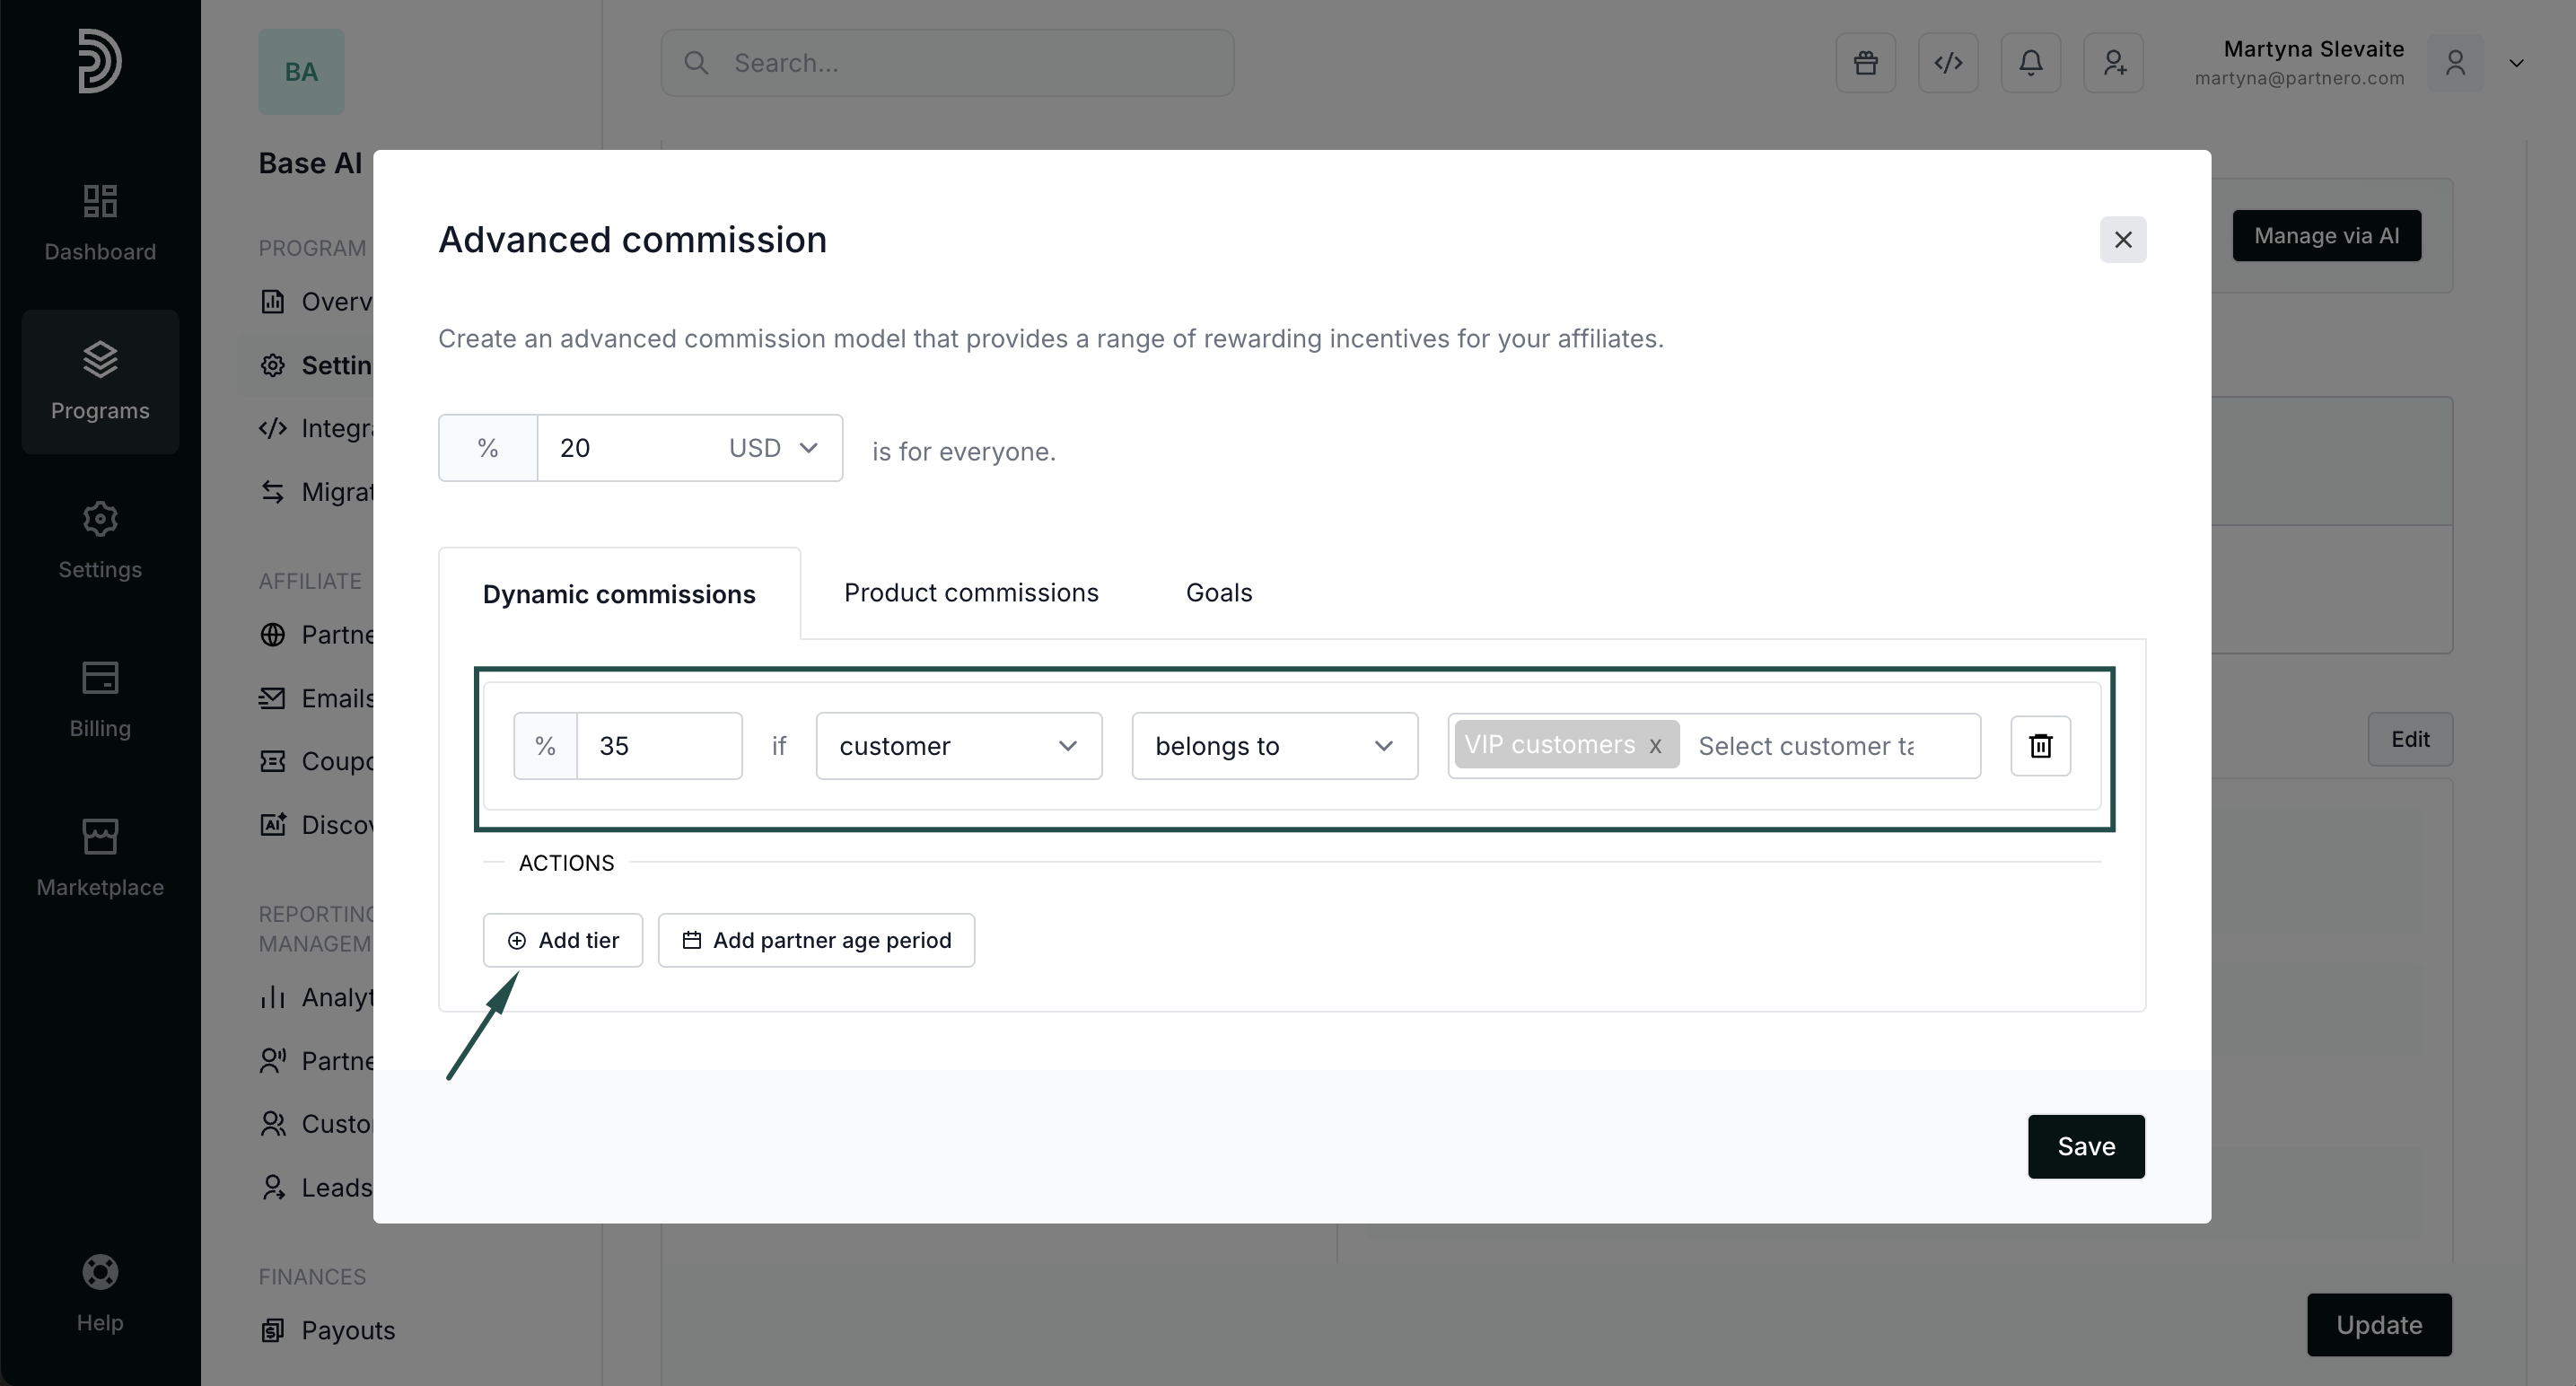
- Click Save. You'll see the new condition displayed under the program commission settings. Click Update to save your changes:
 If you already have other advanced commissions set up, click Edit:

