
Create and enable partner approval form
Approval process
With Partnero, you can choose to make your program open to all registrants or set up an approval process.
If partner approvals are enabled:
- Upon sign-up, each partner will be asked to complete and submit an approval form.
- The program owner will see all pending approval requests in the dashboard.
- Each request must be reviewed and either approved or rejected.
Only approved partners will gain access to the partner portal and receive their unique affiliate link to promote your product.
Enable and customize approval process
To enable the partner approval process:
- Open the program you’d like to work with.
- On the left sidebar, click on Partner Portal under Affiliate.
- Navigate to the Pages & Content tab → Public pages → Sign-up page:
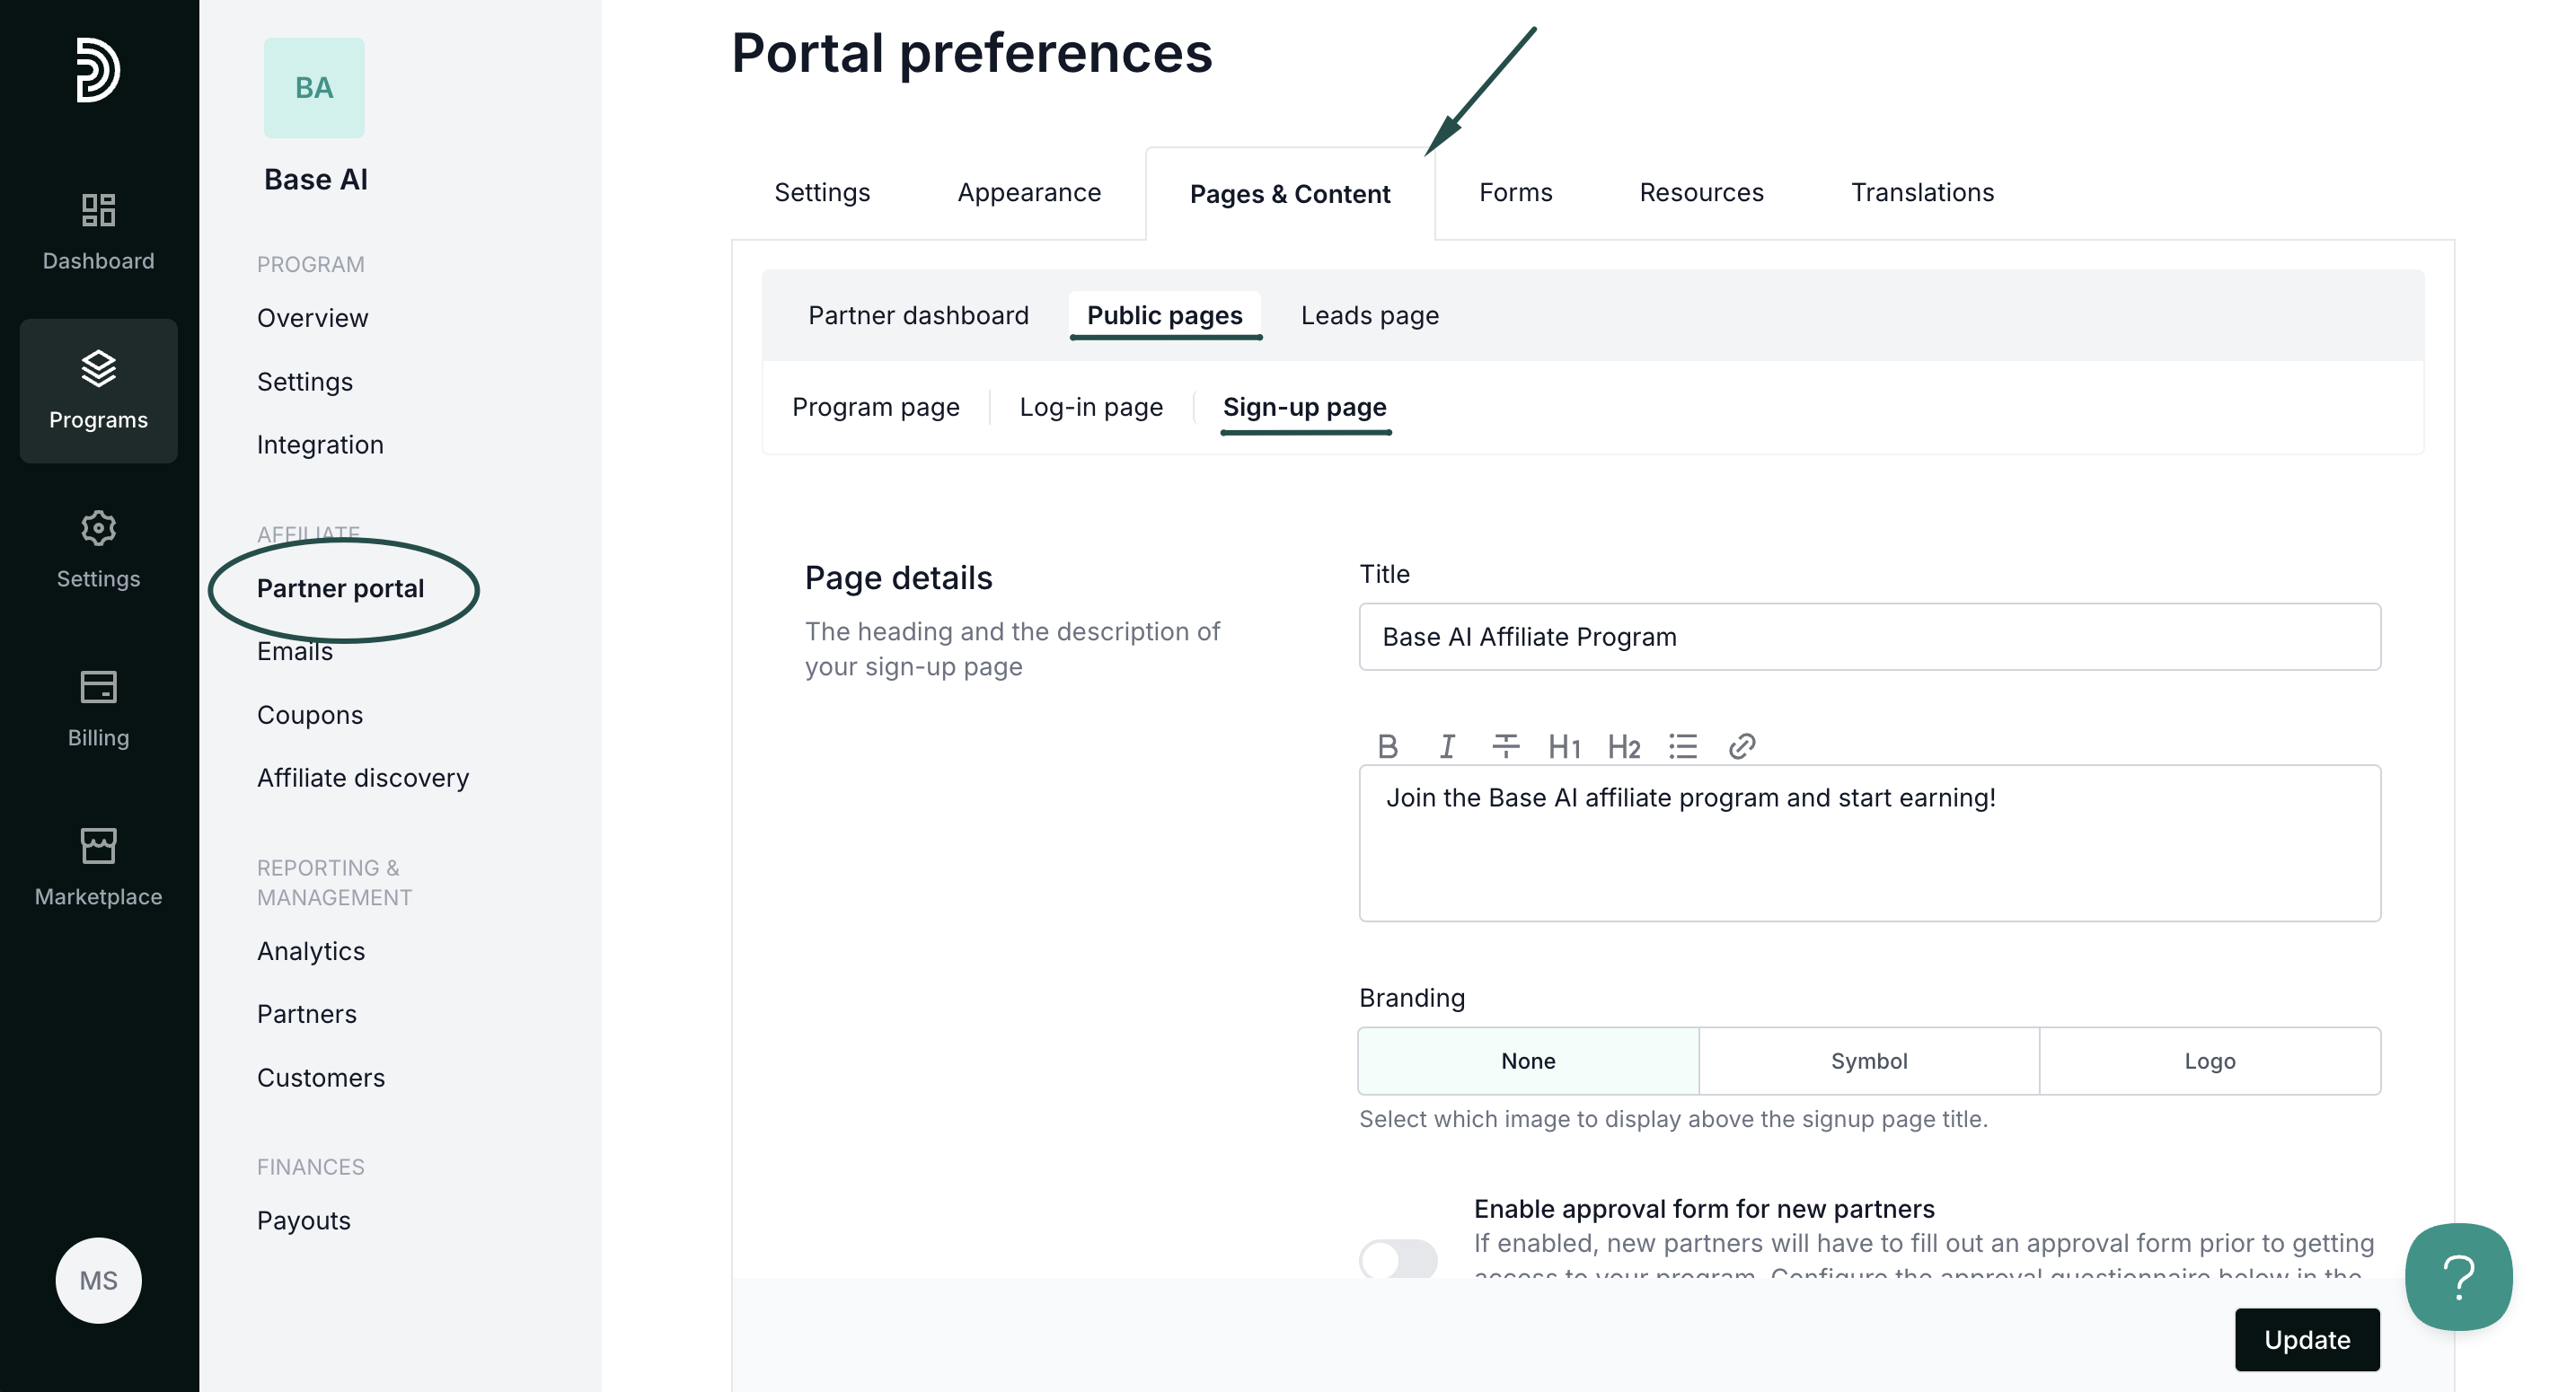
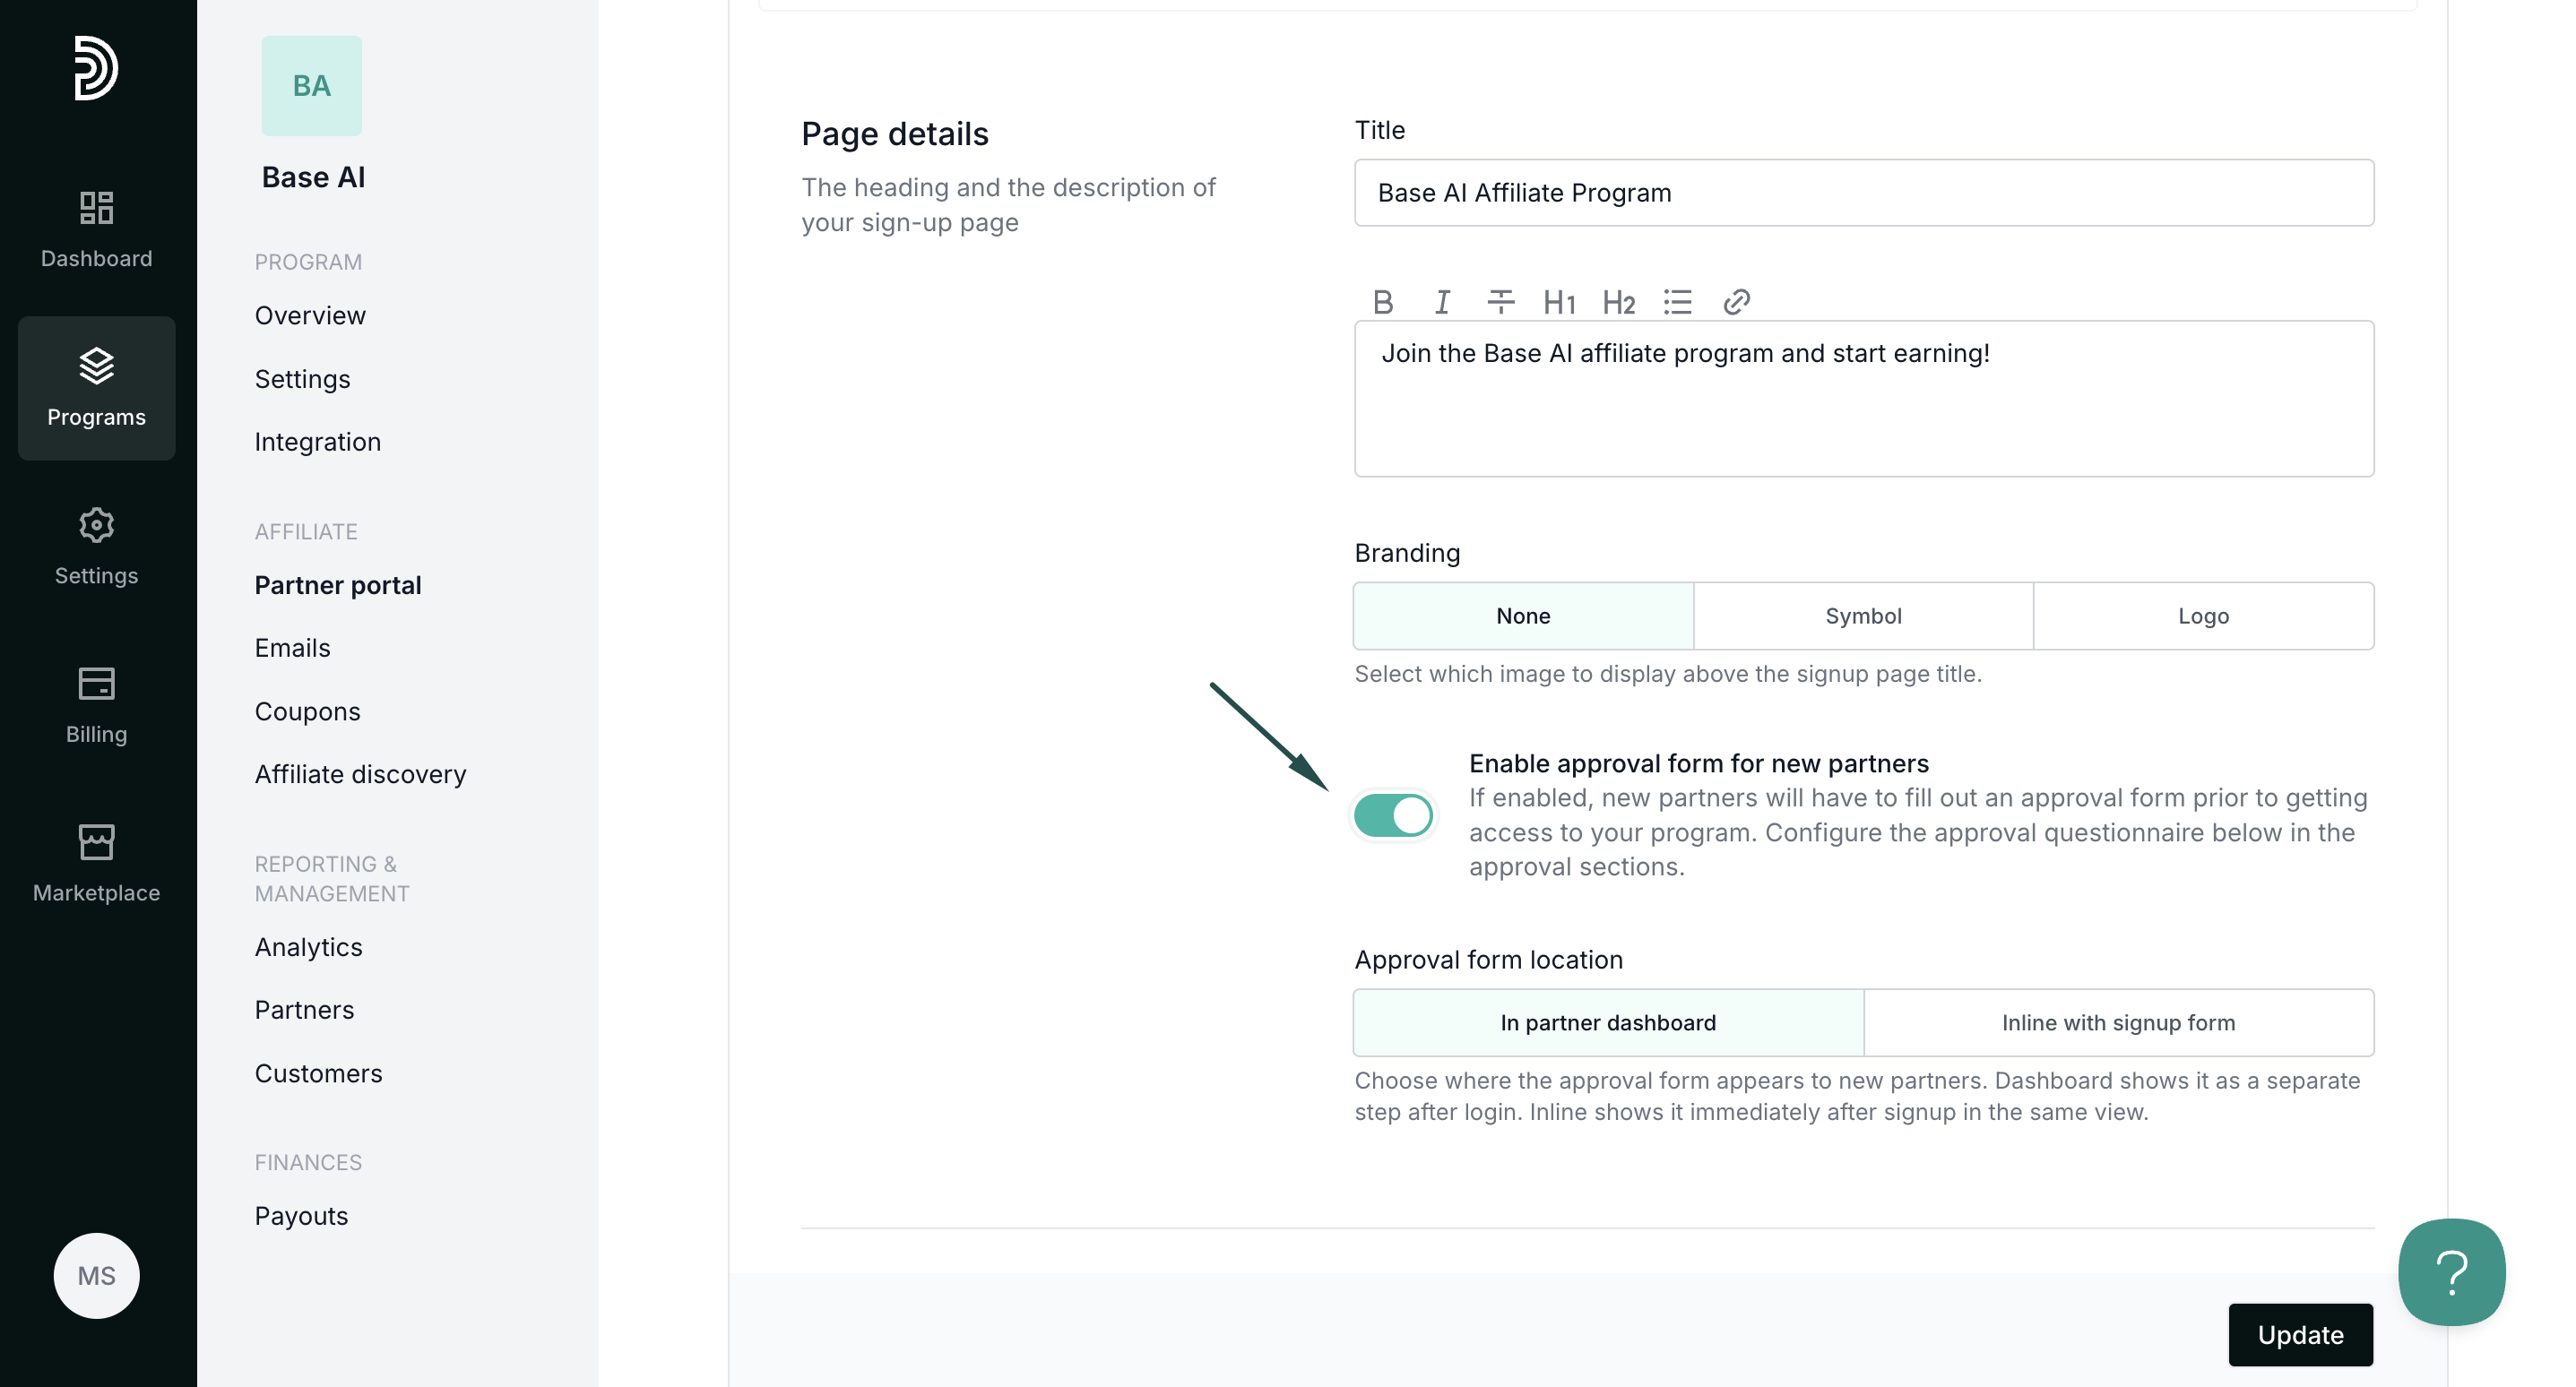
- Toggle to enable the approval form for new partners:
 Alternatively, the approval can be enabled under Program → Settings → Other. Enabling in one location is sufficient.
 - Click Update to save changes.

 Alternatively, the approval can be enabled under Program → Settings → Other. Enabling in one location is sufficient.
Approval form placement
You can choose between two approval form placements: 
- In partner dashboard – the form appears inside the partner dashboard after a user signs up.
- Inline with sign-up form – the form appears directly on the sign-up page as part of the registration process:


Approval form content & messaging
You can customize the messages shown to candidates before and after they complete the approval form.
To edit these messages:
- Go to Partner portal → Pages & Content tab → Public pages → Sign-up page.
- Scroll down to the Approval content section.
- Switch between the tabs to customize the following messages:
- Welcome message – displayed before a candidate starts the form.
- Submission message – displayed after the form has been submitted.
- Rejection message – displayed if the candidate’s application is rejected.

Approval form questionnaire
Lastly, you can create a custom questionnaire that candidates must complete.
To create questions
- Go to Partner portal → Pages & Content tab → Public pages → Sign-up page.
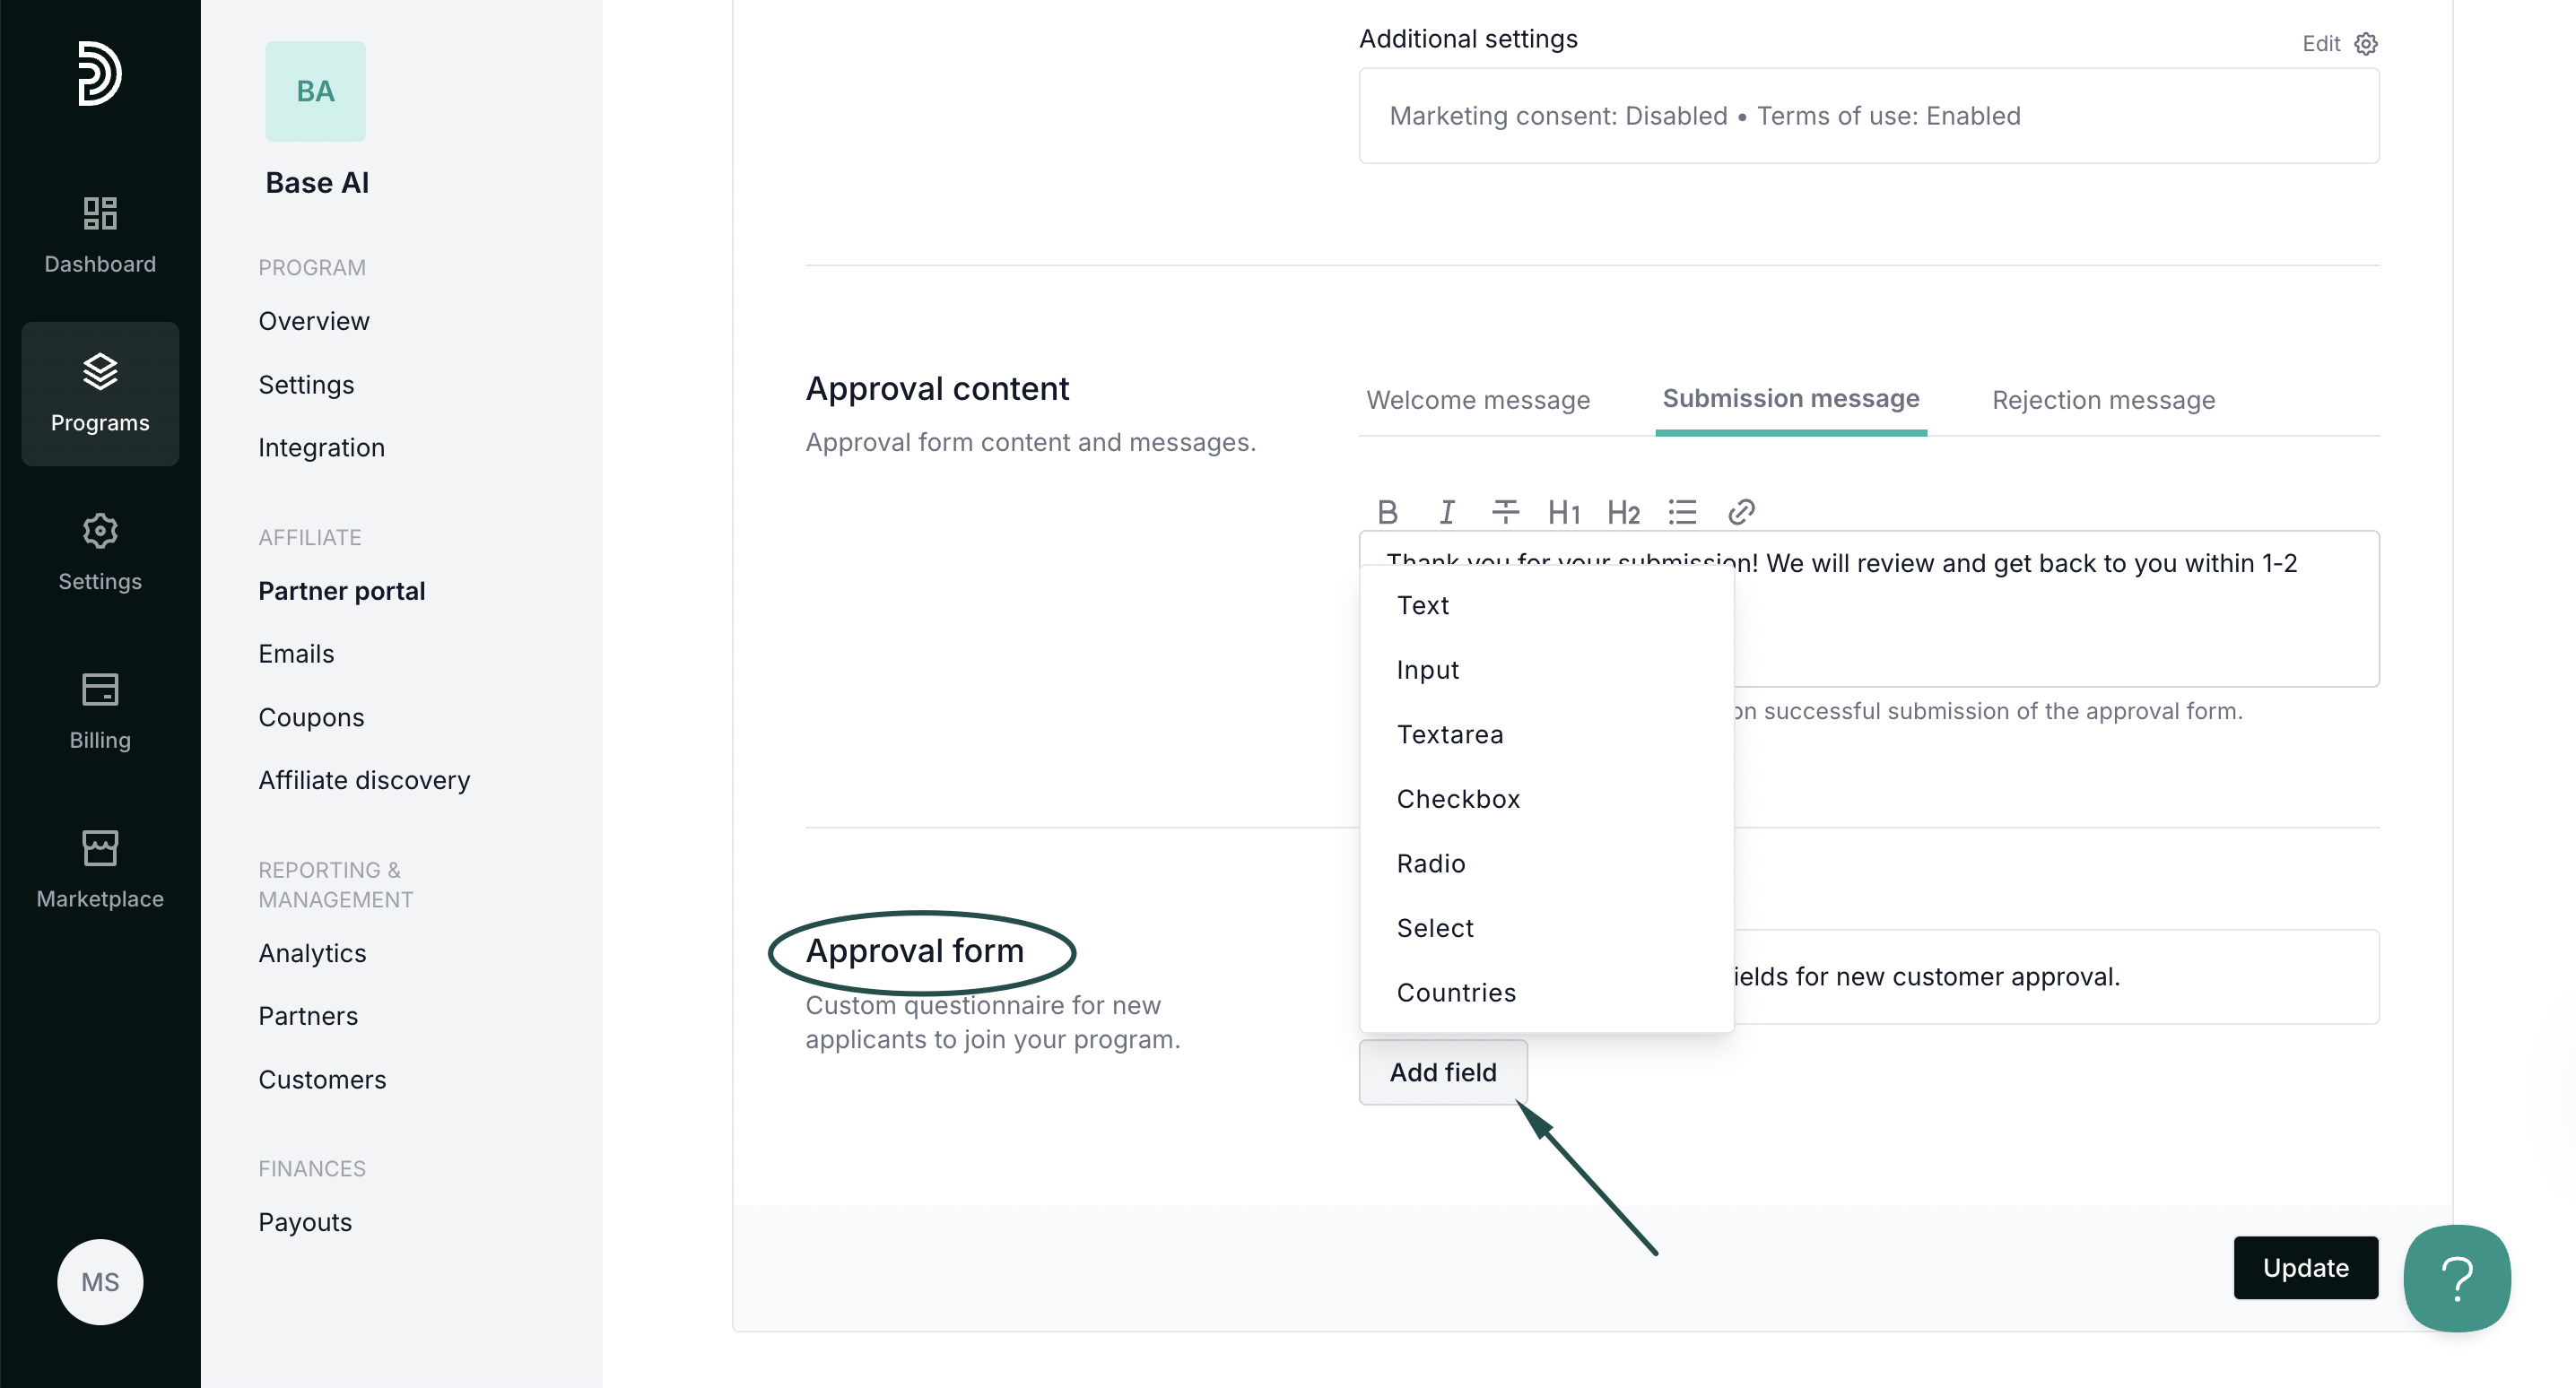
- Scroll down to the Approval form section.
- Click Add field and select the question type:
- Add as many questions as you need. Toggle 'Required?' to make the answer mandatory:
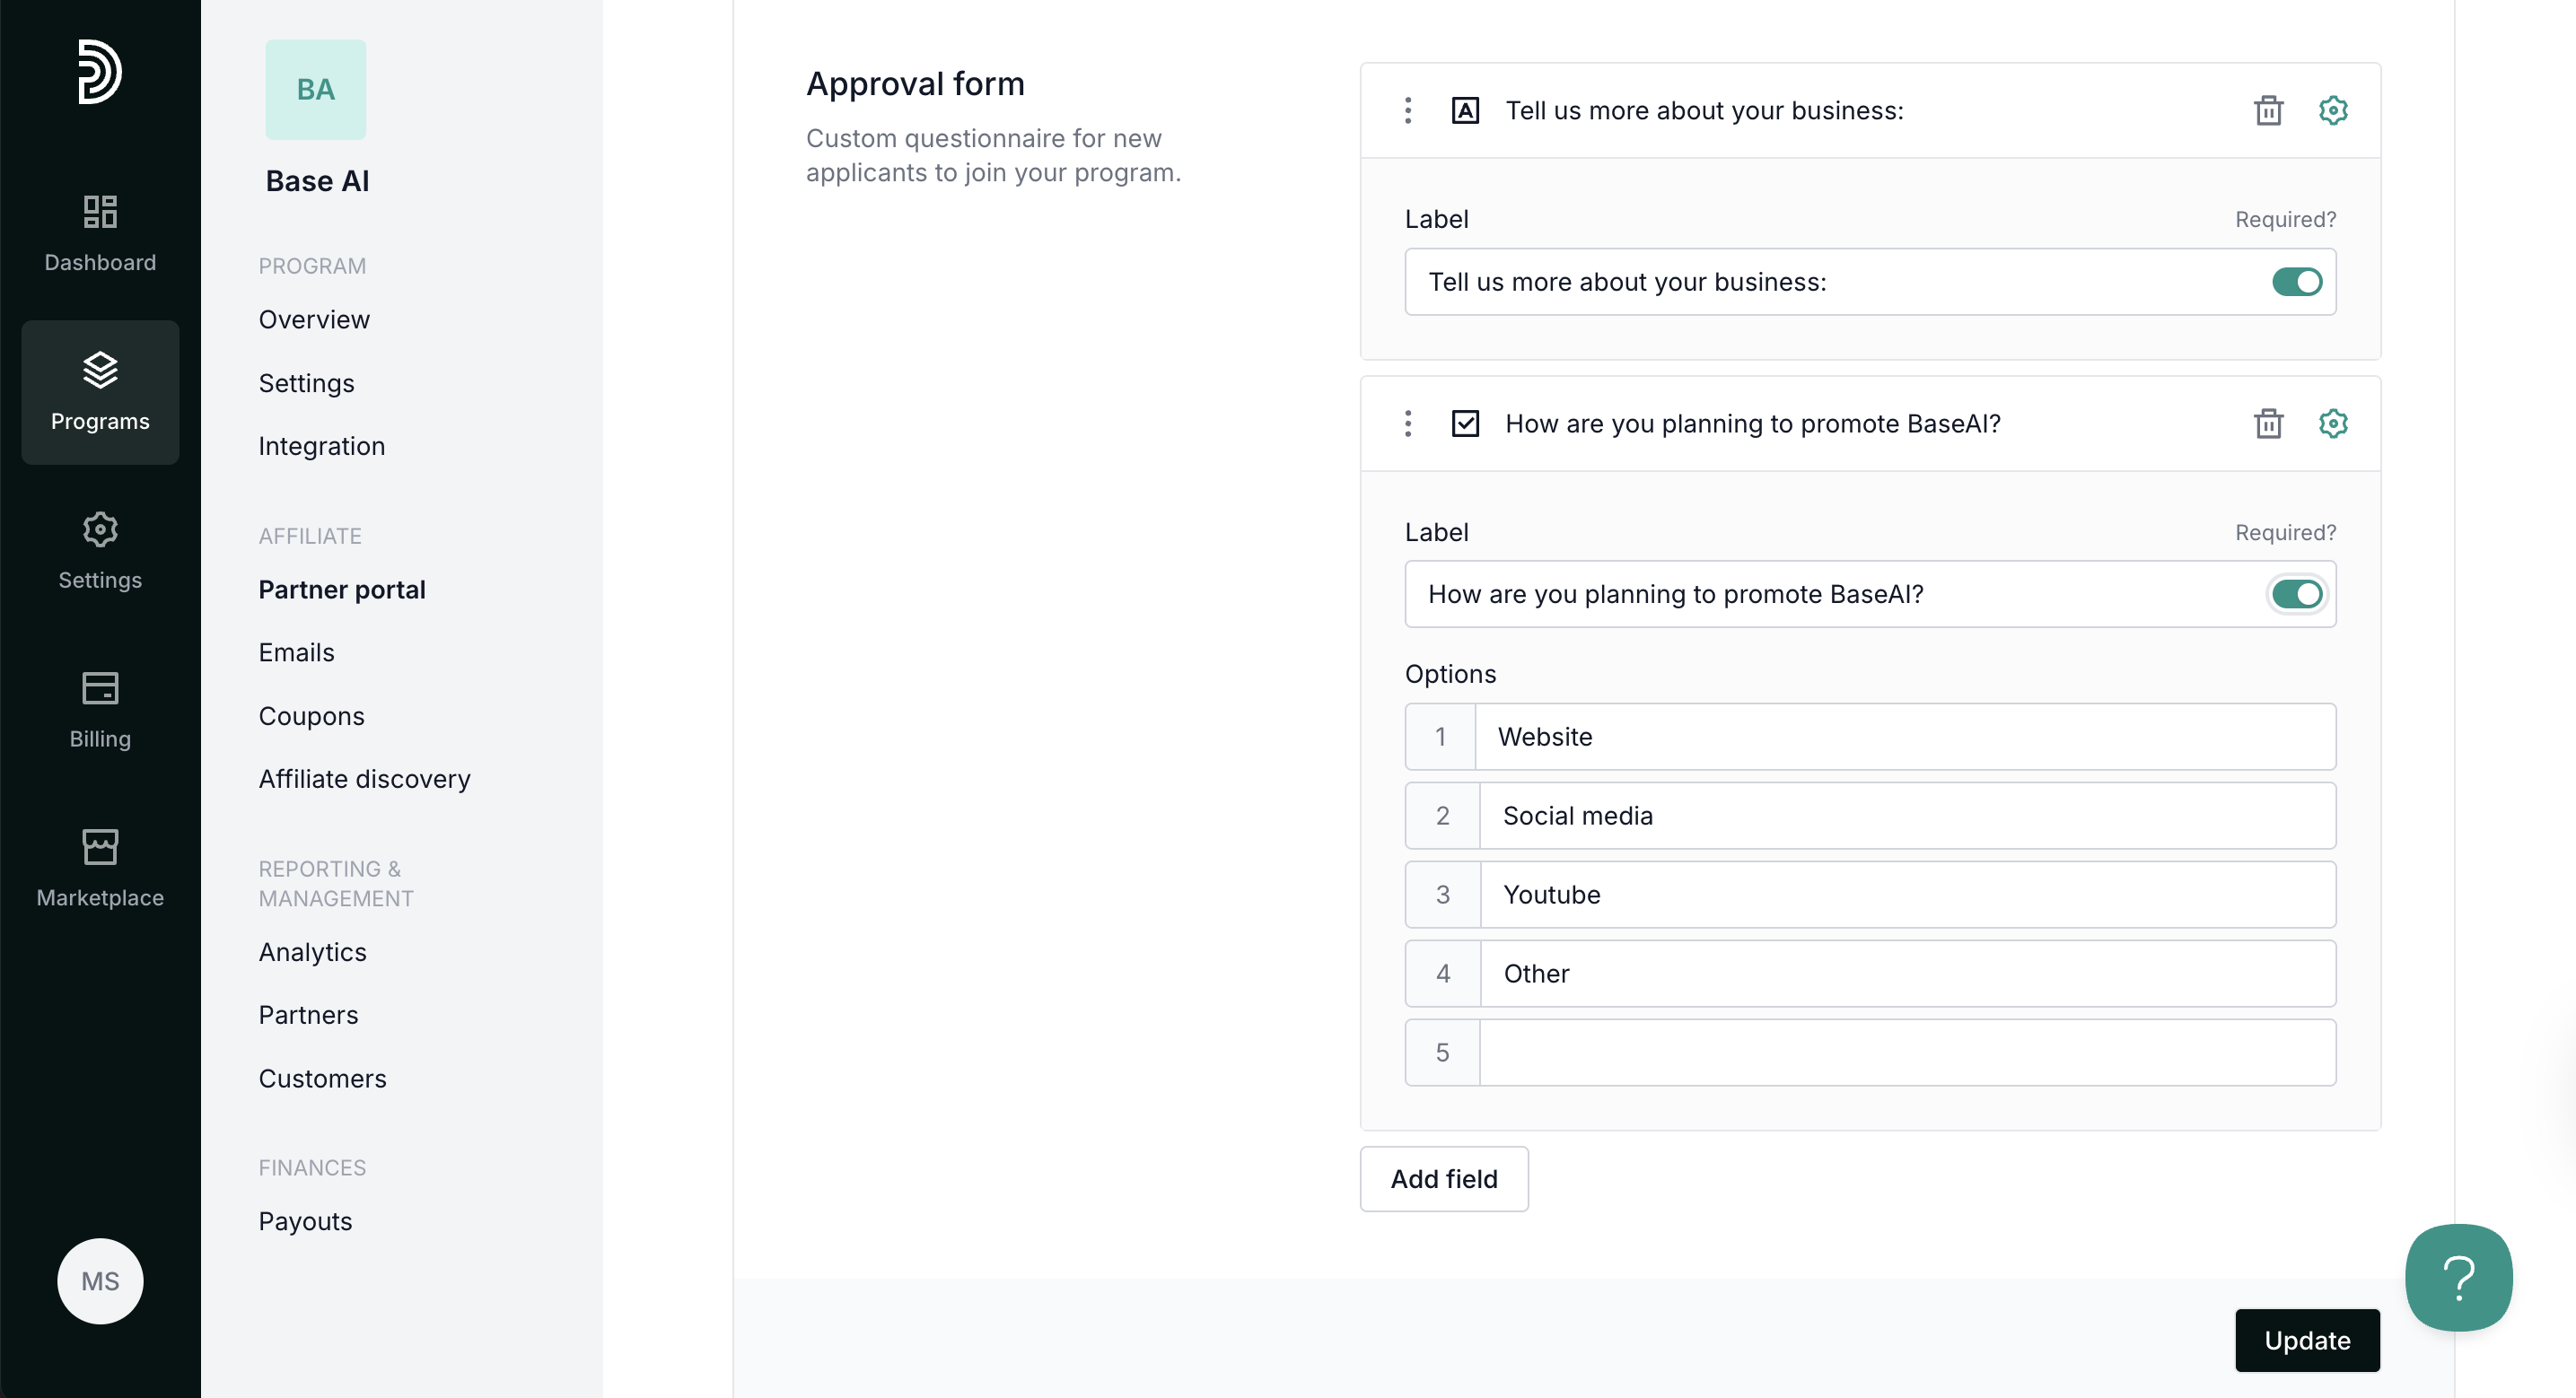
- Click Update to save your changes.


Approval form question types
You can add the following field types:
| Input | Creates a free-text field for a partner to type in their answer. Question example: “Tell us more about your business.” |
| Checkbox | Allows creating predefined options that the partner can choose from. They will be able to select multiple options. Question example: “How are you going to promote our product?”; checkbox options: website, social media, video content, other. |
| Radio | Allows creating predefined options that the partner can choose from. Partners will be able to choose a single option. |
| Select | Creates a dropdown with pre-defined options. |
| Countries | Includes a dropdown countries list. |
| Text | Adds a note or additional text in between questions. It does not require an answer. |
To add a free-text input option:
- Click Add field, and then select Input.
- Type your question in the Label field and toggle the Required option if you wish to make this question mandatory.
- Click Update.

To add checkboxes:
- Click Add field, and then select Checkbox.
- Type your question in the Label field.
- List the checkbox options in the Options field.
- Click Update.

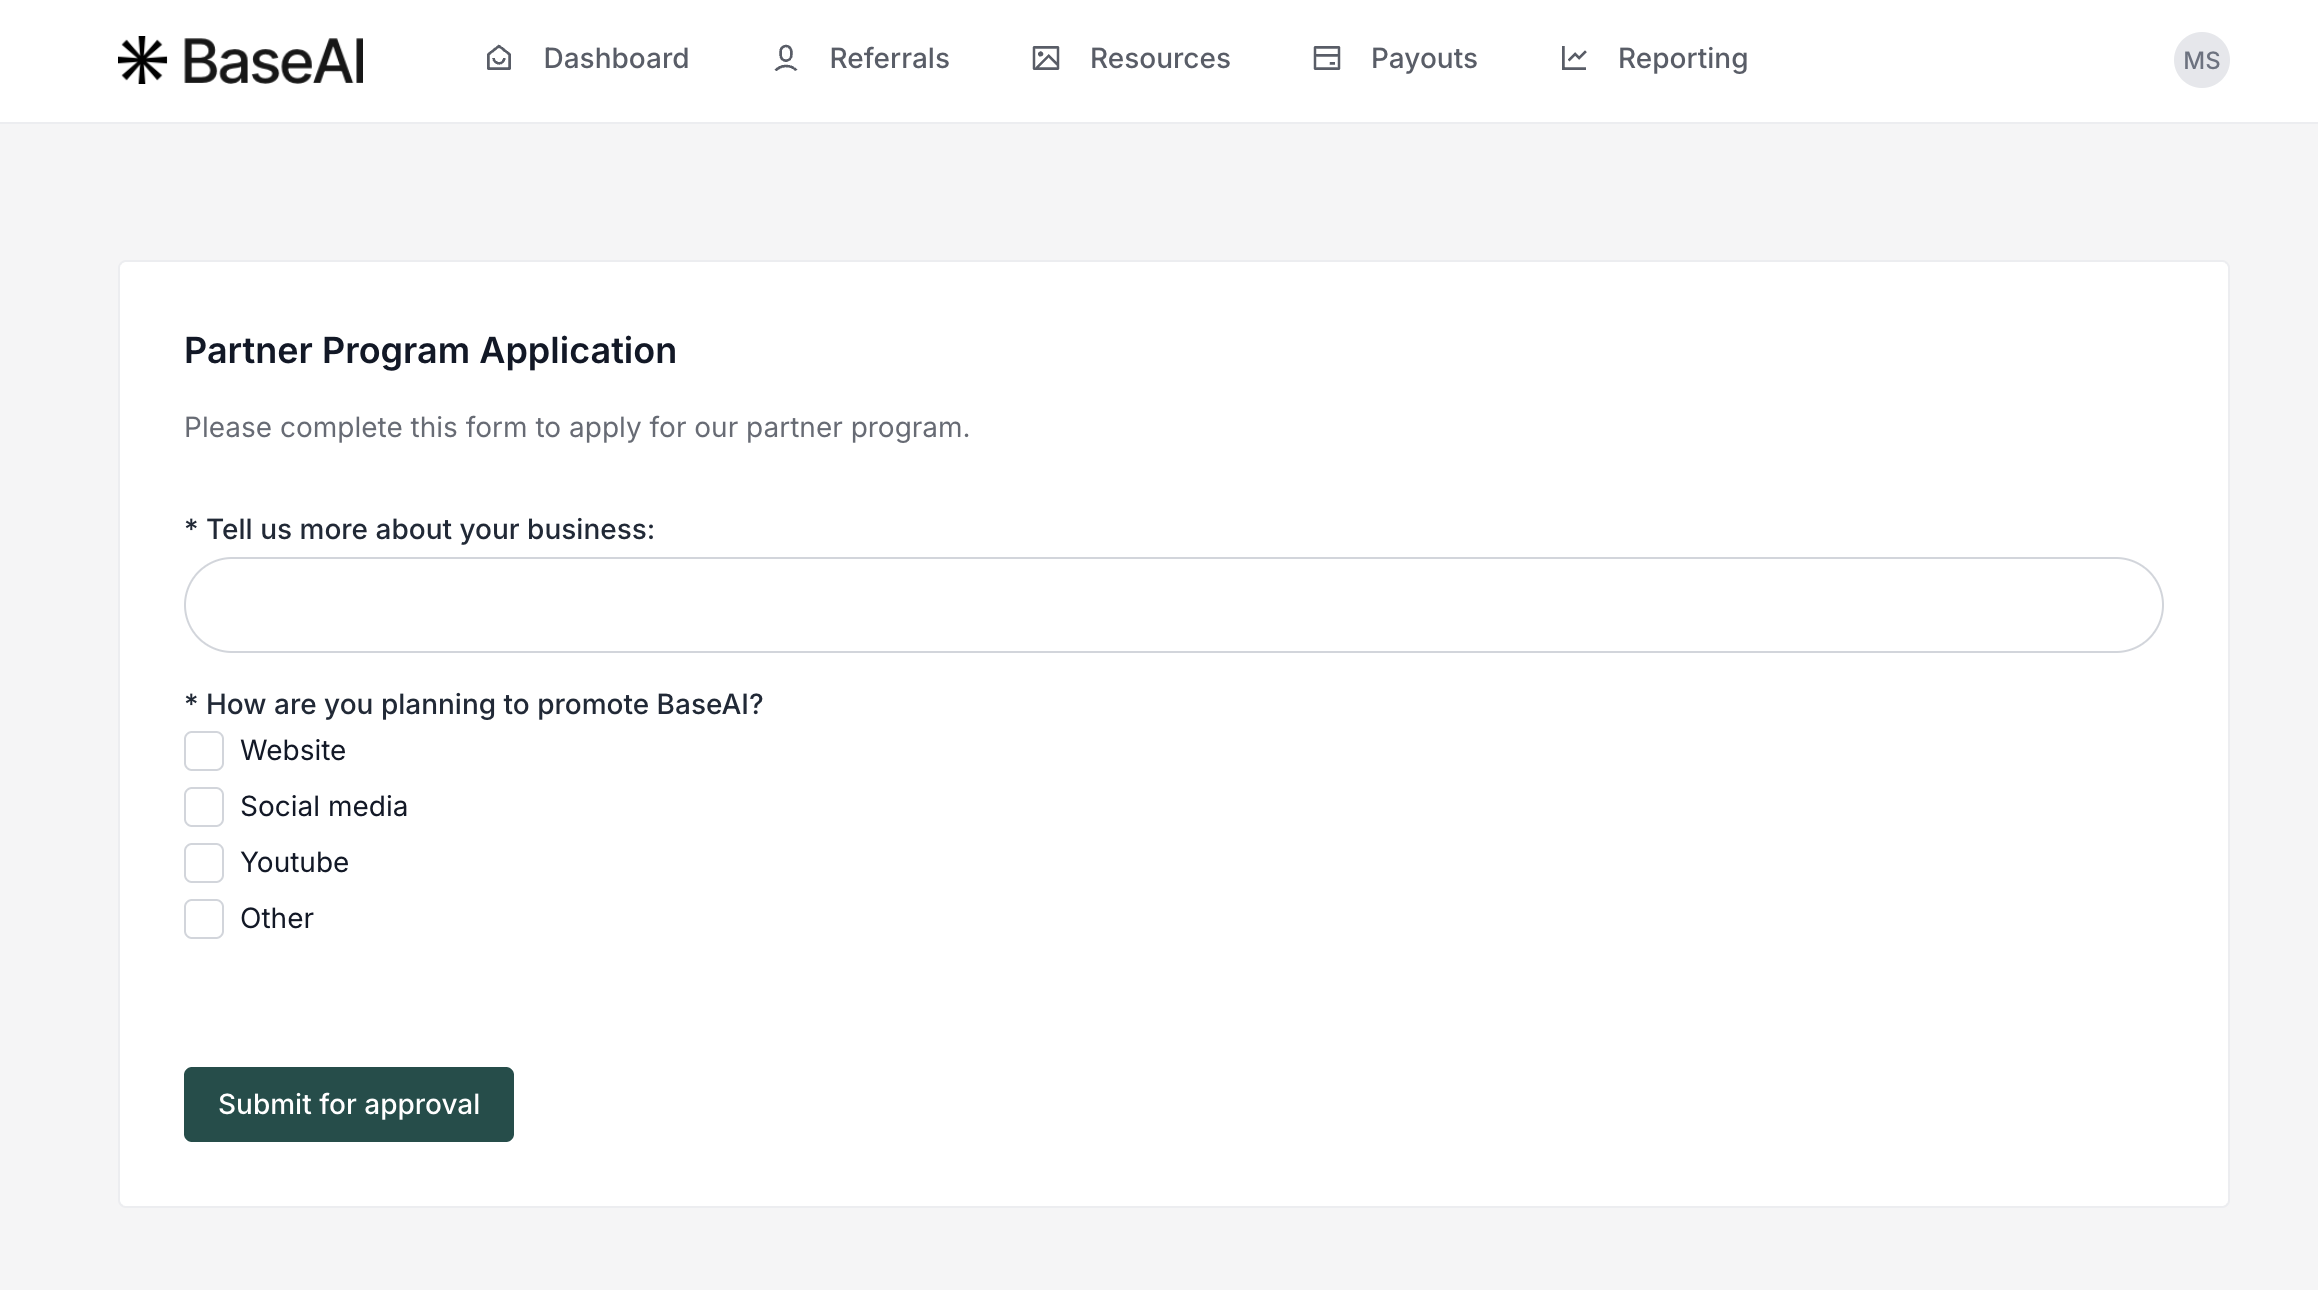
Below is an example of how the form and each approval question type look on the Partner portal:

Don't forget to click Update after you make any changes!
Enabling approval for new partners
Now that you’ve created your approval form, the last step is to enable it.
- Go to Program and then Settings:

- Scroll down to the Other block.
- Toggle Enable approval form for new partners.
- Click Update:


Once the approval form is enabled, each new affiliate partner will be presented with the questionnaire when they sign up.